


Time tracking
How to work with time tracking features
Video tutorials and webinars for Easy Redmine 11
Activities
Logging time
Logging time by from-to
Restrict logging more time than the estimate
Spent time global settings
Reporting logged spent time
When is the first calendar week
Corner situations
Activities
To add, remove, (de)activate an activity or choose the default one, go to Administration >> Categories >> Activities (spent time).
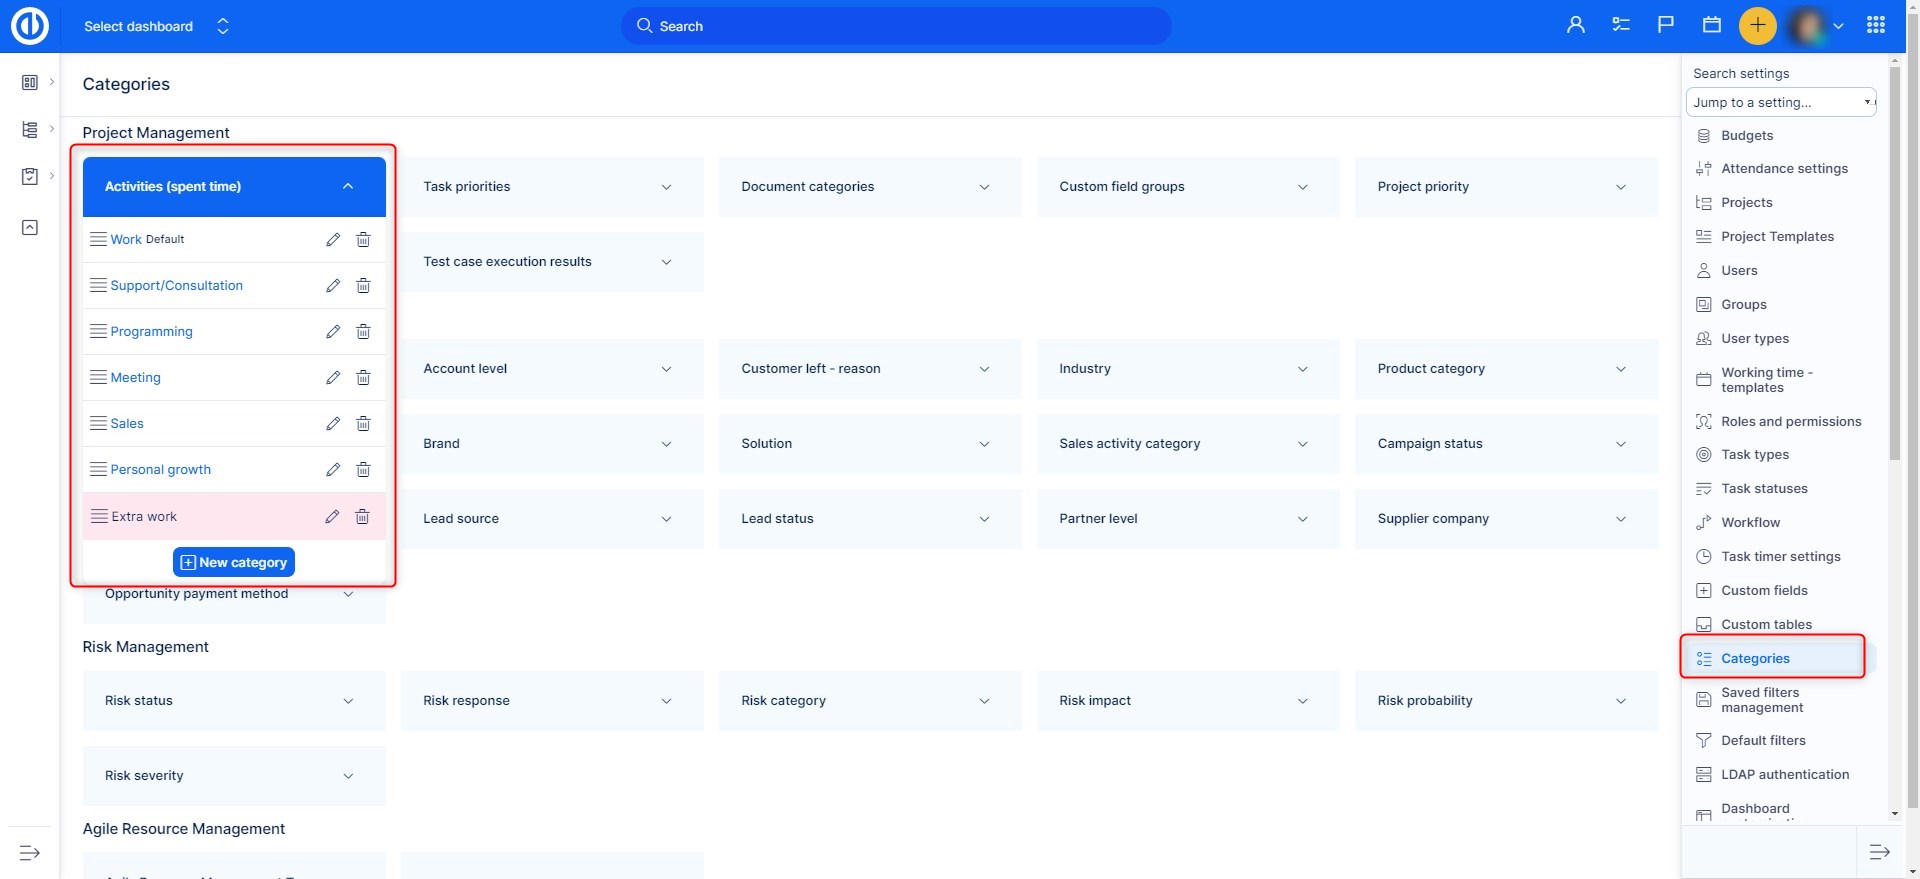
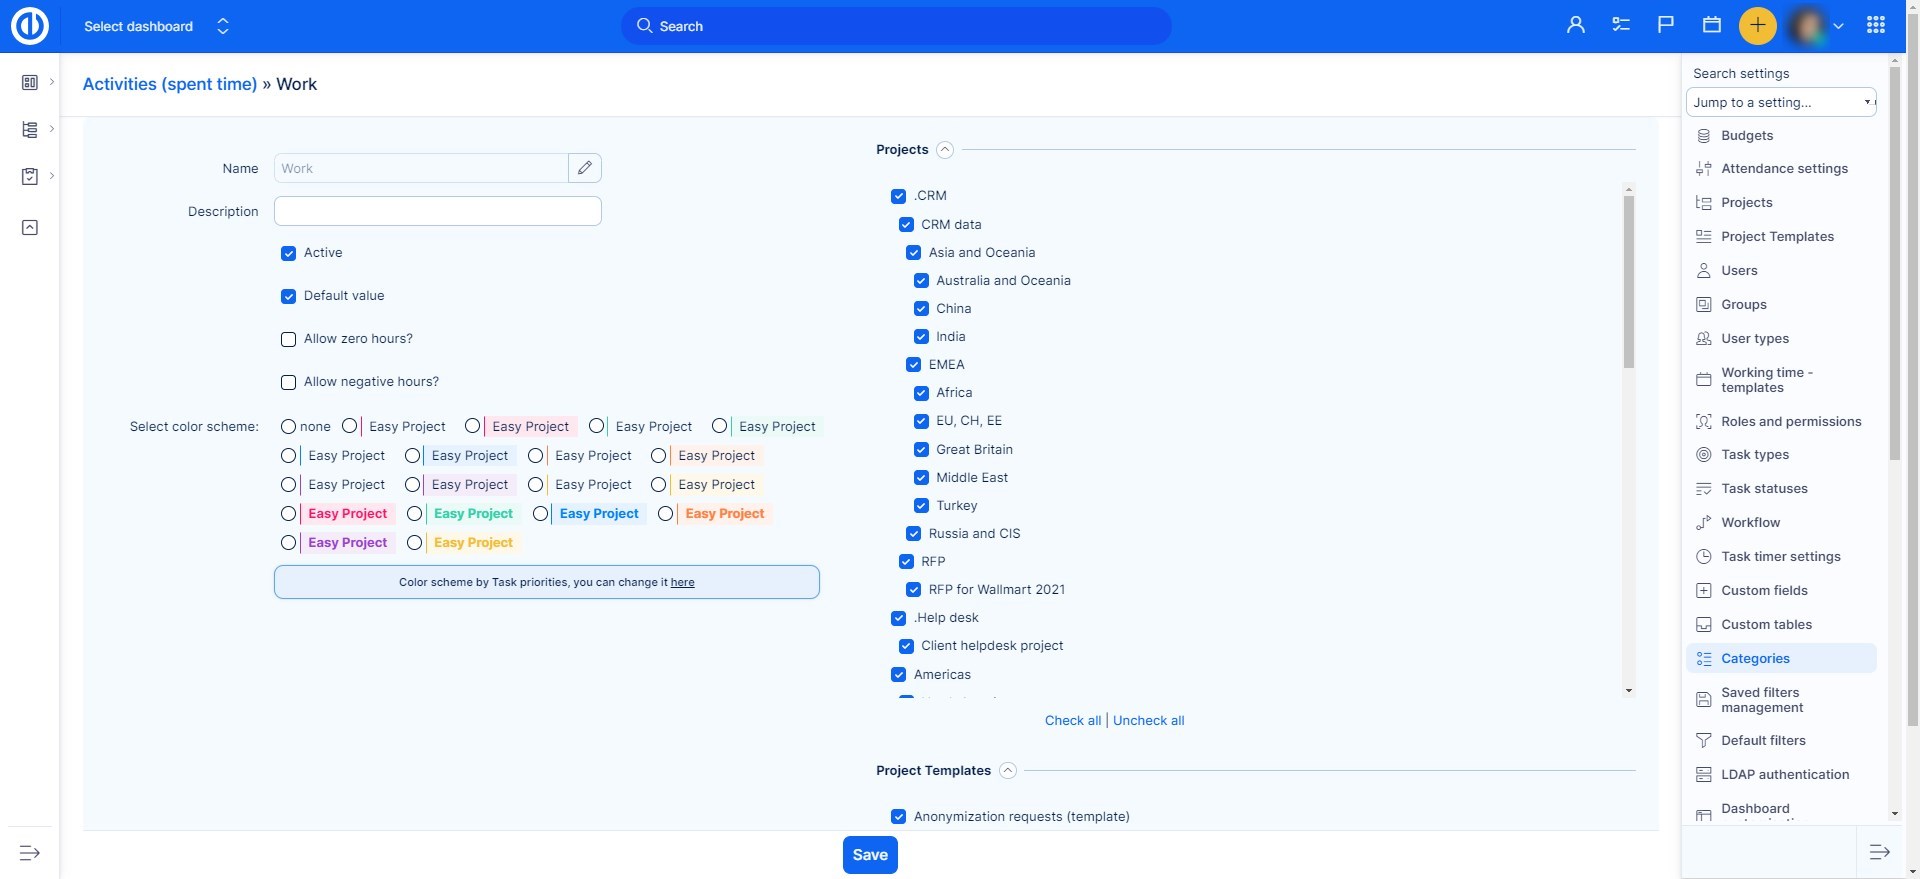
In the activity detail, you can select projects for which the activity is or is not active and select color scheme.
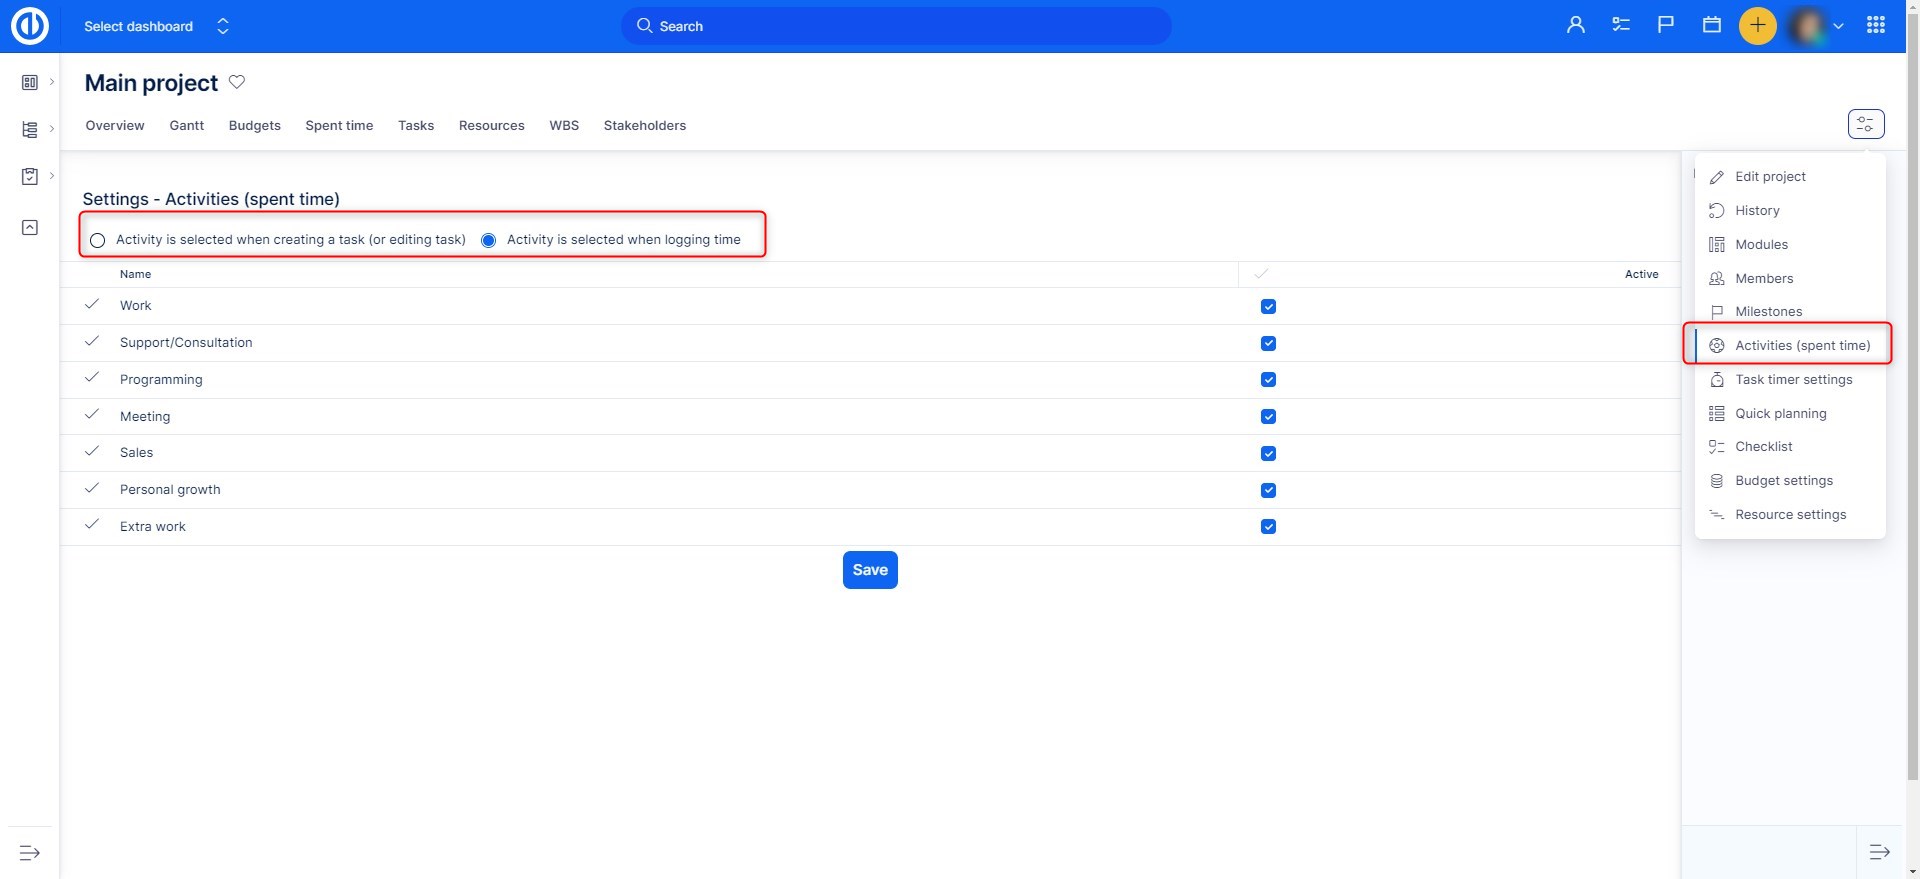
You can set when users should select an activity in Project settings >> Activities (spent time). You got two options there:
- Activity is pre-selected when creating a task - This option makes the user choose the activity when creating a new task directly.
- Select activity when logging time for a task - This second option allows users to create a task without selecting the activity (users will choose the activity when logging time).
Moreover, this is a second place where you can select which activities are active on that particular project.
Logging time
Logging time is the most common function in Easy Redmine. There are several ways to log time.
And of course, you can print the logged time by pressing Ctrl+P. You can also export it in many ways using the export options in the bottom right corner.
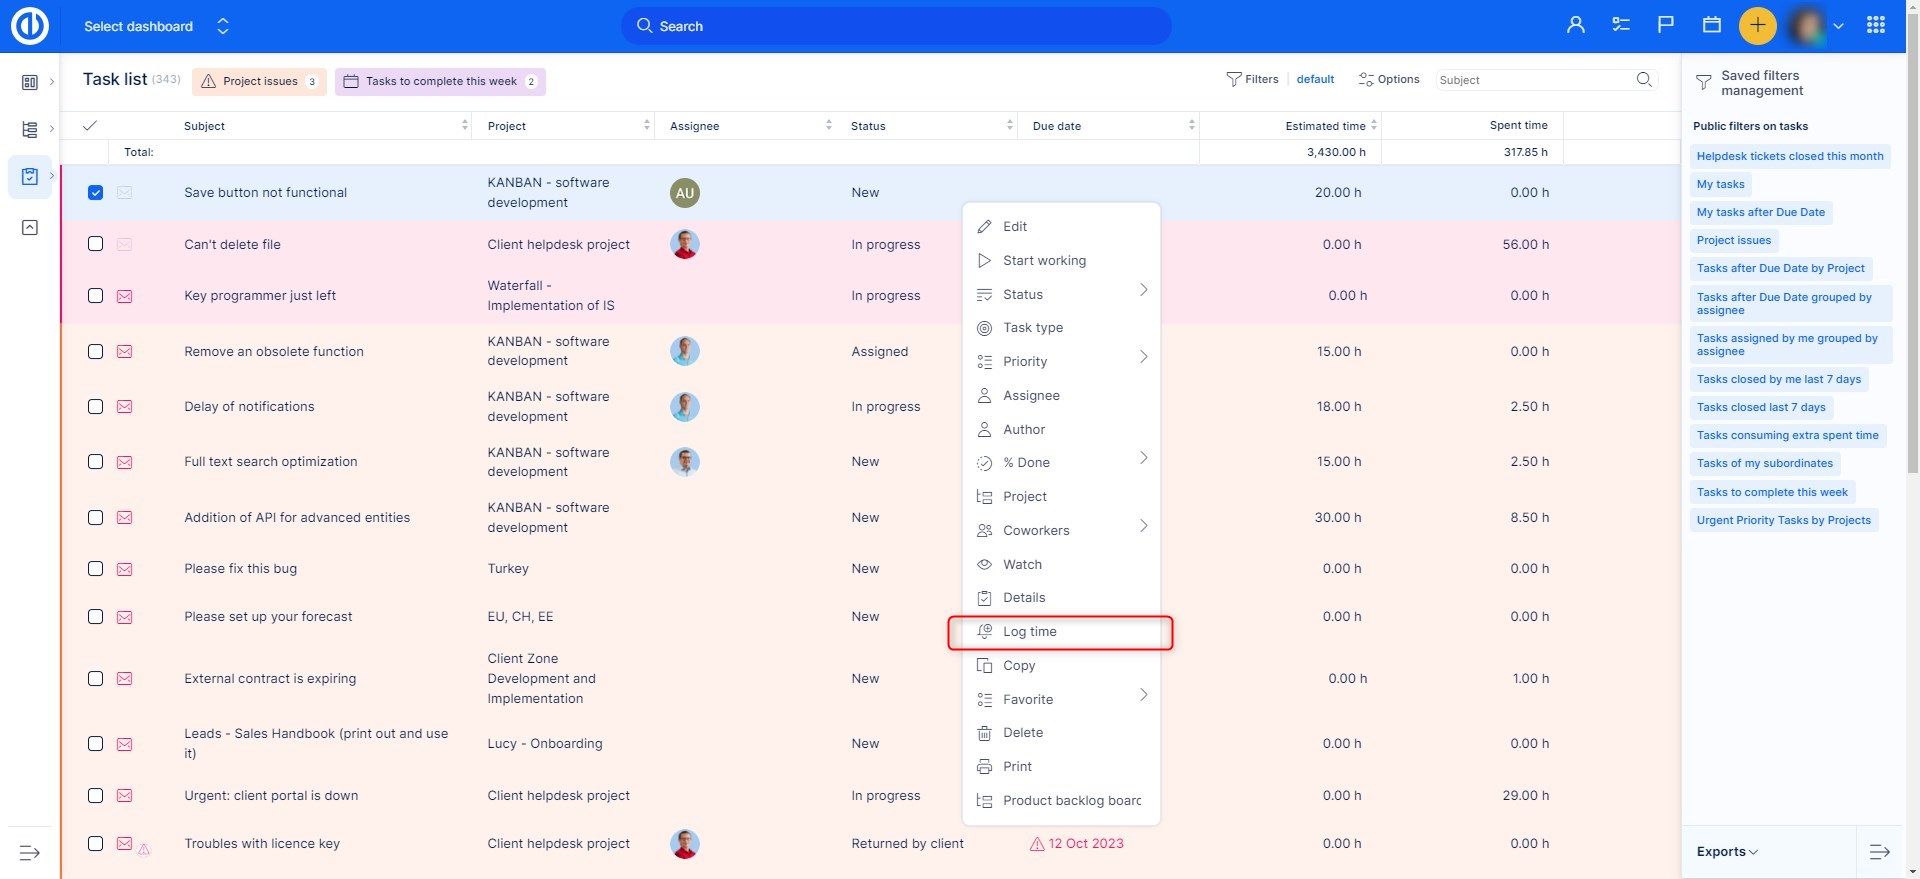
Log time from a task list
To log time, this way right click on a particular task and choose log time. In a table that shows up, you fill in the date, hours you've spent on this task, comment, and type of activity.
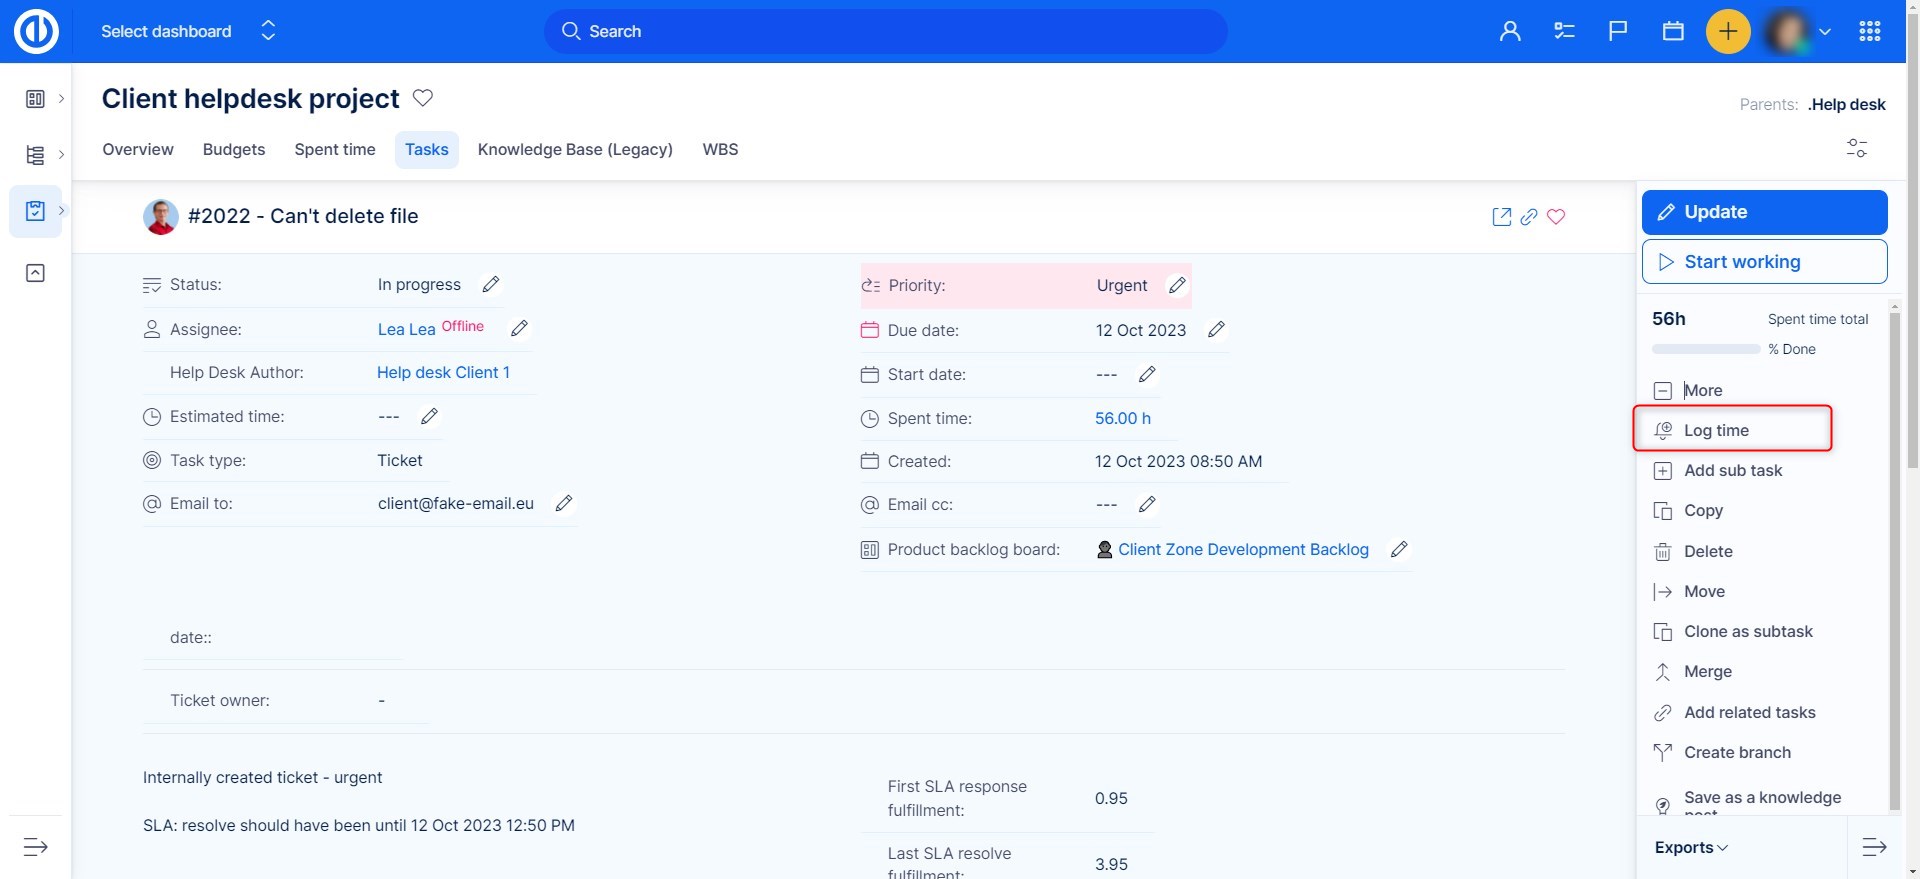
Log time directly from a task
When you are updating a task, apart from changing attributes like status and such, you can log in the time you've spent on it. When deleting a parent task with logged spent time entries either on the task itself or its subtasks, you will be asked to select another task these spent time entries will be transferred to.
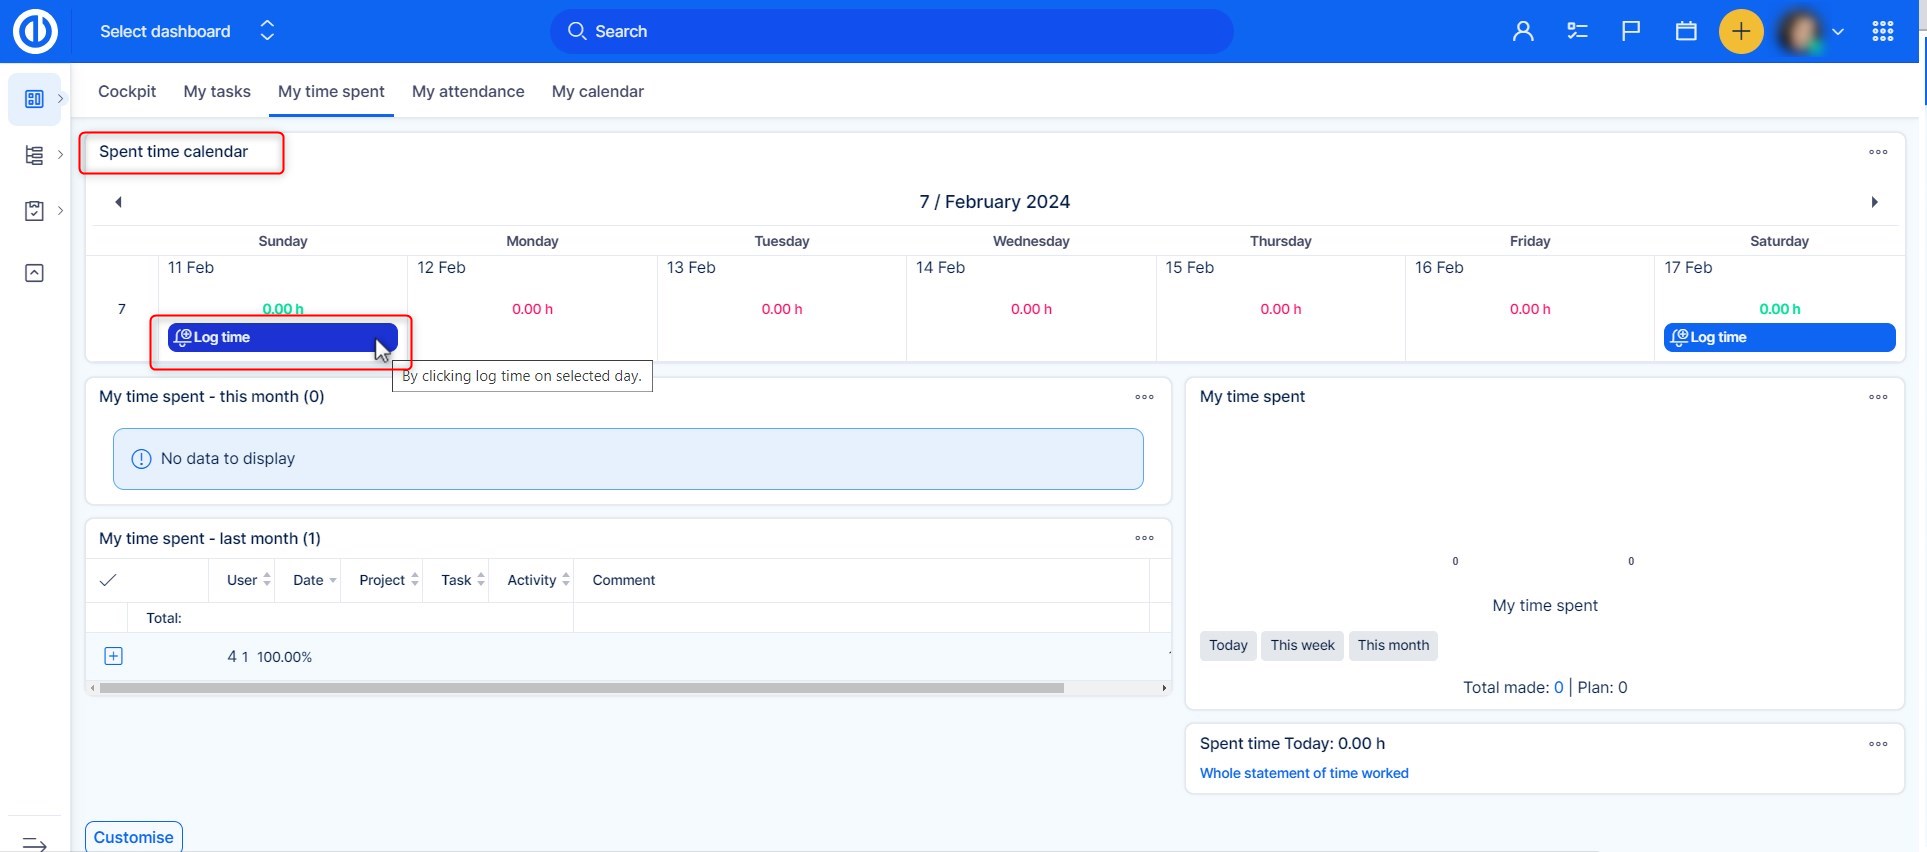
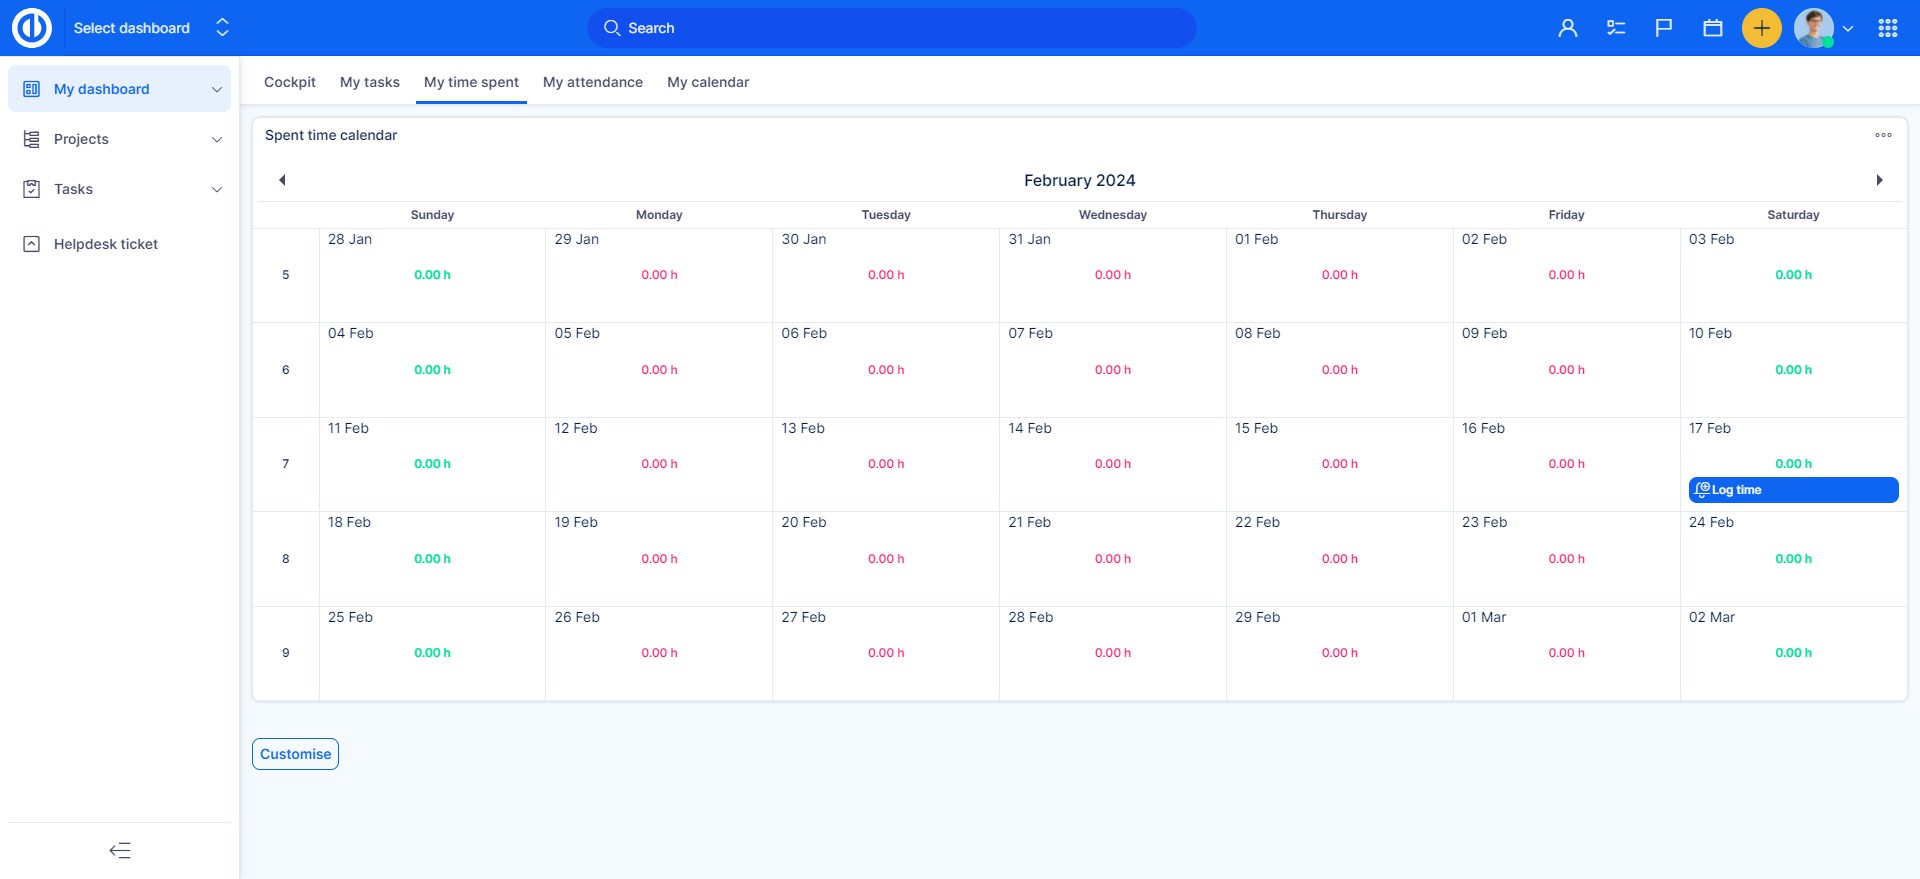
Spent time calendar widget
This widget can be added on a user's dashboard by clicking on "Personalize this page" button. When added, just click on the "Log time" icon for a selected day on the calendar and you will get on the logging page.
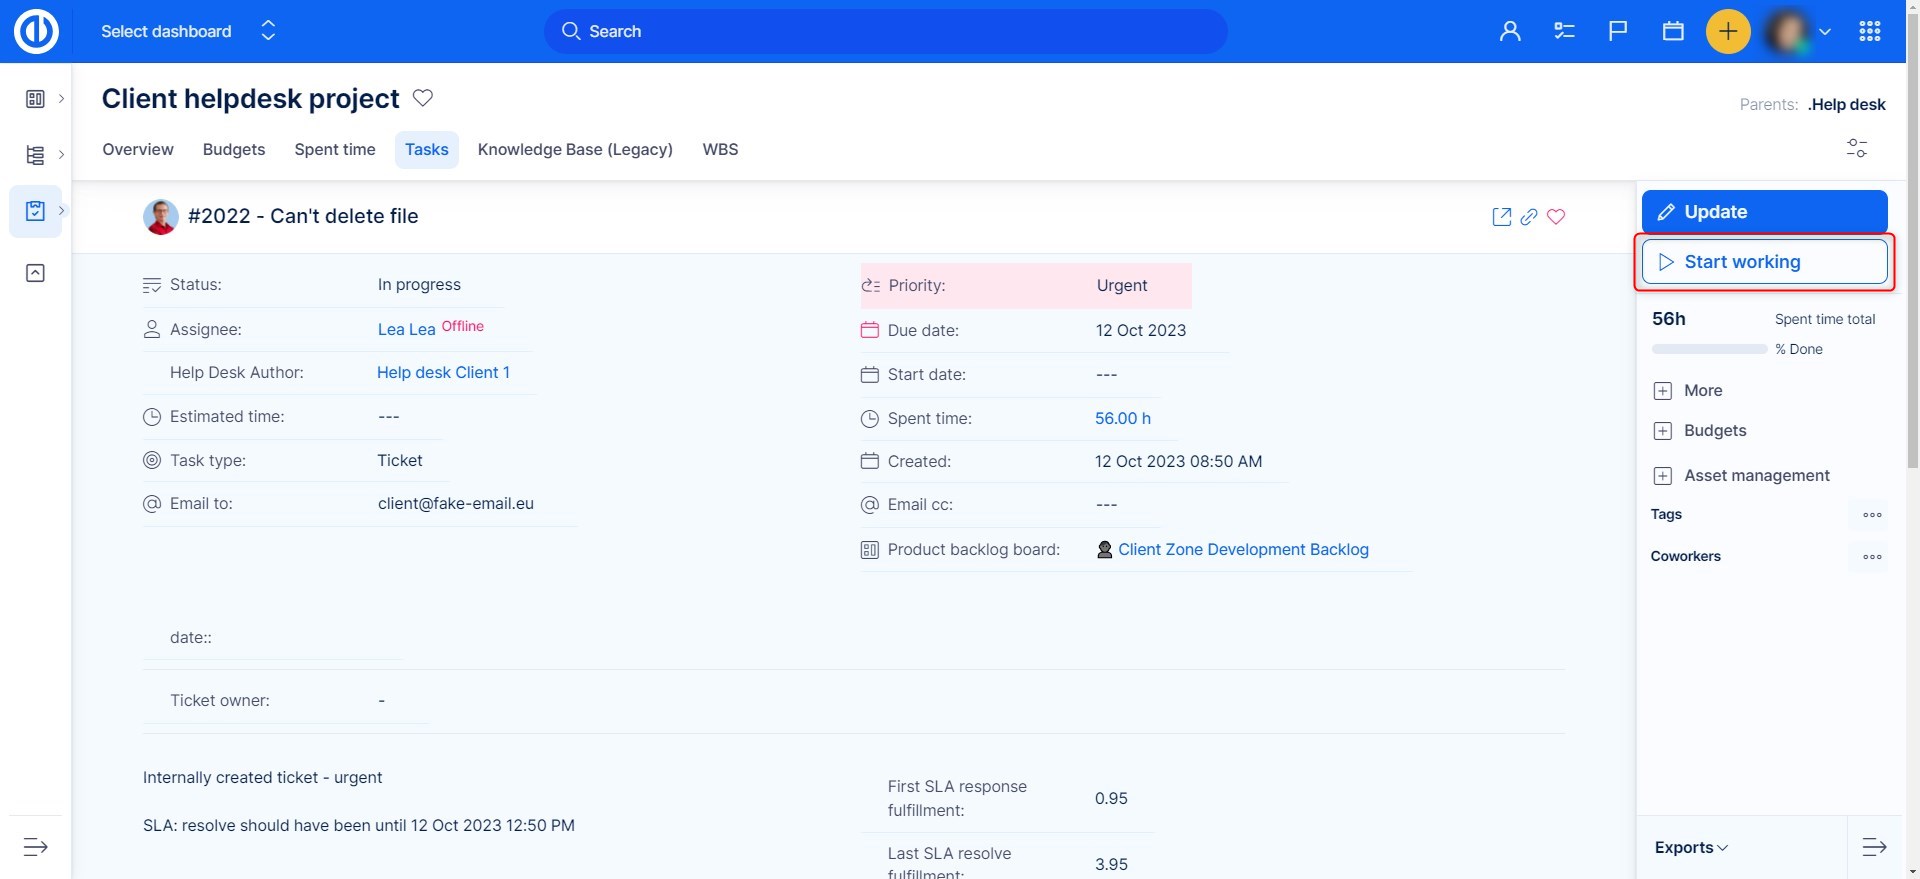
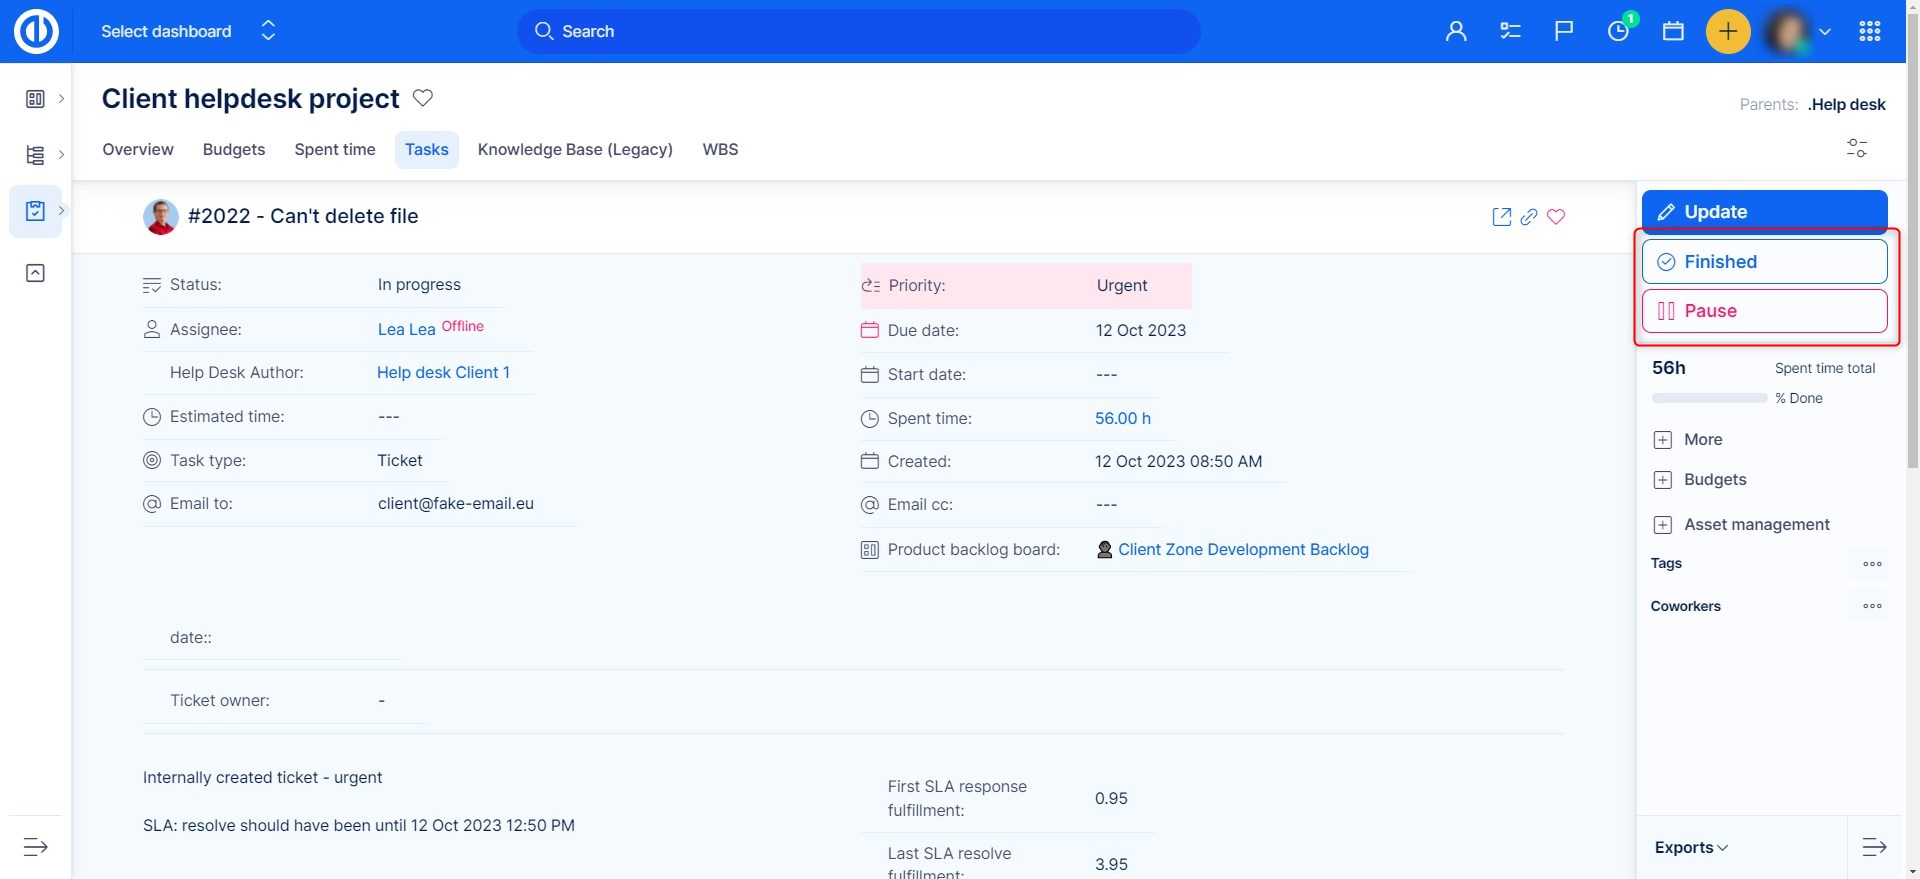
"Start working" button
This is another way to log time from a task itself. When you open a task and you are ready to start working, click on the respective button in the right sidebar. The status of the task will change and the assignee will be automatically changed to the current user. You can then choose to pause, in which case the timer will stop. When you get to this task again, just click on the "Continue" button. When you finish working on the task, click on the "Finish" button. The time logging page will be automatically pre-filled according to how long you had the timer on. All you have to do is fill in the desired attributes and click "Save".
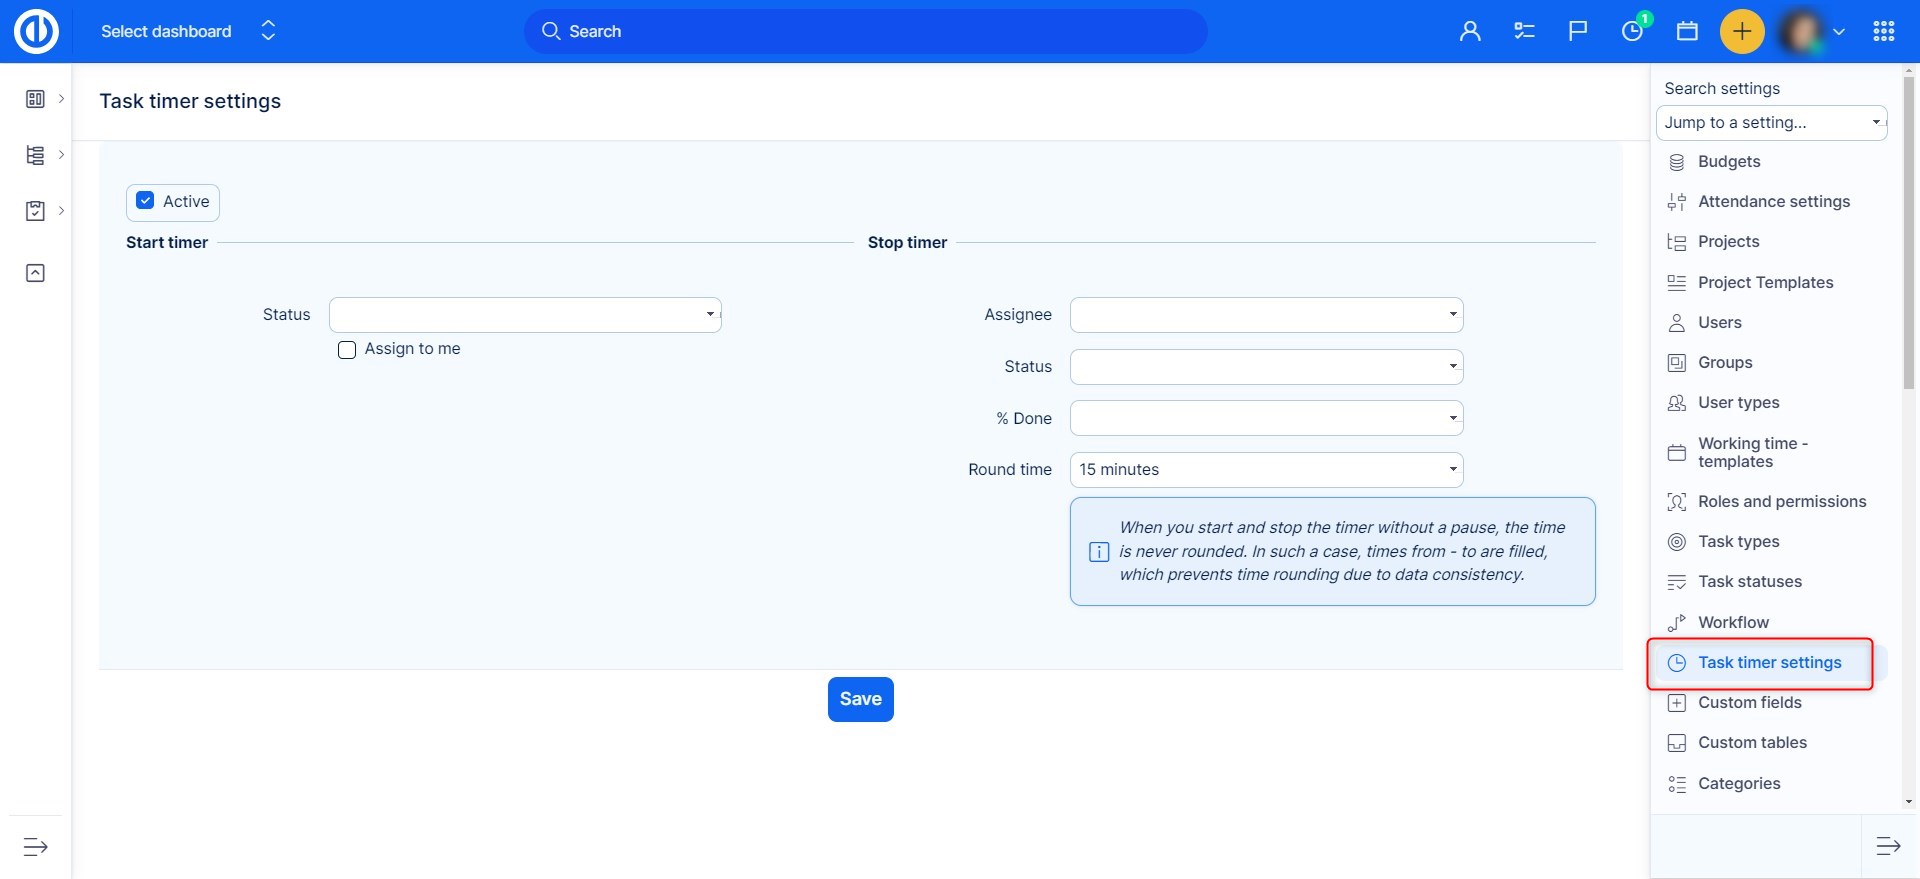
The task timer can be configured in Administration >> Task timer settings. You can set here to what status your task will change when you execute the timer and to whom it will be assigned to. When the timer is stopped, you can set to which status it changes, to whom it will be assigned to and you can choose the time to be rounded up.
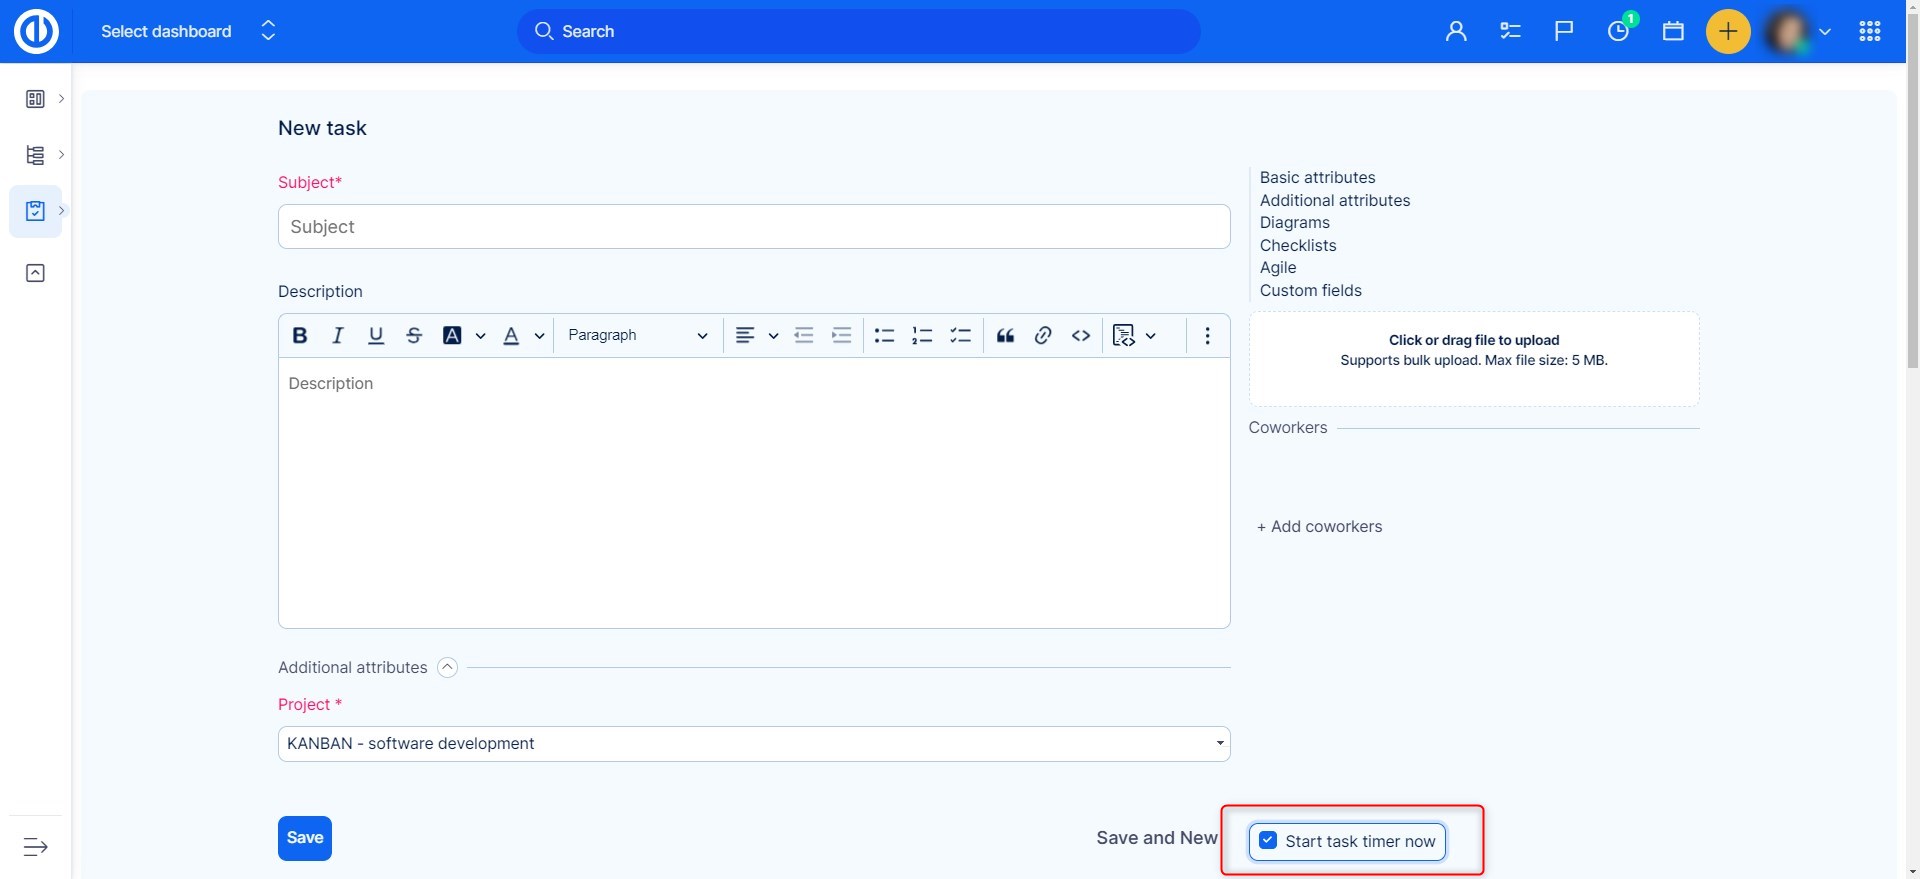
Start task timer right now
This option is only available when creating a new task and allows to start the task timer automatically after the task is created. The regular task timer functionality is not affected at all. To use the "Start task timer right now" feature, make sure that all of the following preconditions are met:
- Go to Project >> Settings >> Modules – enable "Time tracking"
- Go to Admin >> Trackers – enable "Start task timer now" on the tracker of the task
Starting/stopping the task timer will change the Assignee, Status, and %Done fields for the task accordingly. However, only changes that are allowed for that user role in the Workflow settings will be carried out.
Logging time by from-to
Veteran users may remember this feature from older versions. It was discontinued due to functional incompatibility with the rest of the system, with the hope of eventual replacement. A new shape of this feature returns in version 13.5.
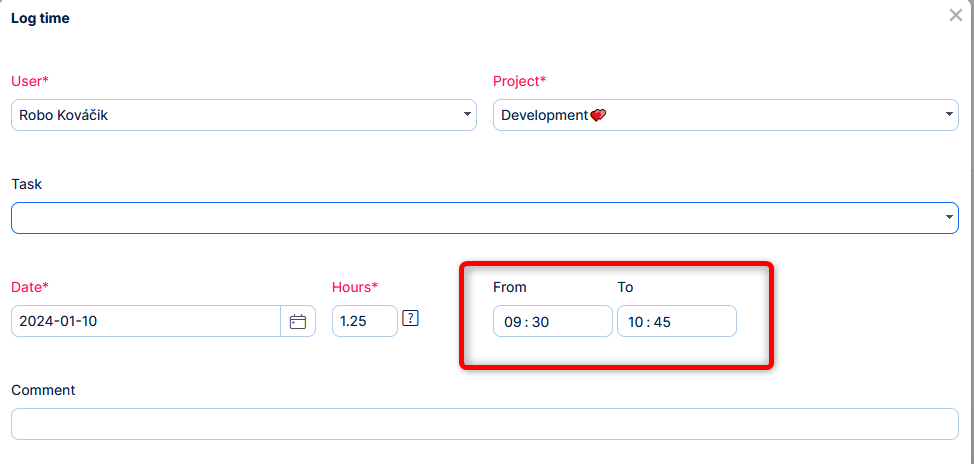
The input form has autocalculation => filling two values calculates the third.
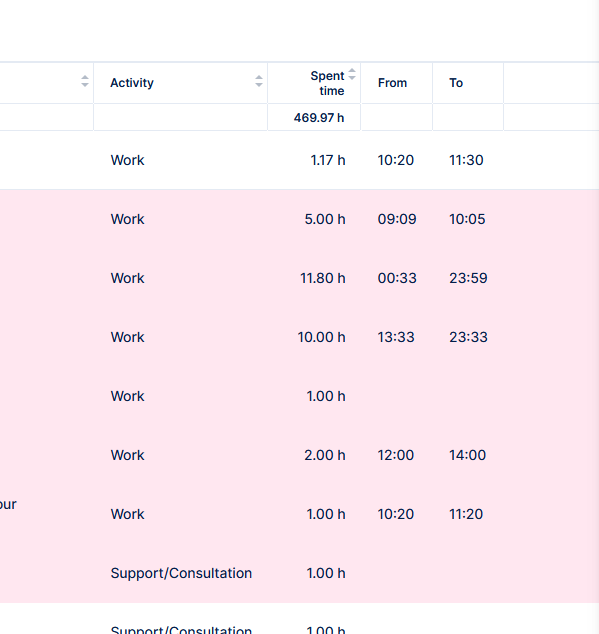
These fields are available in spent time list.
Times are prefilled also when using Task timer without a pause, starting and ending the same day. Please note that in this case, the time is never rounded (regardless of the task timer setting), due to the data consistency of filled from - to and the total time.
In other cases in task timer (e.g. with pause), the logic gets too complicated and from-to fields are left empty (and rounding also works).
Restrict logging more time than the estimate
New setting on tracker - Limit spent time by estimated time. It will disallow logging more time than the estimate on trackers where this setting is enabled.
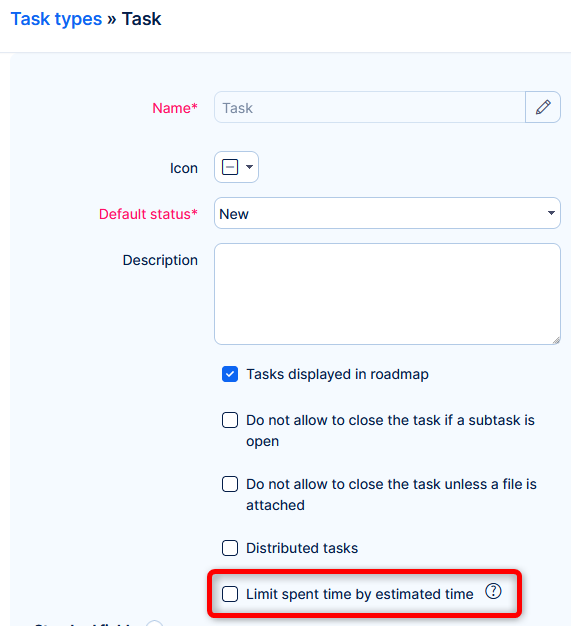
How it works
- When a new time entry would cause task spent time to exceed the estimated time, user will receive a warning message
- If you change tracker from unrestricted to restricted, this situation will be validated => you will not be allowed to change into the restricted tracker if spent time exceeds estimated time (same warning message).
We recommend enabeling this feature only in trackers with low probability of being changed. Also take into account the possibility that not all users may be able to see estimated time or spent time on the task. If you have such visibility restrictions, enabeling this setting could also lead to user frustration.
Spent time global settings
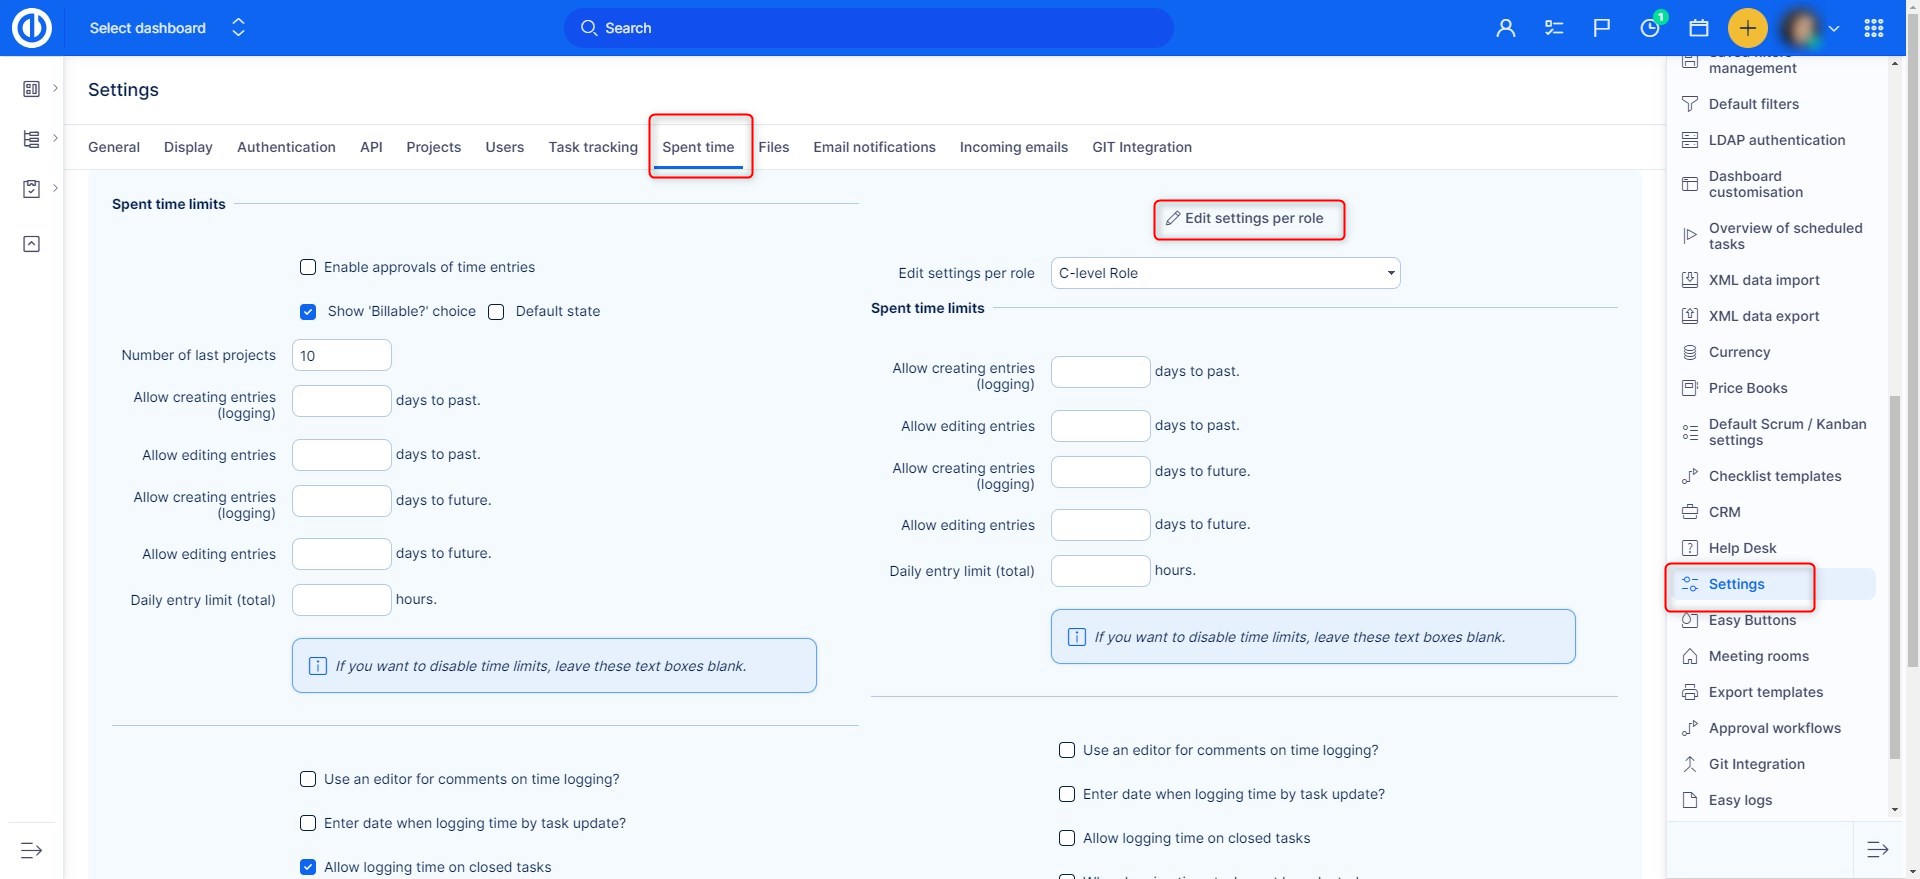
Most settings related to spent time can be configured in Administration >> Settings >> Spent time. You can edit these settings globally or per user role (via "EDIT SETTINGS PER ROLE" button in the top right corner). If both configurations are set, the user role settings will prevail over global settings for all users having that particular role(s).
- Enable approvals of time entries - check if time entries need to be approved by user's supervisor
- Show 'Billable?' choice - check if you need to distinguish billable time entries from other time entries
- Allow creating entries (logging) XX days to past - how many days into past can time entries be created (to disable the limit, leave blank)
- Allow editing entries XX days to past - how many days into past can time entries be edited (to disable the limit, leave blank)
- Allow creating entries (logging) XX days to future - how many days into future can time entries be created (to disable the limit, leave blank)
- Allow editing entries XX days to future - how many days into future can time entries be edited (to disable the limit, leave blank)
- Daily entry limit (total) XX hours - how many hours of spent time can be logged per day (to disable the limit, leave blank)
- Use an editor for comments on time logging? - check if you need rich text formatting for comments on time logging
- Enter date when logging time by task update? - check if you need to manually select date on time logging; otherwise, the current day will be used
- Allow logging time on closed tasks - check if you need to log time on closed tasks
- When logging time, task must be selected - check if you need to disable time logging without a task selected
- Show from/to range as select - if a user logs spent time by from-to range (can be set on user profile » Logging time by), this setting defines the format of the range - a drop-down menu (checked) or simple digit selection (unchecked)
- When logging time, comment must be filled - check if you need to disable time logging without a comment filled
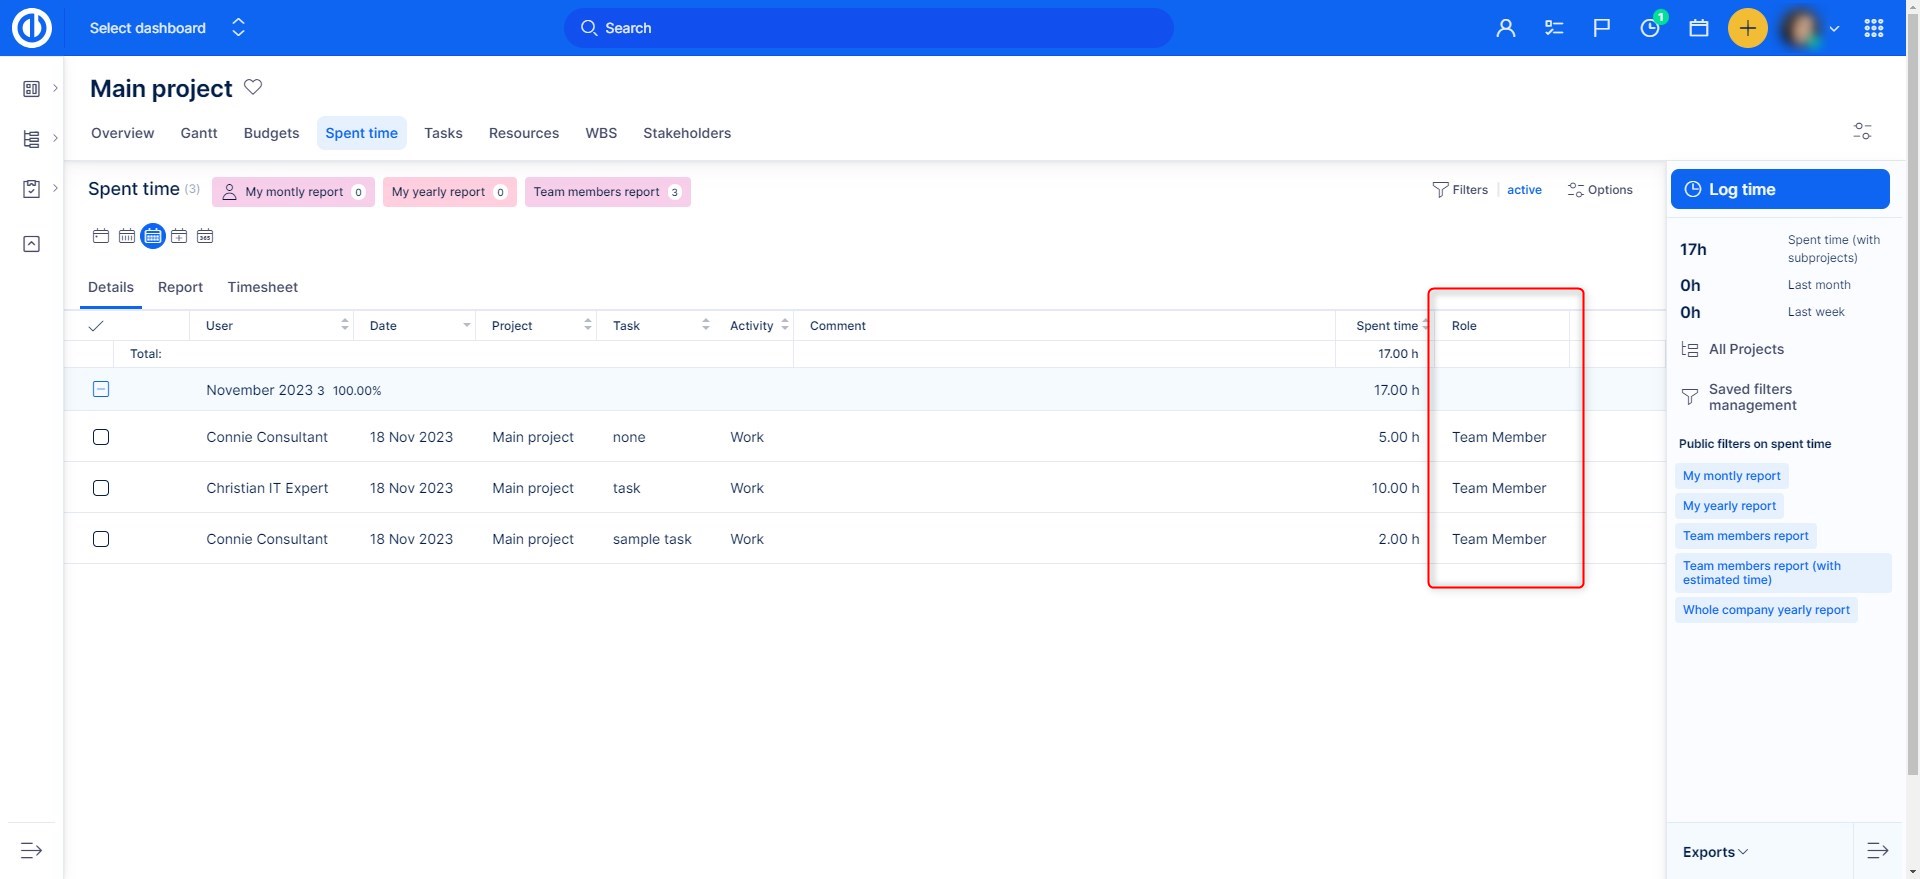
When you have multiple roles on a project, a time entry always shows all the roles you have on the particular project regardless of which role you selected when logging time. The principle of selecting role when logging time is only to show correct activity options, not to link the time entry with the particular role.
Important note: As of version 12.6.0 the limit for logging spent time in the past is now calculated as calendar days. It does not respect nor weekends neither holidays, in order to make it as predictable as possible.
Reporting logged spent time
Spent time entries may be reported and/or checked using several ways.
Widget Spent time
This widget shows your spent time entries per week or month as a list or chart. Go to page edit mode, add a new widget (Spent time) and configure the time period and output format (list or chart). Please note that when using output Chart and setting a filter for current time periods (such as this week/month/year), it will only show totals up to today. For example, it is Thursday the 5th and the filter is set to this month. The gauge will show spent time from Monday (2nd) to Thursday (5th) and the 100 % mark in gauge will be 32 hours (8x4 working days).
On the Spent time widget in the Chart mode, using the filters "within the past" and "within the next" works in such a way that the displayed period starts with the actual date (today) and going backward or onward within the specified number of days (for example: within 3 days = today + other 3 consecutive days).
Widget Spent time calendar
This widget shows your spent time entries in the calendar form. Go to page edit mode, add a new widget (Spent time calendar) and configure the time period of the calendar (weekly or monthly).
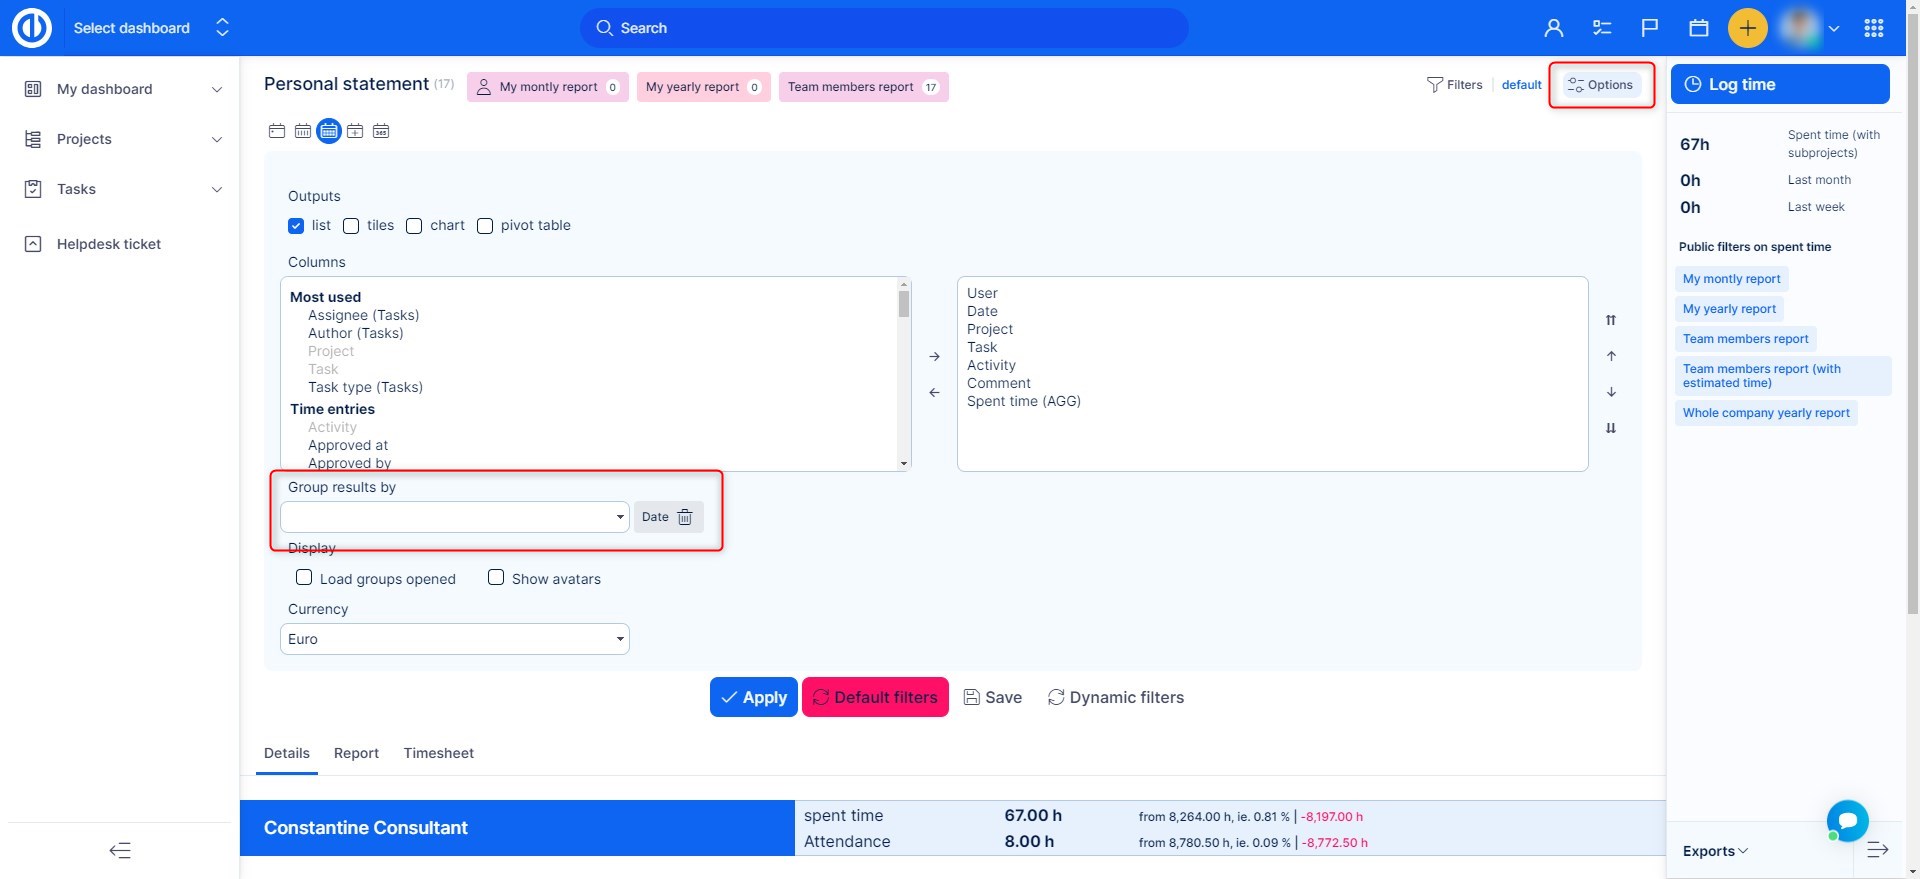
Personal statement
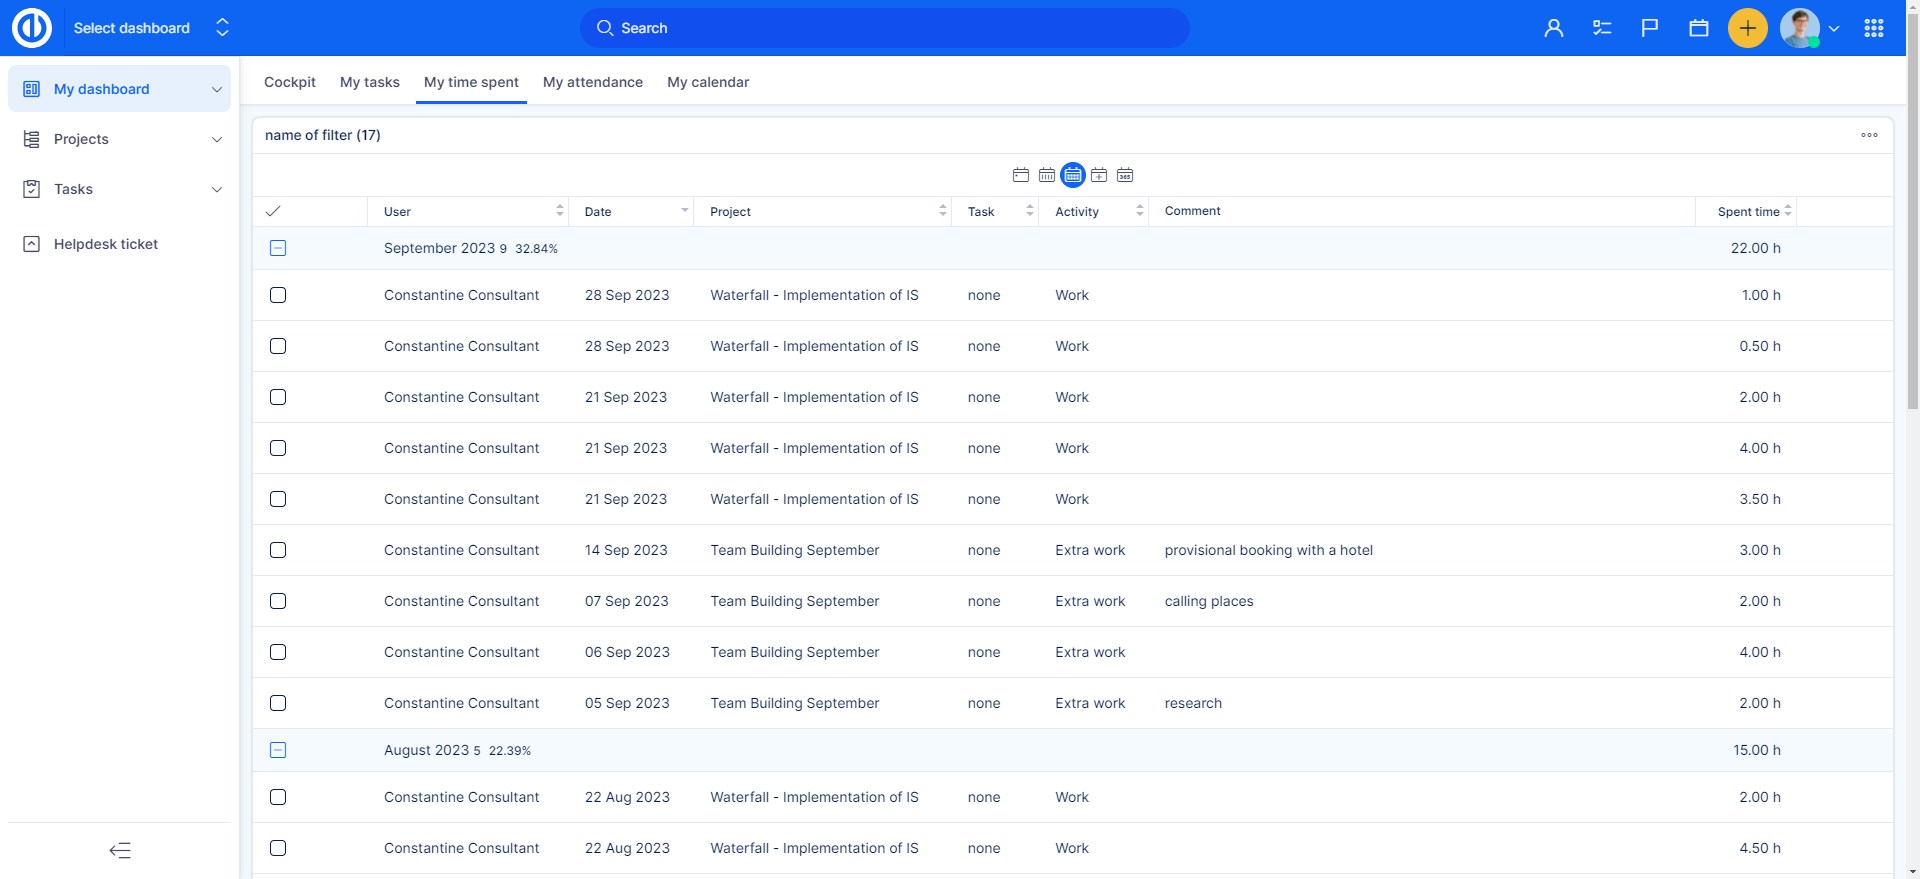
For managers who need to see and/or export the full list of spent time entries grouped by days, weeks, months, years or some other non-time entity, we recommend navigating to Global menu >> Time reports >> Personal statement >> Details (or /time_entries?only_me=true) and using the option "Group results by" under the Options button at the top right. Here you can select an exact time interval for grouping the time entries (such as Week, Month...). In addition to that, grouping by "Date" entity is also possible. In this case, time entries are grouped as per the current view (daily, weekly, monthly...), which can be changed using the icons just above the list of time entries. If you prefer to group by weeks, we recommend using "Group by weeks" instead of "Group by date" along with weekly view because the first option counts weeks by their standard number in calendars, while the latter option counts weeks depending on the user-defined option "Start calendars on", which can be found in Global menu >> Administration >> Settings >> Display.
- On the Details tab, you can find a list of spent time entries as per the applied filter.
- On the Report tab, you can find a list of spent time totals as per the time interval, applied filter and selected entity, such as Activities, Milestones, Projects or Tasks.
- On the Timesheet tab, you can find your weekly and monthly timesheets.
When is the first calendar week
The ISO 8601 definition for week 01 is the week with the Gregorian year's first Thursday in it. The following definitions based on properties of this week are mutually equivalent since the ISO week starts with Monday:
- It is the first week with a majority (4 or more) of its days in January.
- Its first day is the Monday nearest to 1 January.
- It has 4 January in it. Hence the earliest possible first week extends from Monday 29 December (previous Gregorian year) to Sunday 4 January, the latest possible first week extends from Monday 4 January to Sunday 10 January.
- It has the year's first working day in it if Saturdays, Sundays and 1 January are not working days.
If 1 January is on a Monday, Tuesday, Wednesday or Thursday, it is in week 01. If 1 January is on a Friday, it is part of week 53 of the previous year. If it is on a Saturday, it is part of the last week of the previous year which is numbered 52 in a common year and 53 in a leap year. If it is on a Sunday, it is part of week 52 of the previous year.
Our first calendar week is the first week with the first working day according to the calendar (simplified version). For example, the year 2019 has a leap week. If Monday is your first working day, according to the ISO 8601 norm it starts on 31. 12. 2018 but our start is 7. 1. 2019.
Corner situations
- Deactivating an activity in administration >> categories will cause the activity to be disabled on all projects. As a consequence, this may leave your holiday activity disabled so you will not be able to log/approve absences. In such case, please make sure to manually activate the activity in the project, where time is logged for absences (more info about this in Attendance documentation)
- When the option "When logging time, task must be selected" is checked, then you always have to select some task, even when there is no task created on a project. Naturally, this will cause an inability to log time on this project.
- If any item on the list of time entries has "Billable" attribute set to "No", then you are not able to set "Billed" for entire list in bulk. You can overcome this by filter the list to show only those items which have "Billable" attribute set to "Yes" or none, check all items on the list and set "Billed" in bulk.
- When logging time from Global menu >> Administration >> Personal statement, only projects not marked as "planned" can be selected from the drop-down menu. To log time on a planned project, do it directly from the Spent time module of the particular project.
- When you go to "Administration >> Settings >> Spent time" and tick the checkbox "When logging time, comment must be filled", please note this setting does not apply to Timesheets. When logging time using Timesheets, there's no field you can enter your comment in, so the mandatory comment is automatically pre-filled with a dash. When you need to add/change a comment for any task, you have to do so via standard task edit button and the comment will also be visible in timesheets.
- If you edit spent time entries of another user, possible spent time limits (if defined in Administration >> Settings >> Spent time) are considered as per his user role, not yours.
- [With Time sheets plugin] By logging spent time to a period for which a timesheet has been previously created, this logged time is not added to the existing timesheet. However, if spent time is logged first and a timesheet is created afterward, the logged time is added to the newly created timesheet.
- By checking the option "Convert large numbers in charts and trends to a friendly text representation (3.000 -> 3K, 3.000.000 -> 3M)" in Administration >> Settings >> Display, please note that not only big numbers will be shortened but also very small decimal numbers (such as 0,0005 -> 500µ).
- In a list of spent time entries, it is not advisable to place any columns having a value in the total row in the very first position in the order of the columns in the list, otherwise there may be a problem with shifting the value in the total row to the left side.
- When grouping filter results by week, the custom start of the week (such as Saturday or Wednesday) is ignored. In this case, if you want to use your custom start of the week, you must group the results by the Date column.
- For the sake of simplicity, there is a known corner situation in loggin from-to - there is no validation for overlapping of periods in various time entries. For example, the system allows to log:
Time entry A - 1 hour, 9:30 - 10:30
Time entry B - 0,5 hour, 10:10 - 10:40
If such a validation was implemented, it would require a complex solution, and could significantly impact user experience.

