Redmine Plugin Generator
Redmine Plugin Generator
Note: Easy Software does not provide technical support for this plugin. It is developed and supported by Redmine Community.
Installation of Redmine Plugin Generator
Generating a custom plugin/entity
Installing a custom plugin/entity
Adding a custom field to a plugin/entity
Redmine Plugin Generator is a standalone plugin for generic Redmine, which is provided free of charge. Its purpose is to allow users to create new plugins and entities using a quick and intuitive tool.
Installation of Redmine Plugin Generator
Redmine Plugin Generator can be installed or uninstalled as easy as any other plugin for generic Redmine. Learn how to install/uninstall a plugin in this article (Redmine).
Generating a custom plugin/entity
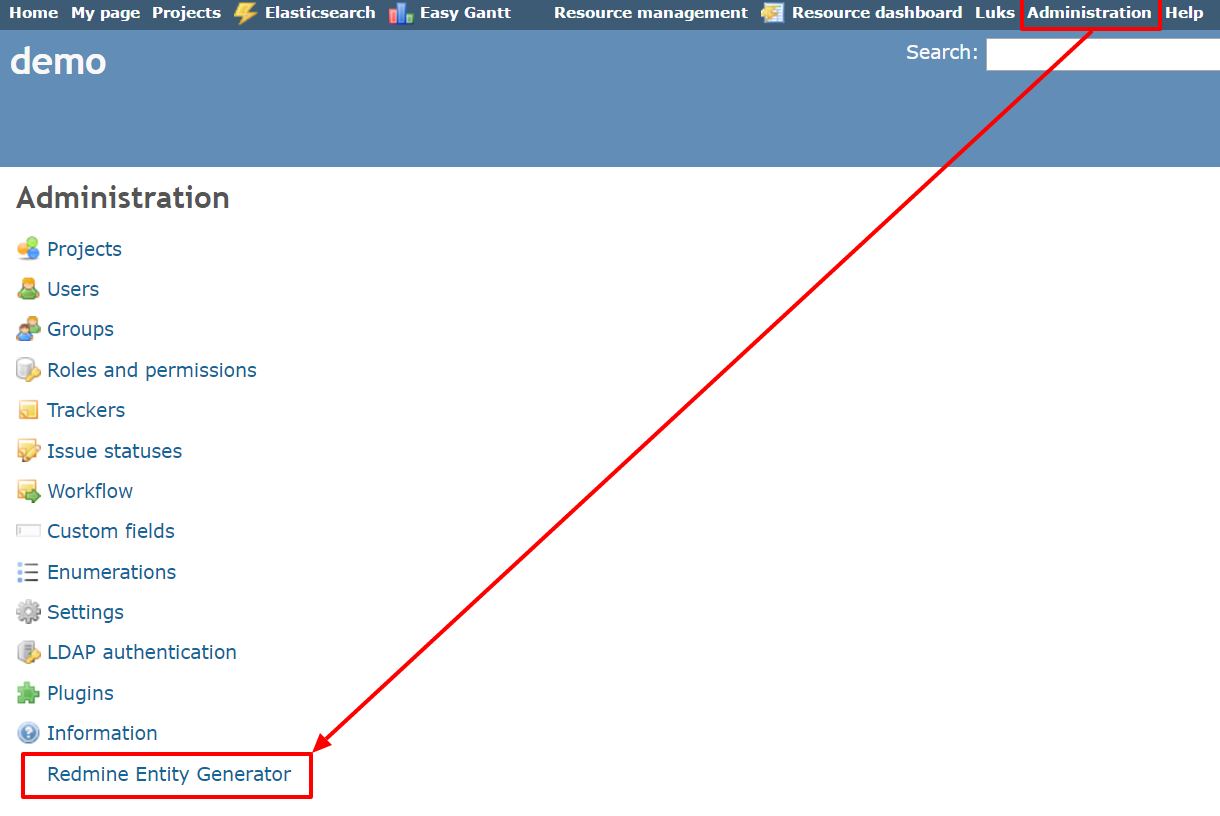
In order to create a plugin or entity, you must be an administrator. Go to "Administration" and select "Redmine Entity Generator" as shown below in Redmine.
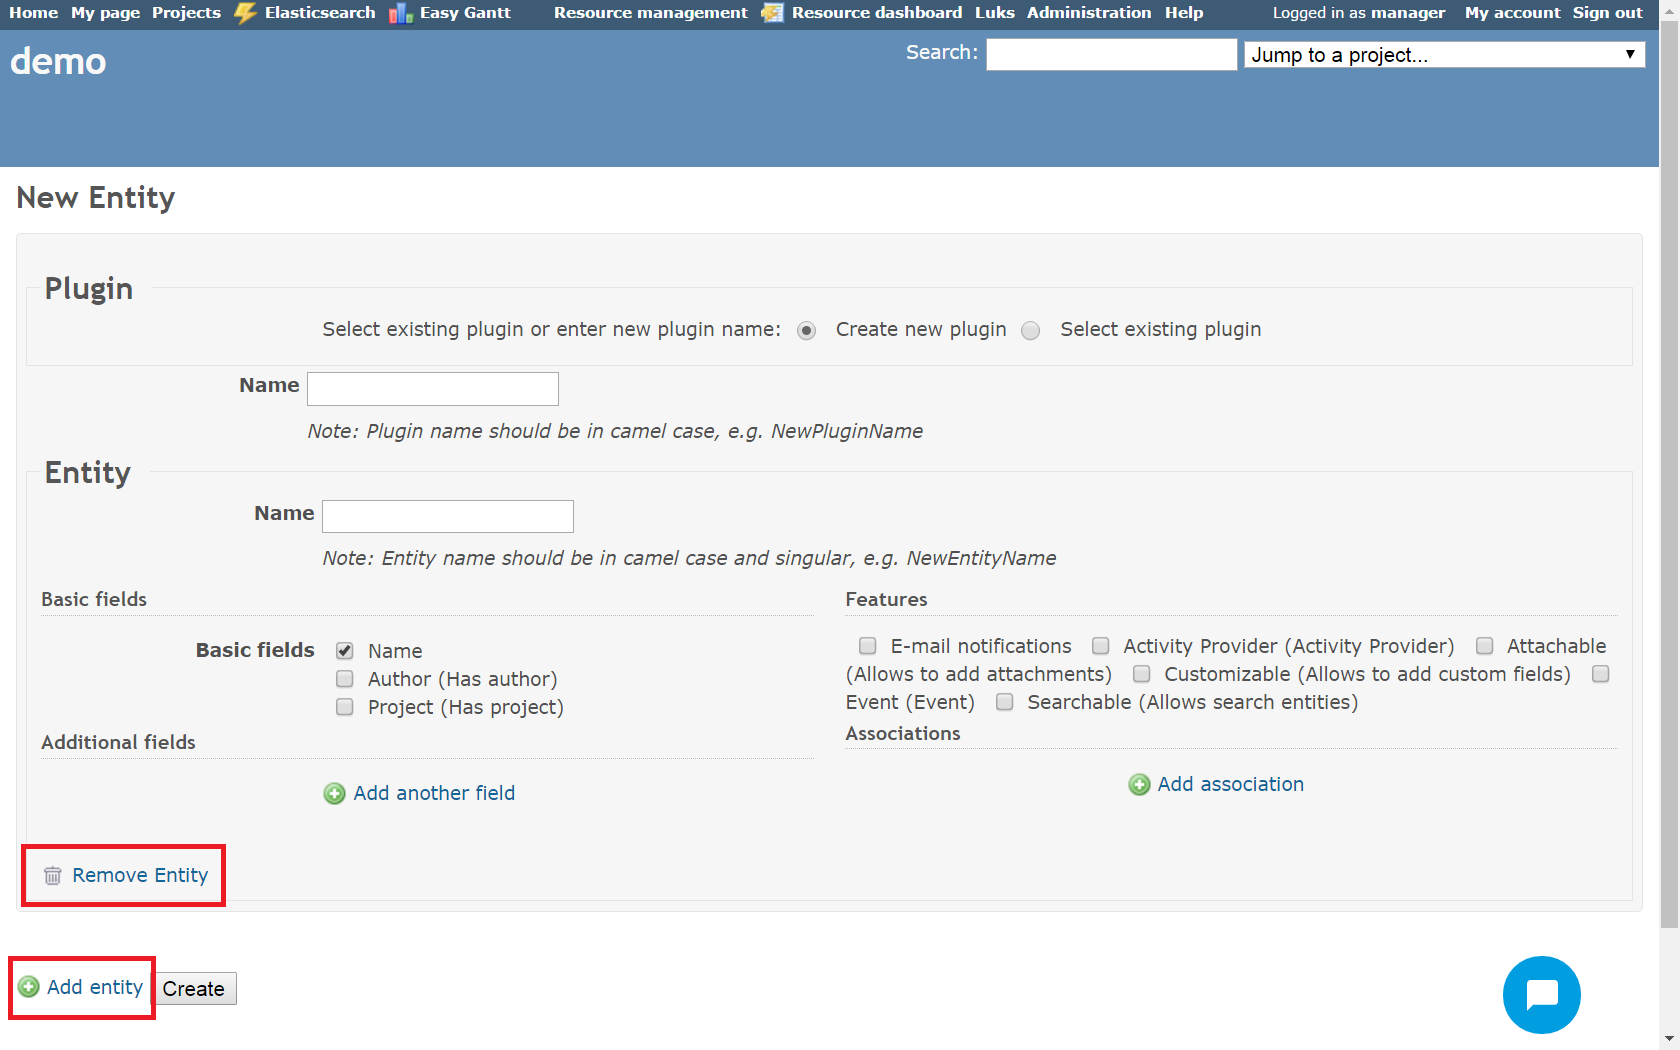
A "New entity" form will open as illustrated below. A new entity can only be created within an existing plugin, not separately. So, the first thing is to select whether you prefer to create a new plugin or select one from the list of already existing plugins. In the first case, enter a name for the new plugin. Each plugin must contain at least one entity so you also have to enter the name for an entity right on this form. More entities can be added by clicking on "Add entity" button down on the page. To remove the entity, just click on the button with trash icon as marked on the screen.
For each entity, select which basic fields and additional fields it is supposed to have, such as name, author, project, a text field, date and time etc. Moreover, choose what features the entity is supposed to have such as whether it sends email notifications, allows attaching files, allows adding custom fields or whether it's searchable. Finally, there is an option to add some associations to the entity such as a project, task, user or something else. When finished with the settings, click on "Create" button down on the page.
Installing a custom plugin/entity
After clicking on "Create" button, the plugin has been generated but not installed yet. To install it, follow these instructions:
In Redmine, run this command after generating a plugin: rake redmine:plugins:migrate
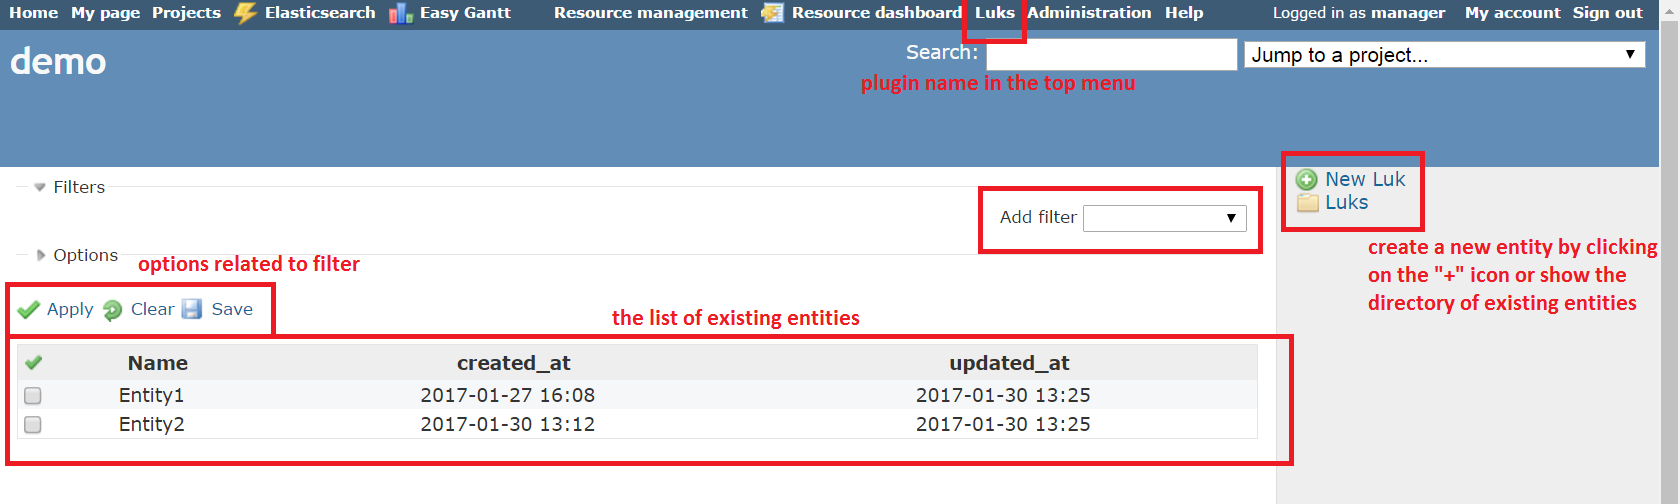
Afterward, restart your server. Then you will find the name of your plugin in the top menu like on the below screen where we created a plugin called "Luks". Clicking on it will open the list of entities that have been created in the plugin. To see the entity detail, just add "/1" after the URL to open the first one, "/2" to open the second one etc. Use Filters to see only selected entities in the list or use Options to select which columns you would like to see on the list.
Adding a custom field to a plugin/entity
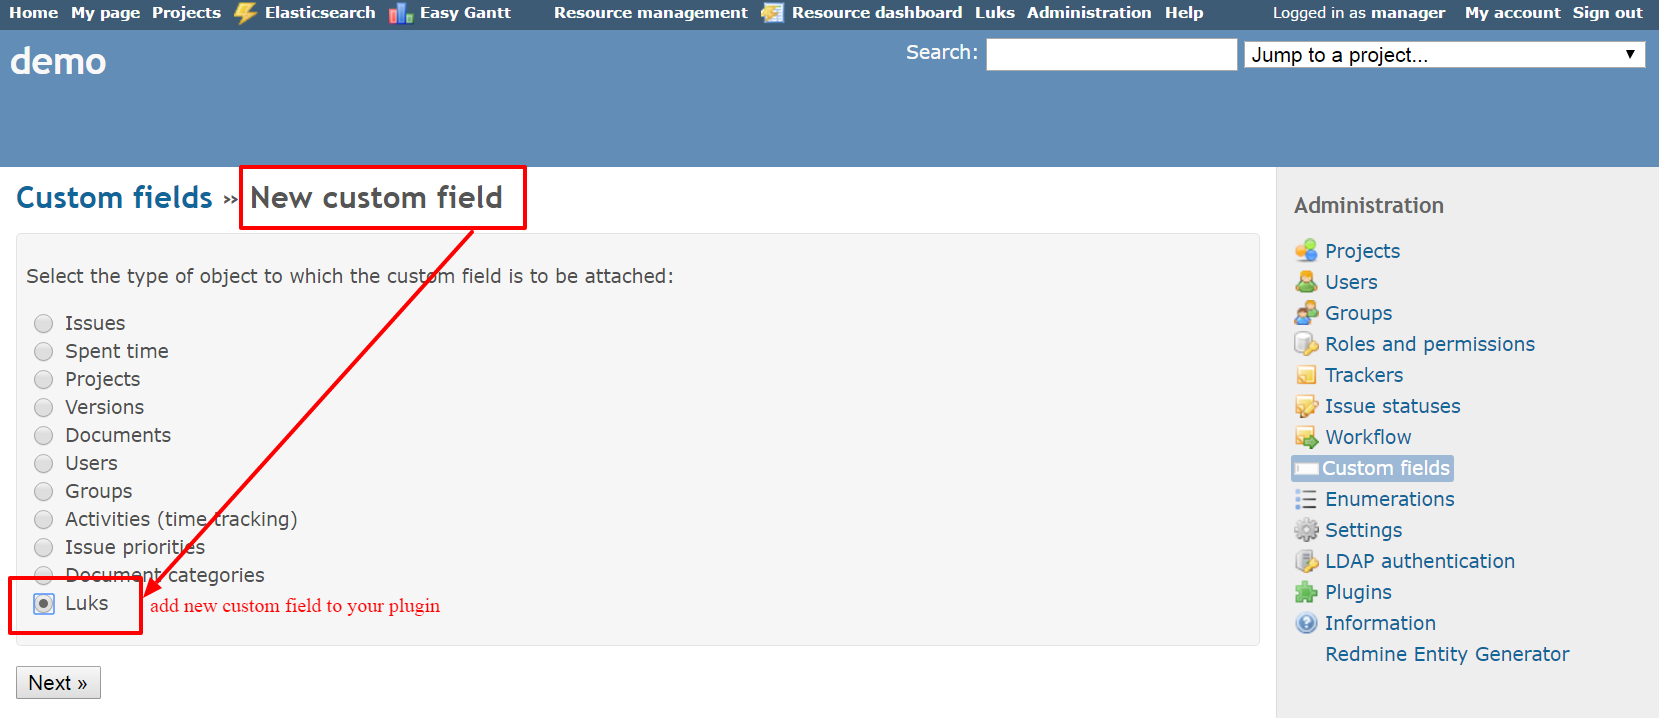
To add a custom field into your created plugin/entity, just go to Administration: Custom fields, click on the "New custom field" button and then select the plugin name as illustrated below.