


Calendar
The video tutorial, #2
The module configuration
Task scheduling
Users
Calendar events
Export and import of calendar events
Filters
Quick task editor
Roles and permissions
How is Calendar's behavior affected by the personal time zones of users
Corner situations
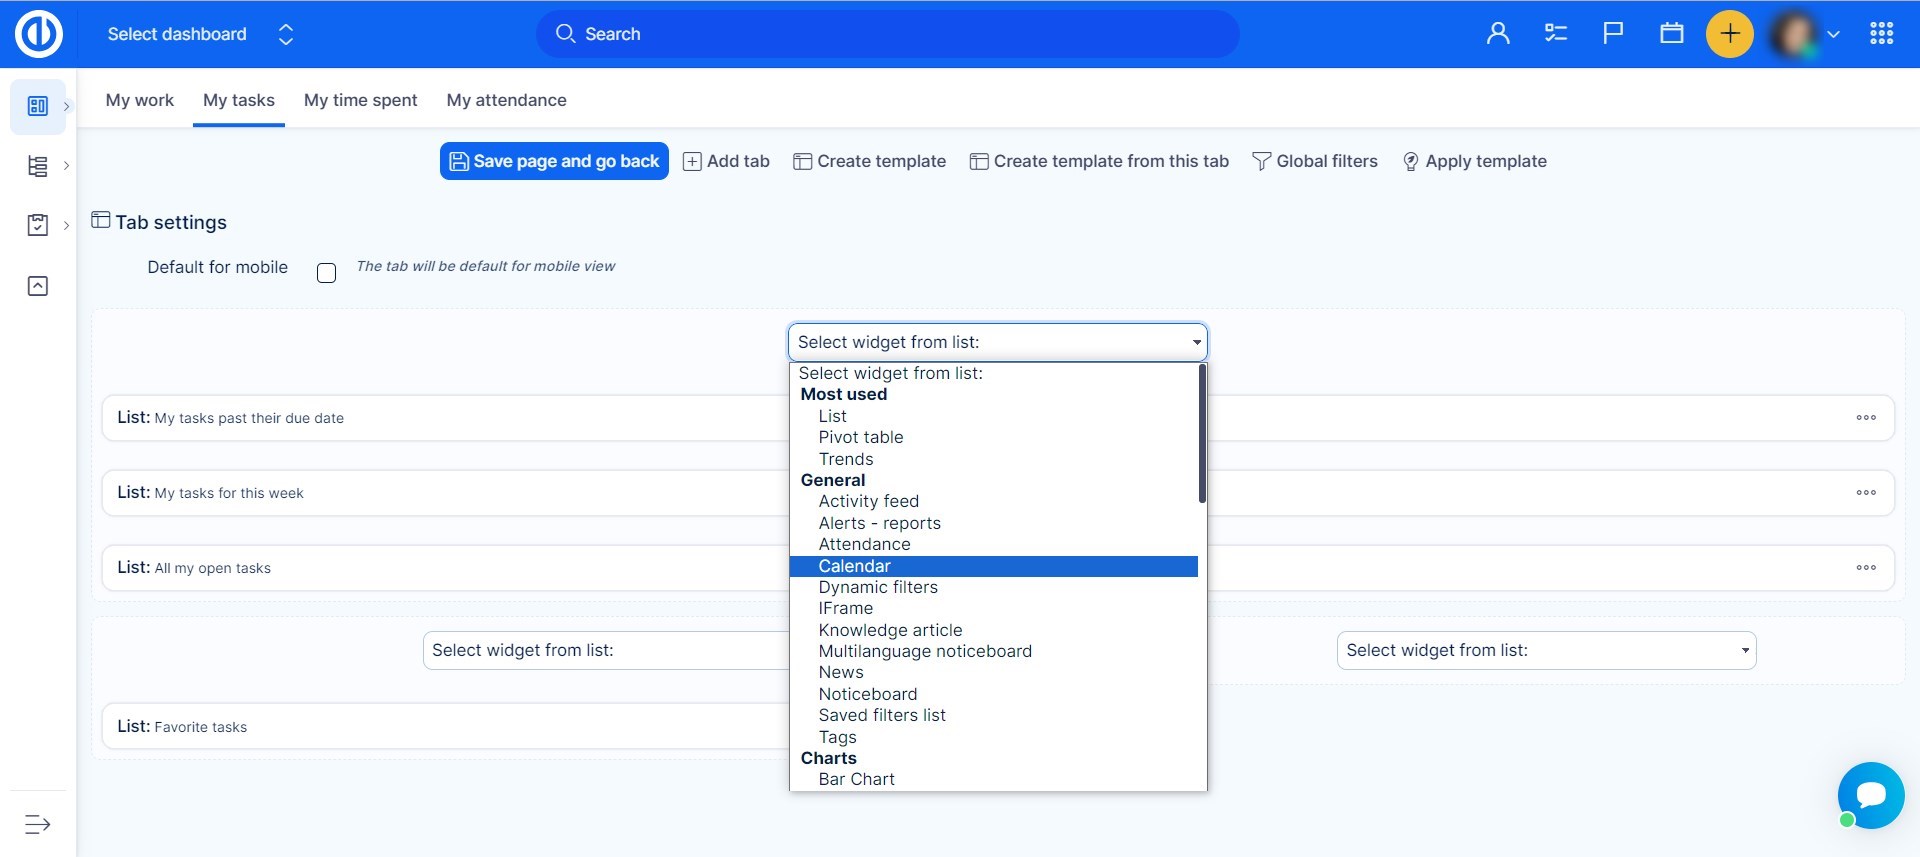
Calendar plugin is a drag and drop calendar that shows all meetings, to-dos, planned resources, attendance, and spent time entries. It's quickly becoming the most used plugin by our clients because it gives an ultimate and instant overview of what is going on to both regular workers and managers. Calendar can be added to any personal dashboard, such as your homepage. To add Calendar on your homepage, project page or another personalized page, just go to page edit mode ("Customize this page" button), add a module called "Calendar" and save the page. Alternatively, you can open it instantly by clicking the calendar icon in the upper bar of your application.
The module configuration
In the module configuration, you have the option to switch between personal and manager roles with different permissions. Just click on the pencil icon in the upper right corner of the module to open the settings window. If you are the Manager, you can simply select any user and assign task using drag and drop and thus use Calendar to optimally allocate resources of your team. If you select Personal, you can use Calendar to plan tasks in your own calendar only, not for any other users. Moreover, you can edit display range (including the option to show/hide weekends) as well as users and groups and filters right from here. In "Sort" options, you can set up the criteria of sorting tasks in the left column. To import a calendar, use the "Add external calendar" button in the lower right corner.
Task scheduling
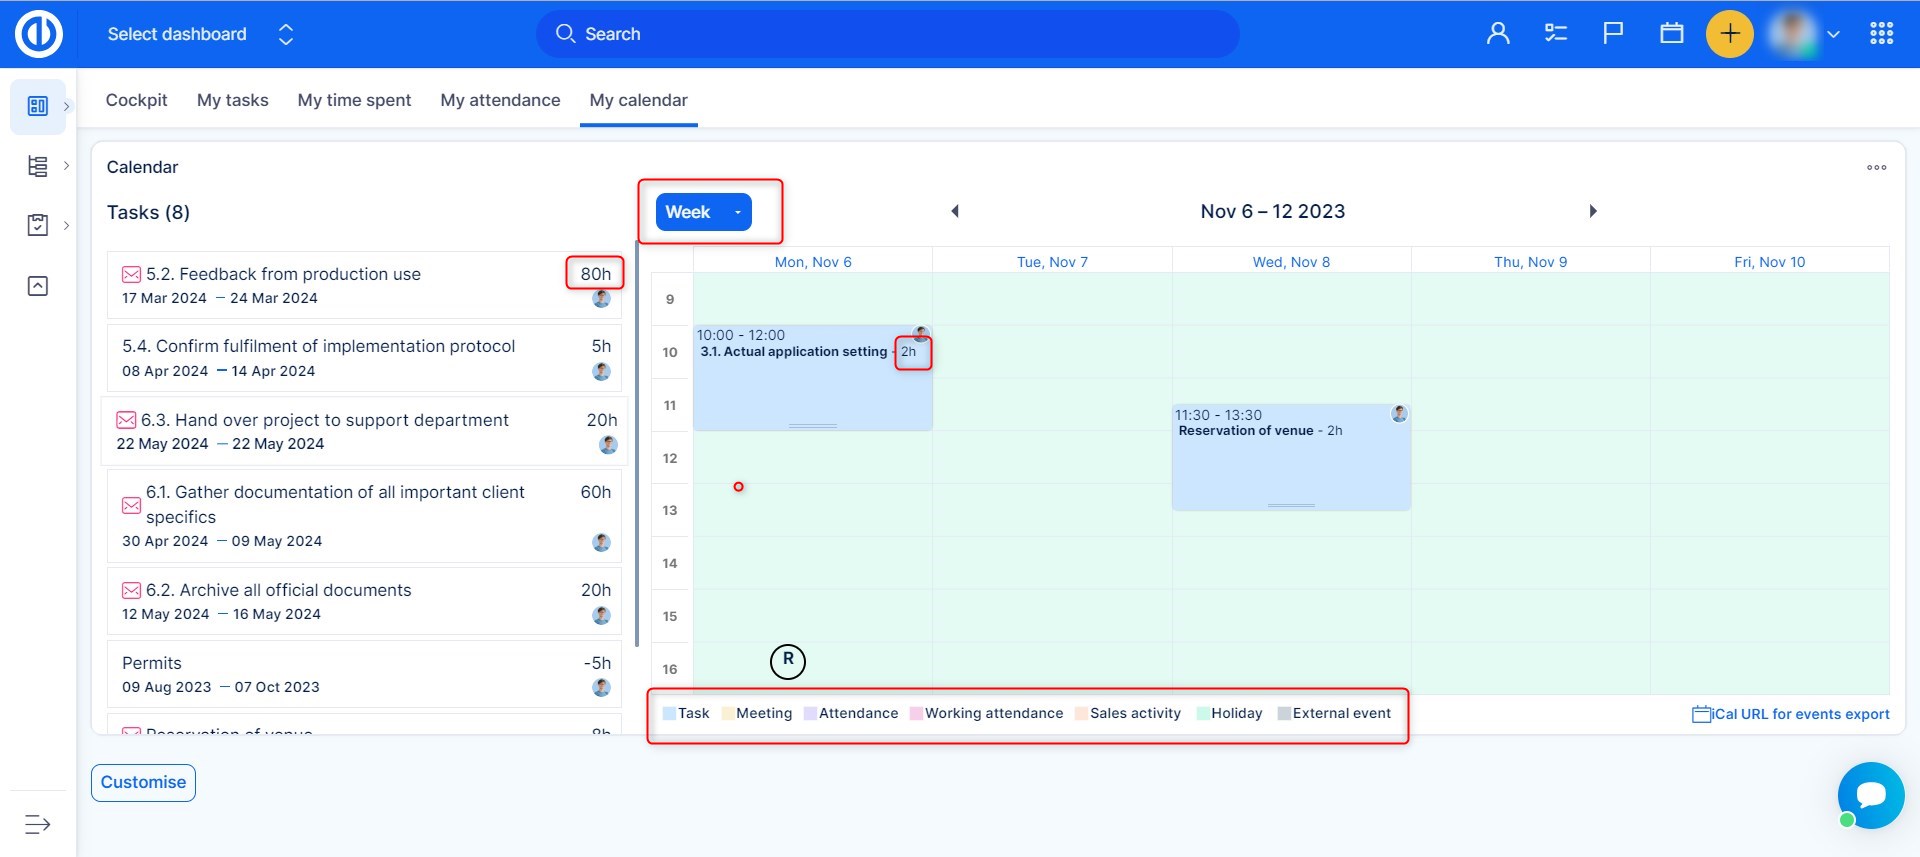
The task list in the left column includes all the tasks valid for filtering criteria defined in the module configuration (or applied manually using the filter tags). You can simply plan tasks in the left column by dragging and droping them into the calendar. By dragging a task from the left column to the calendar, 1 hour will be allocated for this task by default. If the task has a lower remaining estimated time, only half an hour will be allocated by default. When you change your expectation about the estimated time, just drag the bottom part and modify it as you wish. The legend under the calendar allows you to enable only specific entites to show in the calendar while the disabled ones are hidden.
To quickly change a task's estimated time, simply click on the number of hours shown in the right column for each single task and then enter a new value. The option to change the value only appears when "Estimated time" field is not set as "read-only" in Workflow. The change will save immediately. The number of hours shown in the left column is the remaining time of the task to be scheduled yet, i.e. estimated time minus spent time and already scheduled hours (these are taken from manually set reservations).
Make sure your task is planned between the task's start date and due date. This area is colored in green in Calendar, the non-available area is colored in red when you drag a task and hold. If you drop your task into a red area, an error message will appear. The hours outside your active working time calendar are also considered a part of the red area so that no user can have tasks scheduled outside his standard working hours. Any user's action with tasks is saved automatically.
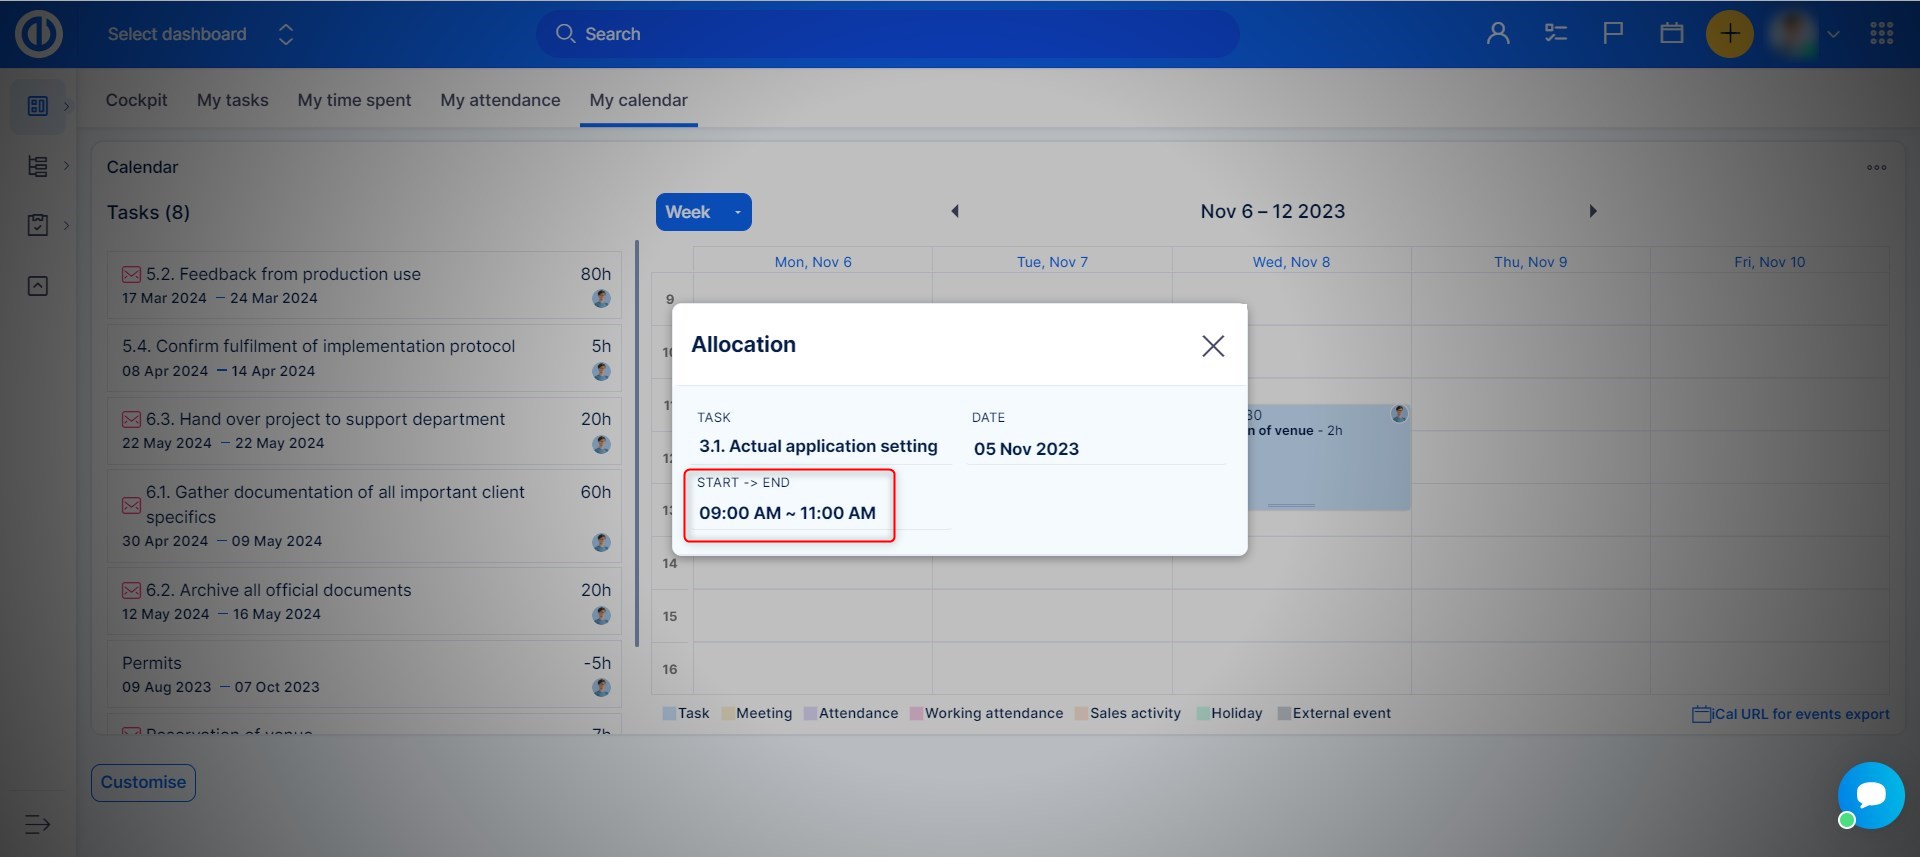
The information about time duration visible inside the already scheduled tasks (calendar boxes) represents time duration of the task in this particular day, which might not correspond with the time duration (estimated time) of the task (as it may be scheduled in parts for more days). To extend or reduce the length of a task in the calendar daily/weekly view, simply move the bottom border of the task up and down with your left mouse button. By right-clicking the task's allocated hours right on the Calendar's timeline, a Task window pops up, which allows you to manually customize the "Start > End" time of the task's duration in the respective day. This pop-up window is an alternative to simply dragging-and-dropping the task directly on the timeline, however, some users may prefer such a way instead.
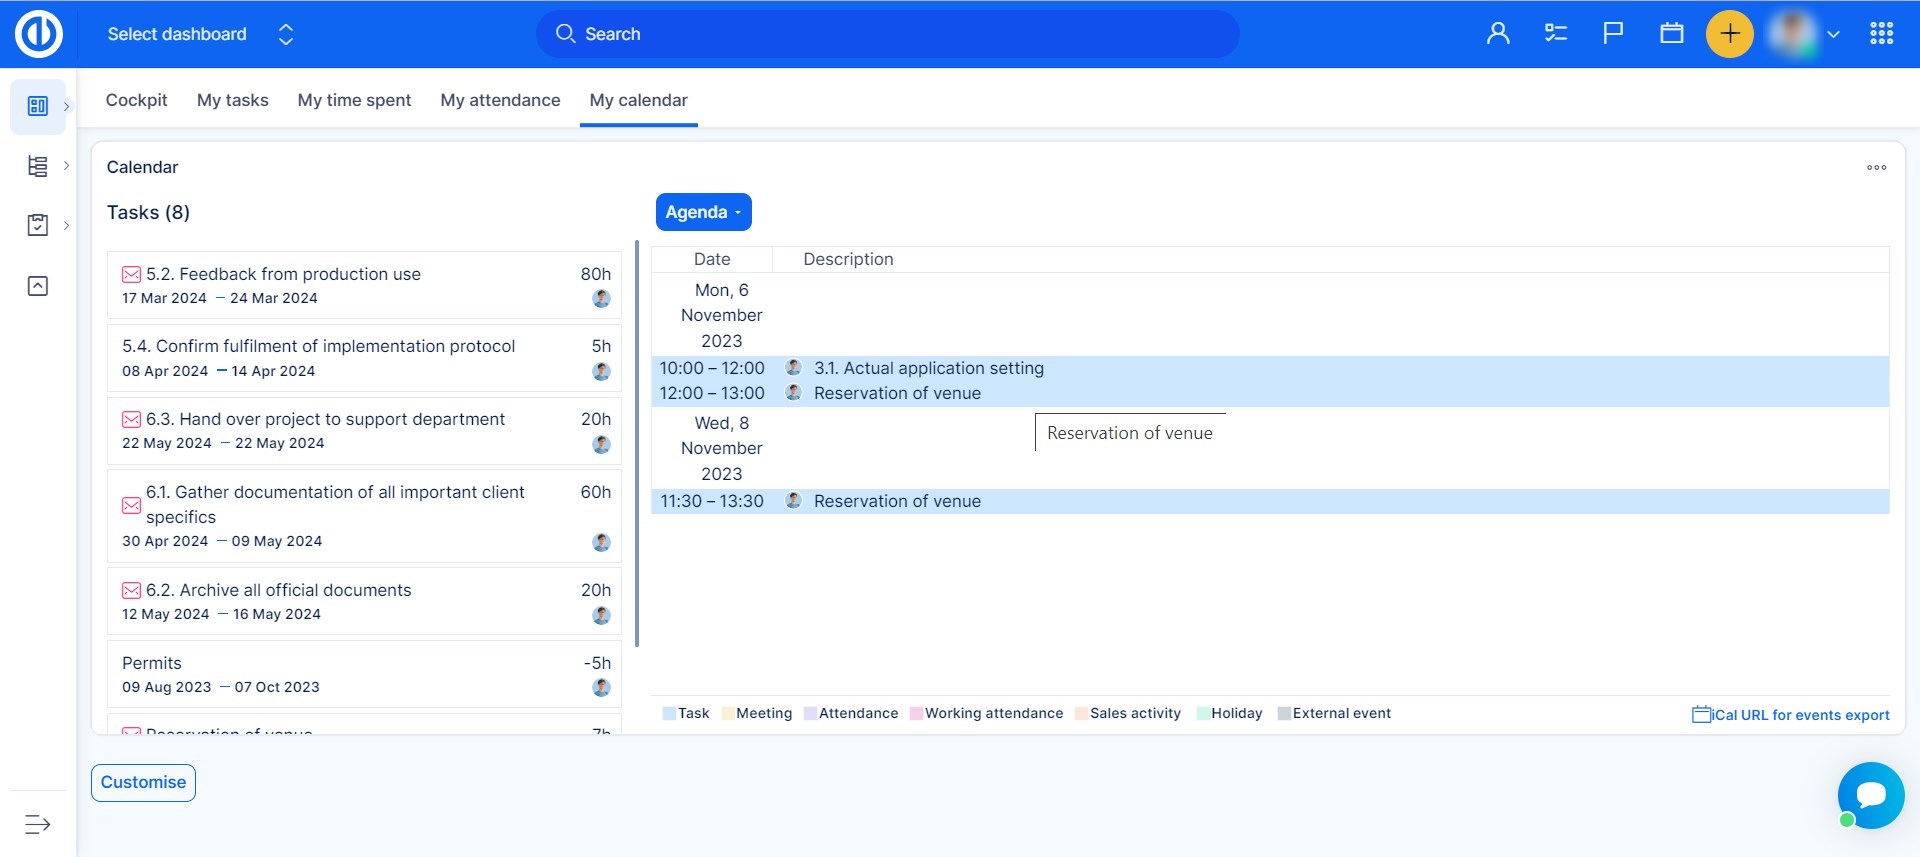
To switch the time view of the calendar, use the respective drop-down list just above the calendar (today, day, week, month, year, agenda). In the year view, only activities of one user can be displayed at a time. The Agenda view shows the journal of all scheduled activities and their dates.
Just as easily you can also modify task attributes. Just click on a task in the calendar to show the Quick task editor. Here you can also log spent time, comment a task or delete a task from the calendar.
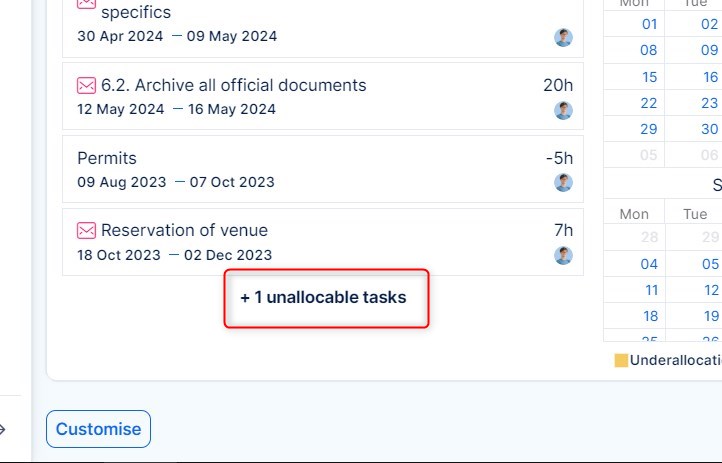
The list of allocable tasks does not intentionally display tasks that have their estimated time exceeded by spent time, which means they cannot provide any allocable hours and are therefore irrelevant for Calendar. These tasks are called Unallocable tasks and you can see information about their quantity directly below the list of allocable tasks.
Users
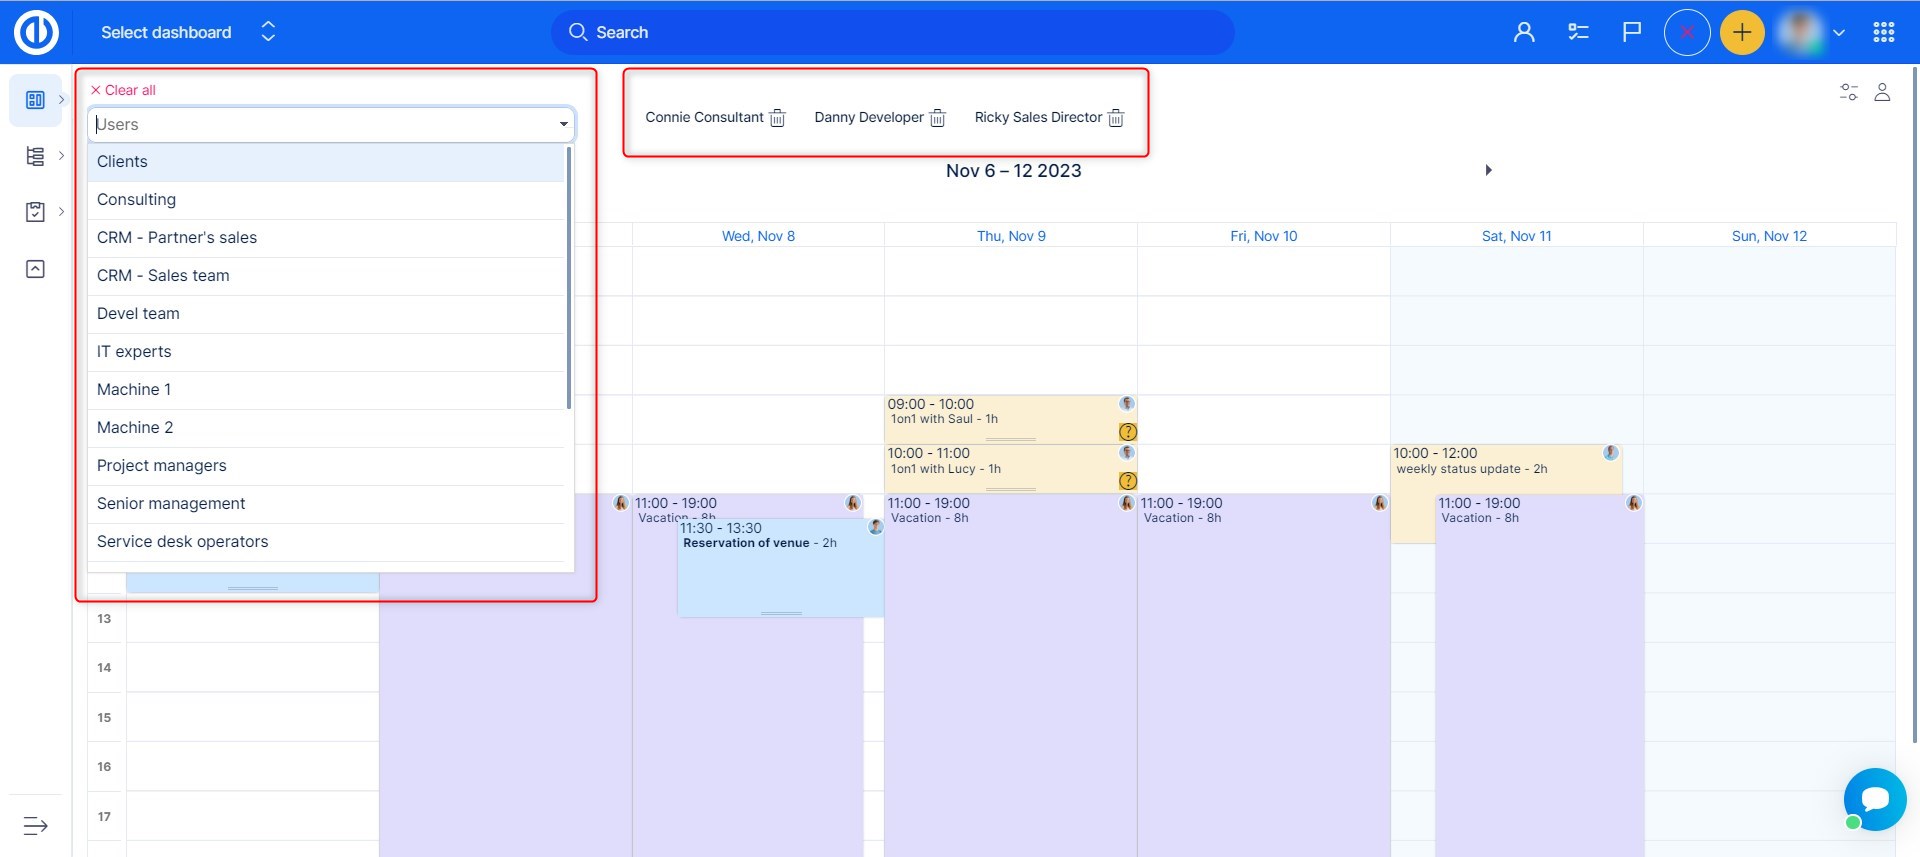
When you click the toothed wheel icon in the top right corner of the module, a drop-down list with the selection of users appears just above the task list, enabling you to easily add selected users to the Calendar by clicking on their names. The selected users appear right above the calendar in the form of named buttons. A single click on the button mark the user so that you can assign tasks to him. A double click will show only tasks, meetings, etc. of that particular user (like a filter). To remove a user from the selection, just click the trash icon beside his name. To activate a specific user, just click on the button with his name.
Only one user might be active at a time (marked by a green frame and the "check" symbol beside his name), meaning that any task dragged from the left column and dropped into the calendar will be assigned and scheduled only to the currently active user. Be careful that a correct user is active before scheduling a task. Otherwise, the task would automatically reassign and reschedule to a wrong user's calendar. The current assignee can be recognized by a user's icon at each task's box.
Calendar events
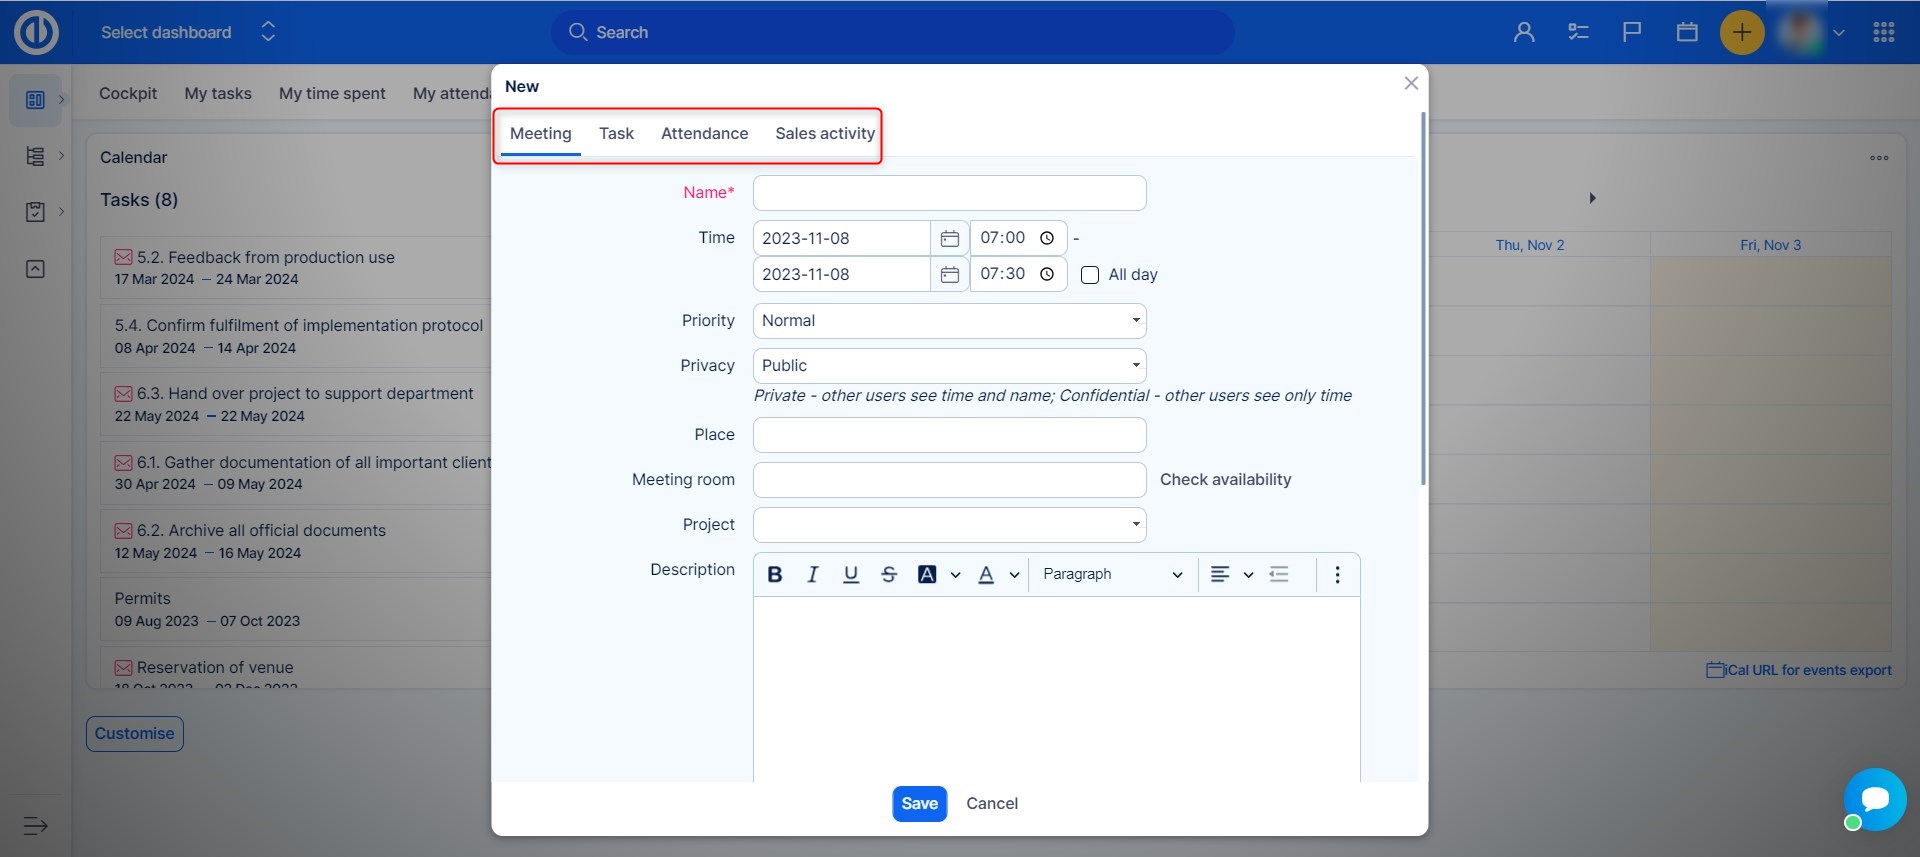
Calendar incorporates meeting calendar, which means you can easily create a new meeting as well as new task, attendance or activity right from here. Just click, hold and move the left mouse button on empty space of the calendar (for an intraday activity) or simply click on the specific day in the day/week view (for an all-day activity), then release the button and choose in the pop-up window what kind of entity you wish to create (meeting, task, attendance). When you schedule various kinds of entities (such as meeting + attendance) for the same time slot, it will result in 3 mutually overlapping boxes in the calendar view.
Attendance records in Calendar are visible only selectively, just like in Meeting Calendar. Attendance records without the attribute "At work?" are visible in Calendar, Meeting Calendar, and Attendance Calendar too. However, attendance records with the attribute "At work?" are visible just in Attendance Calendar but not in Calendar nor Meeting Calendar. The main focus is these tools is rather event planning than attendance overview, which is the main focus of Attendance Calendar on the other hand.
Export and import of calendar events
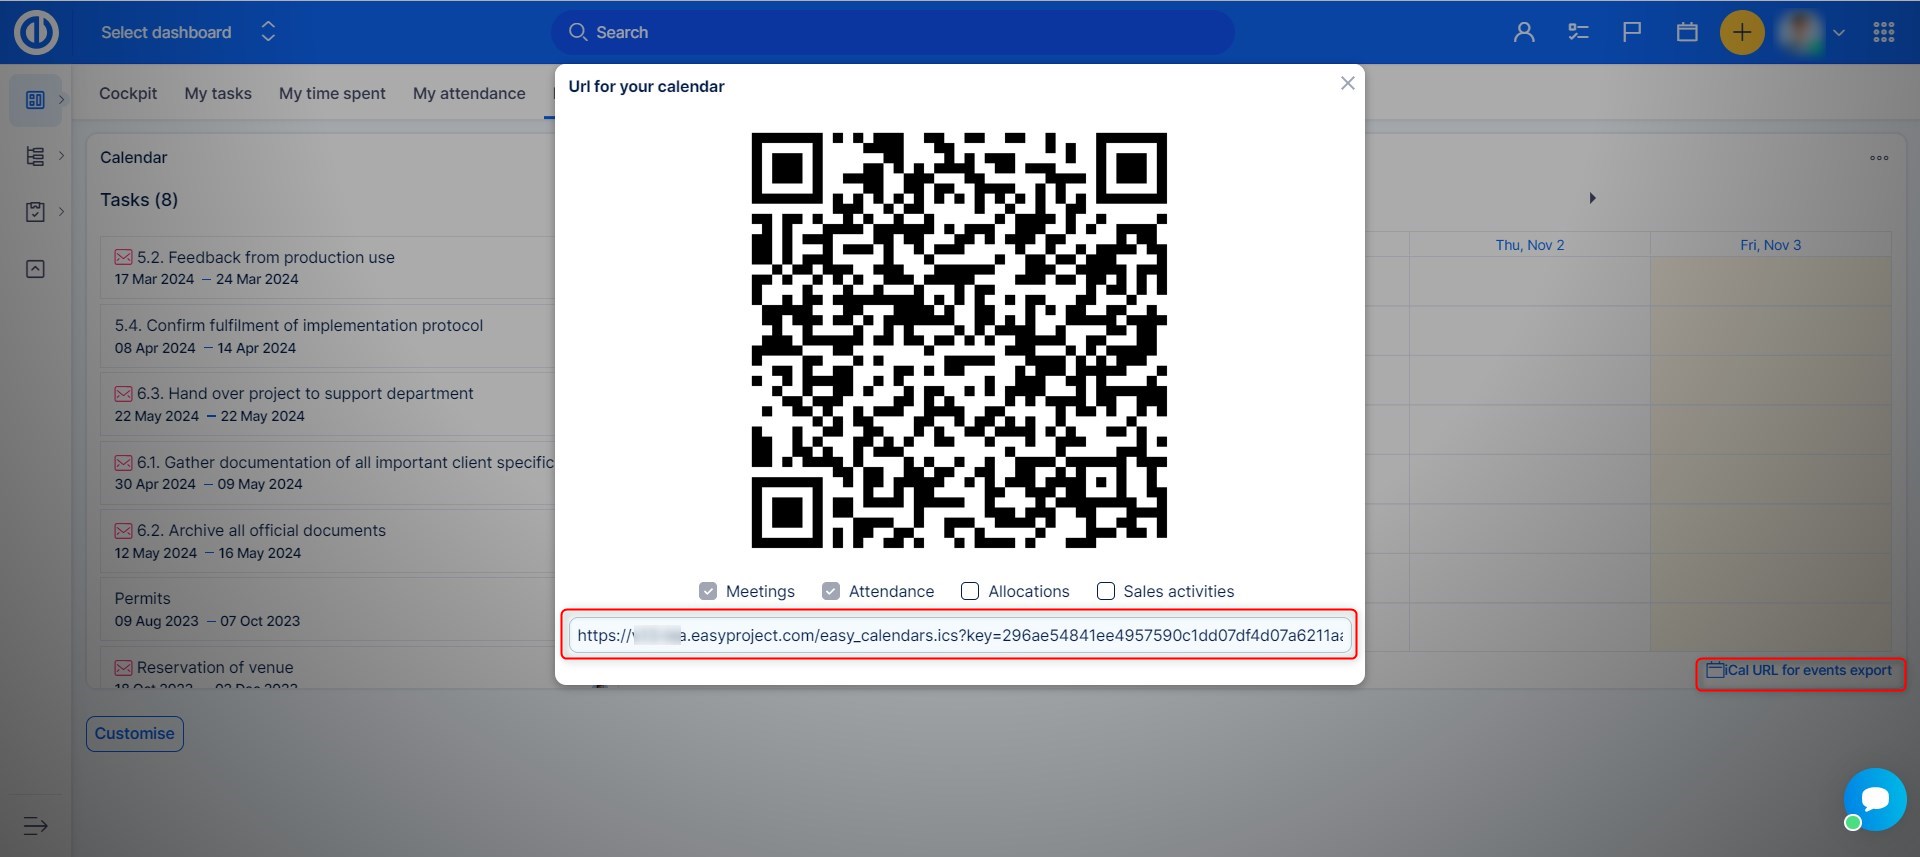
In order to export events or other entities from your Calendar to another iCal-compatible calendar, just click "iCal URL for events export" button in the lower right corner. This will open a pop-up window called "URL for your calendar" with the URL address just like a QR code containing the same URL address for quicker copy-paste. For each URL address, you may decide which entities should be included for export by ticking the respective checkboxes (meetings and attendance records are ticked by default, only tasks are optional). Then simply paste the generated export link into an importing field of the target iCal-compatible calendar.
In order to import an external iCal-compatible calendar into your application's Calendar, you need to first add an external calendar in User profile edit page. !IMPORTANT!User needs to have permission to edit their own profile, in order to achieve this.
Connecting an external calendar can be done the following way:
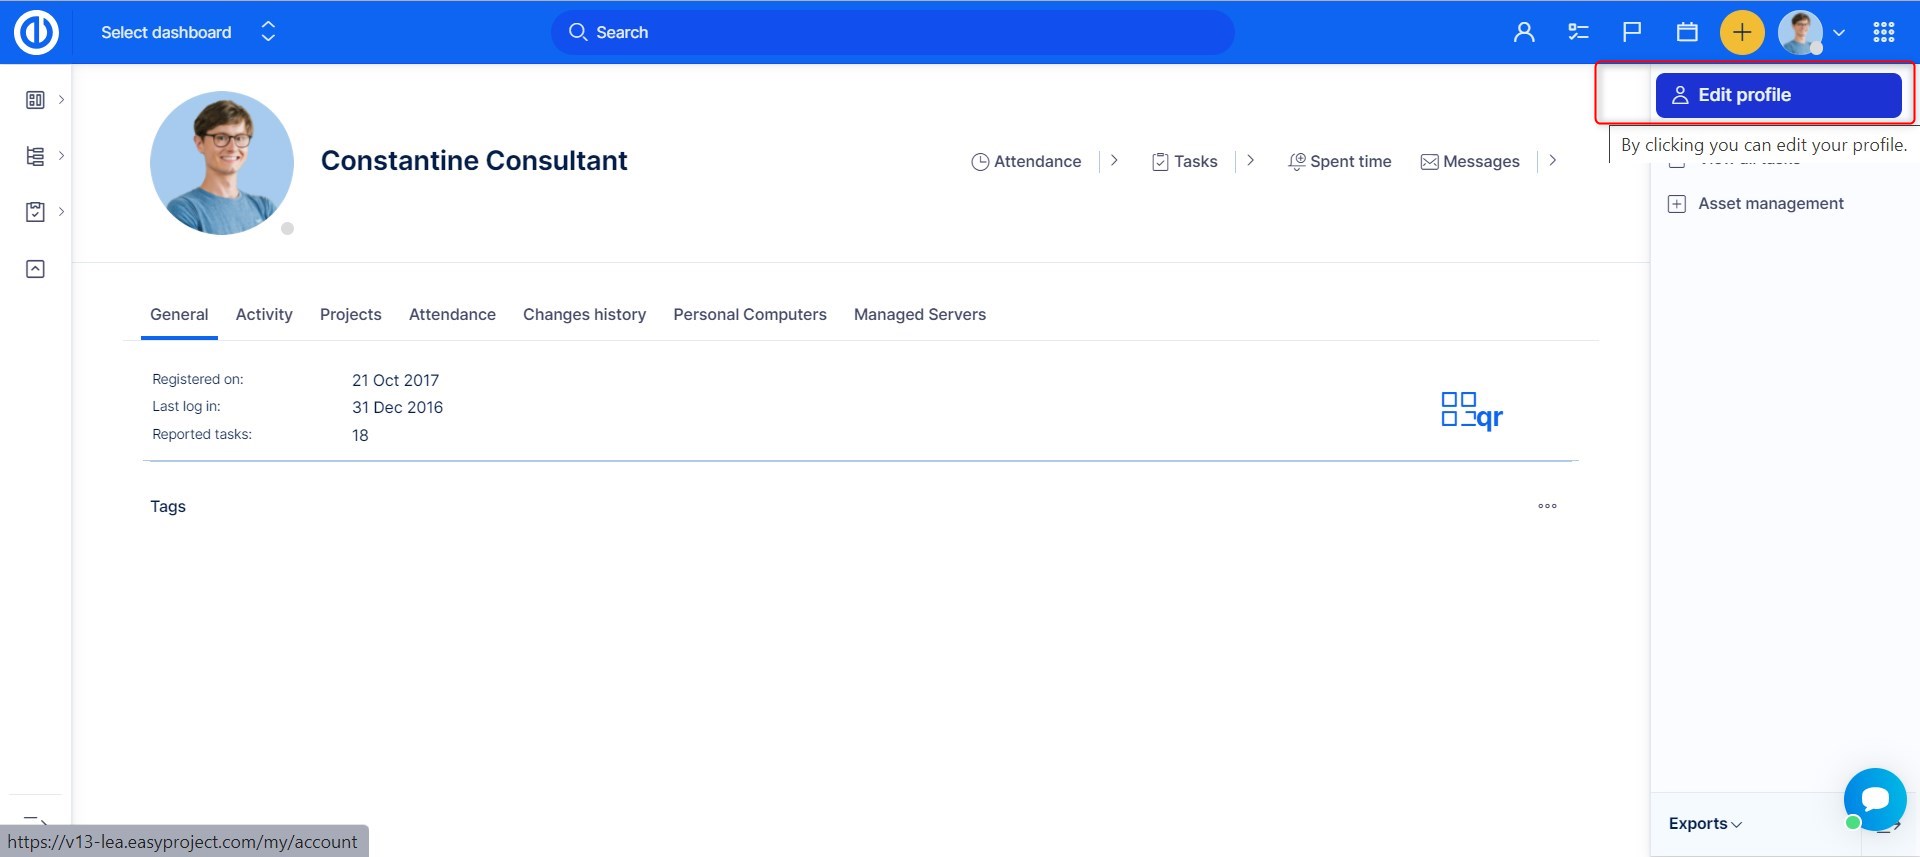
- Open your profile
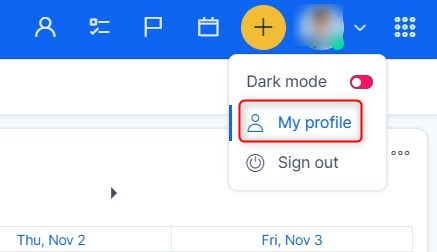
- Click on the button to edit your profile
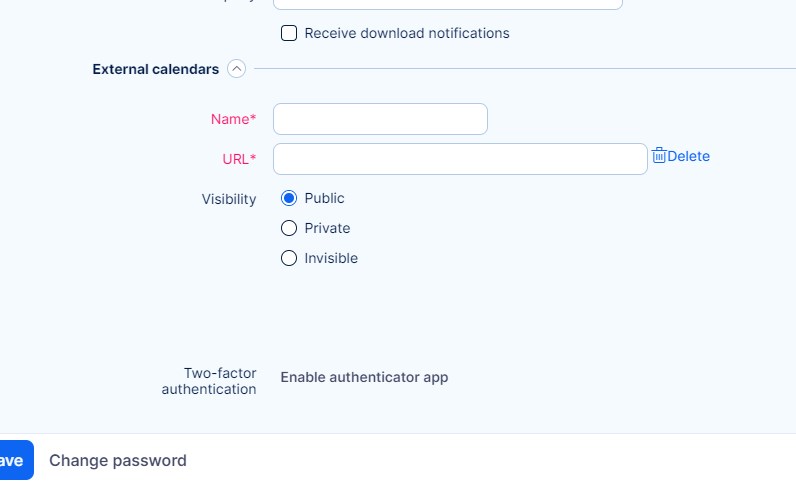
- Scroll down and on the right side you will find a button to Add calendar
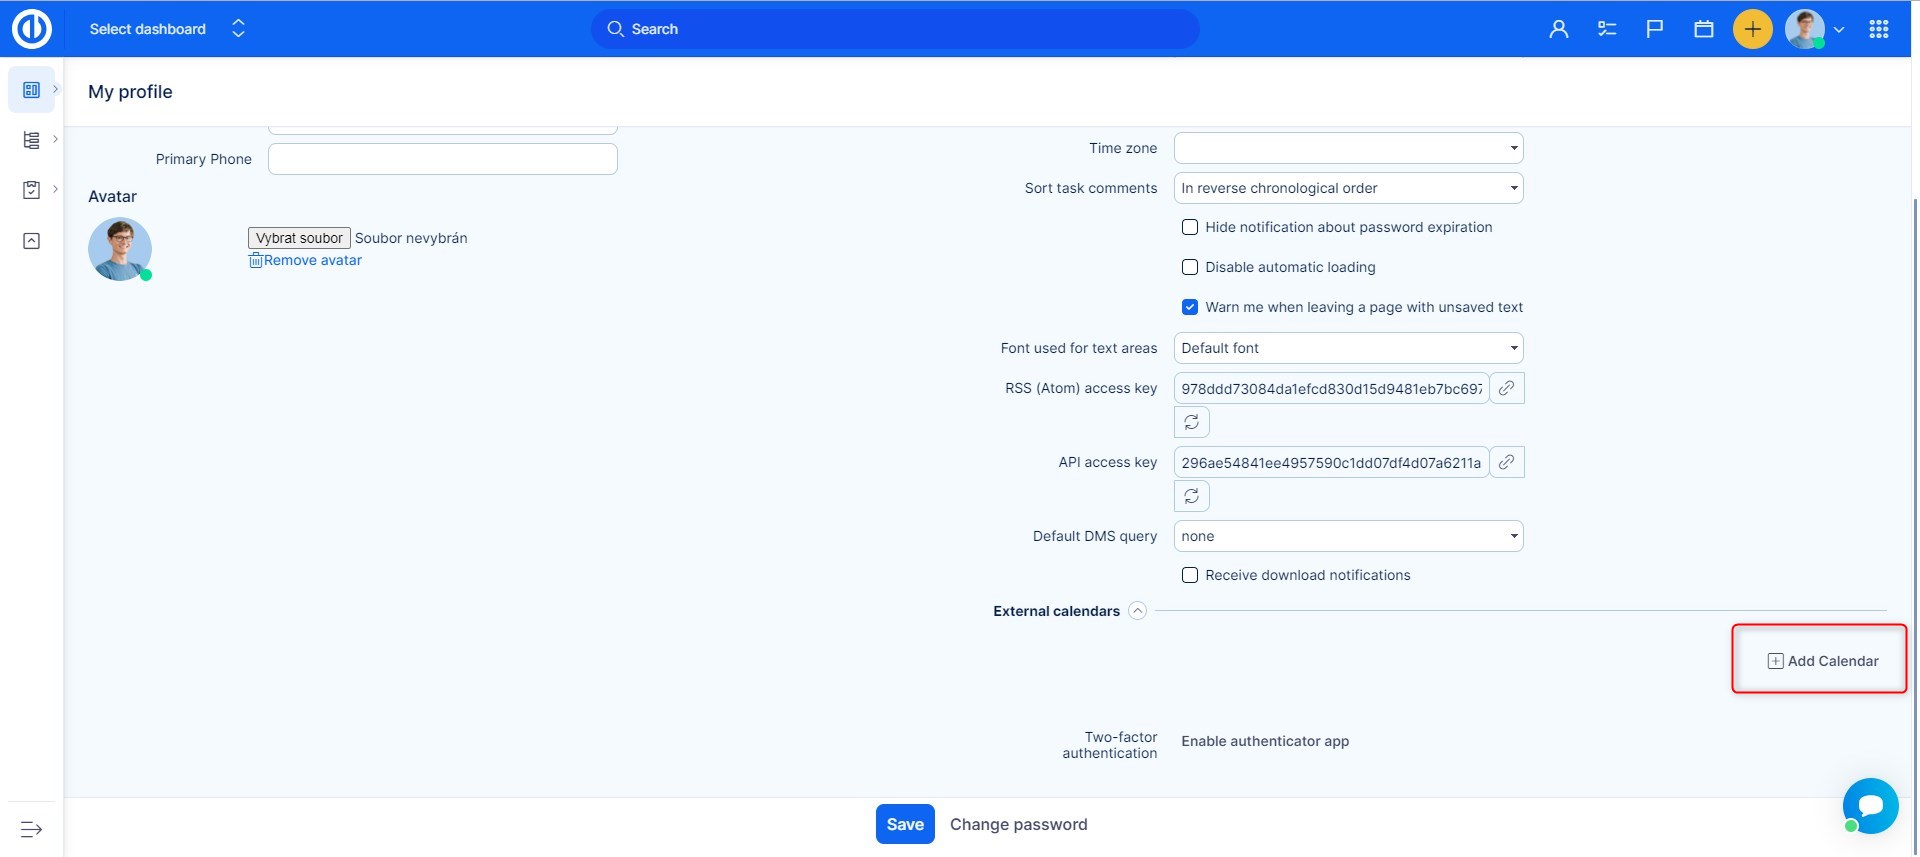
- Fields will appear where you enter how you wish to name the calendar and a field for the iCal link you obtained from the calendar provider.
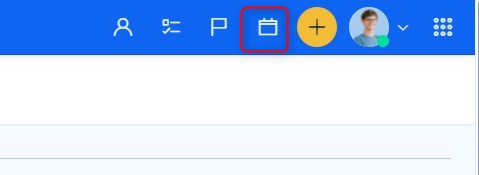
- Once you save the external calendar, open the Calendar from the top menu
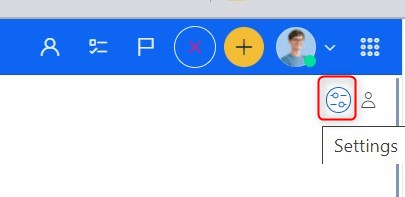
- In this view you will see the Calendar settings icon
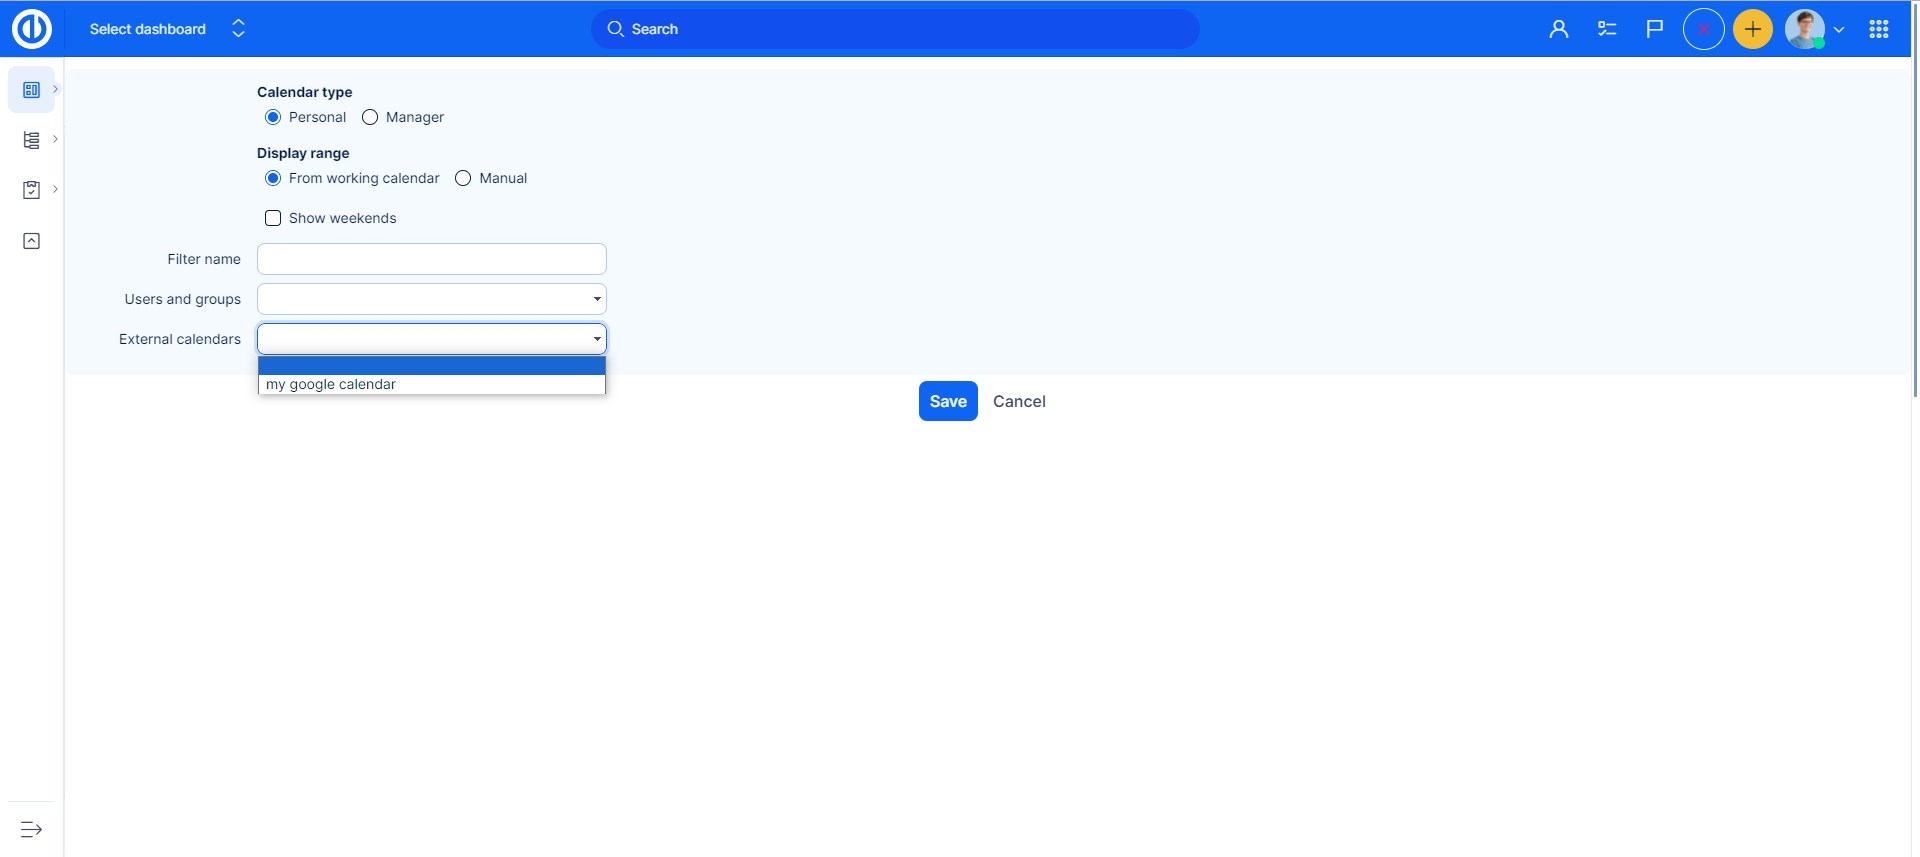
- In the Calendar settings find the field for exteral calendar. You will find here all external calendars connected to your account. Select the calendar and save the settings.
For more information, please check iCal synchronization.
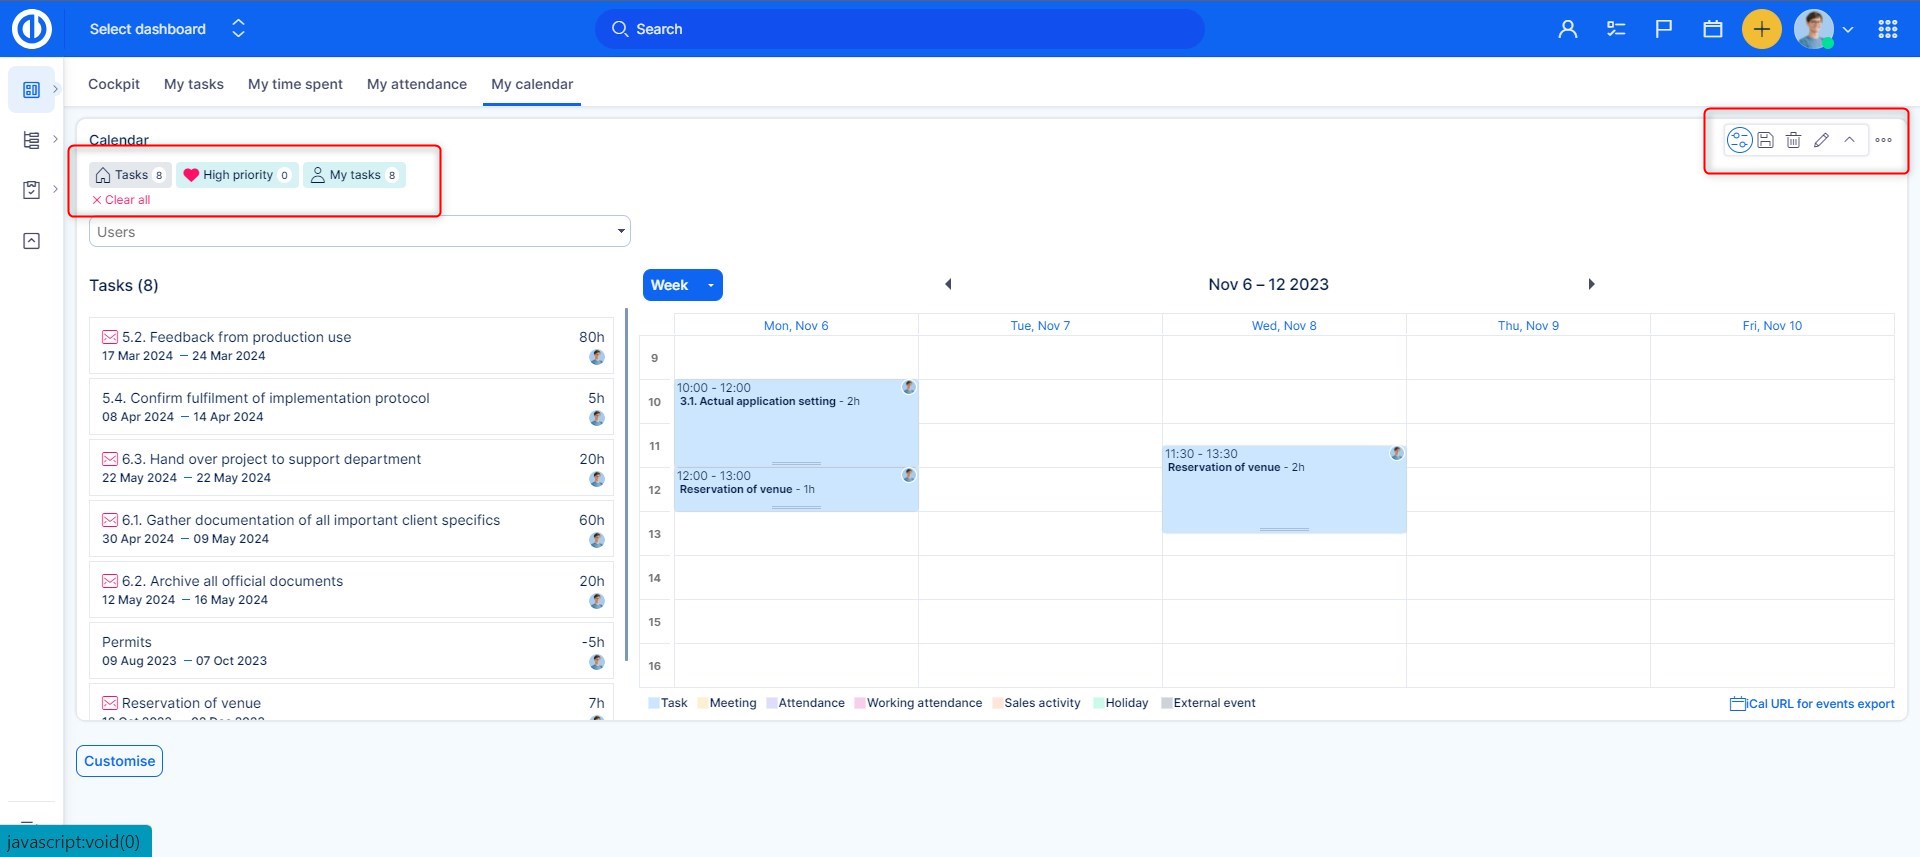
Filters
If you need to overrule the default visibility of tasks shown in the left column, use the saved filters. The menu is hidden behind the three dots icon in the top right corner of the module. Clicking the first icon will show you your saved filters over tasks which are saved with tag for heading. By clicking on one of the filter buttons, selected filter will be applied.
Quick task editor
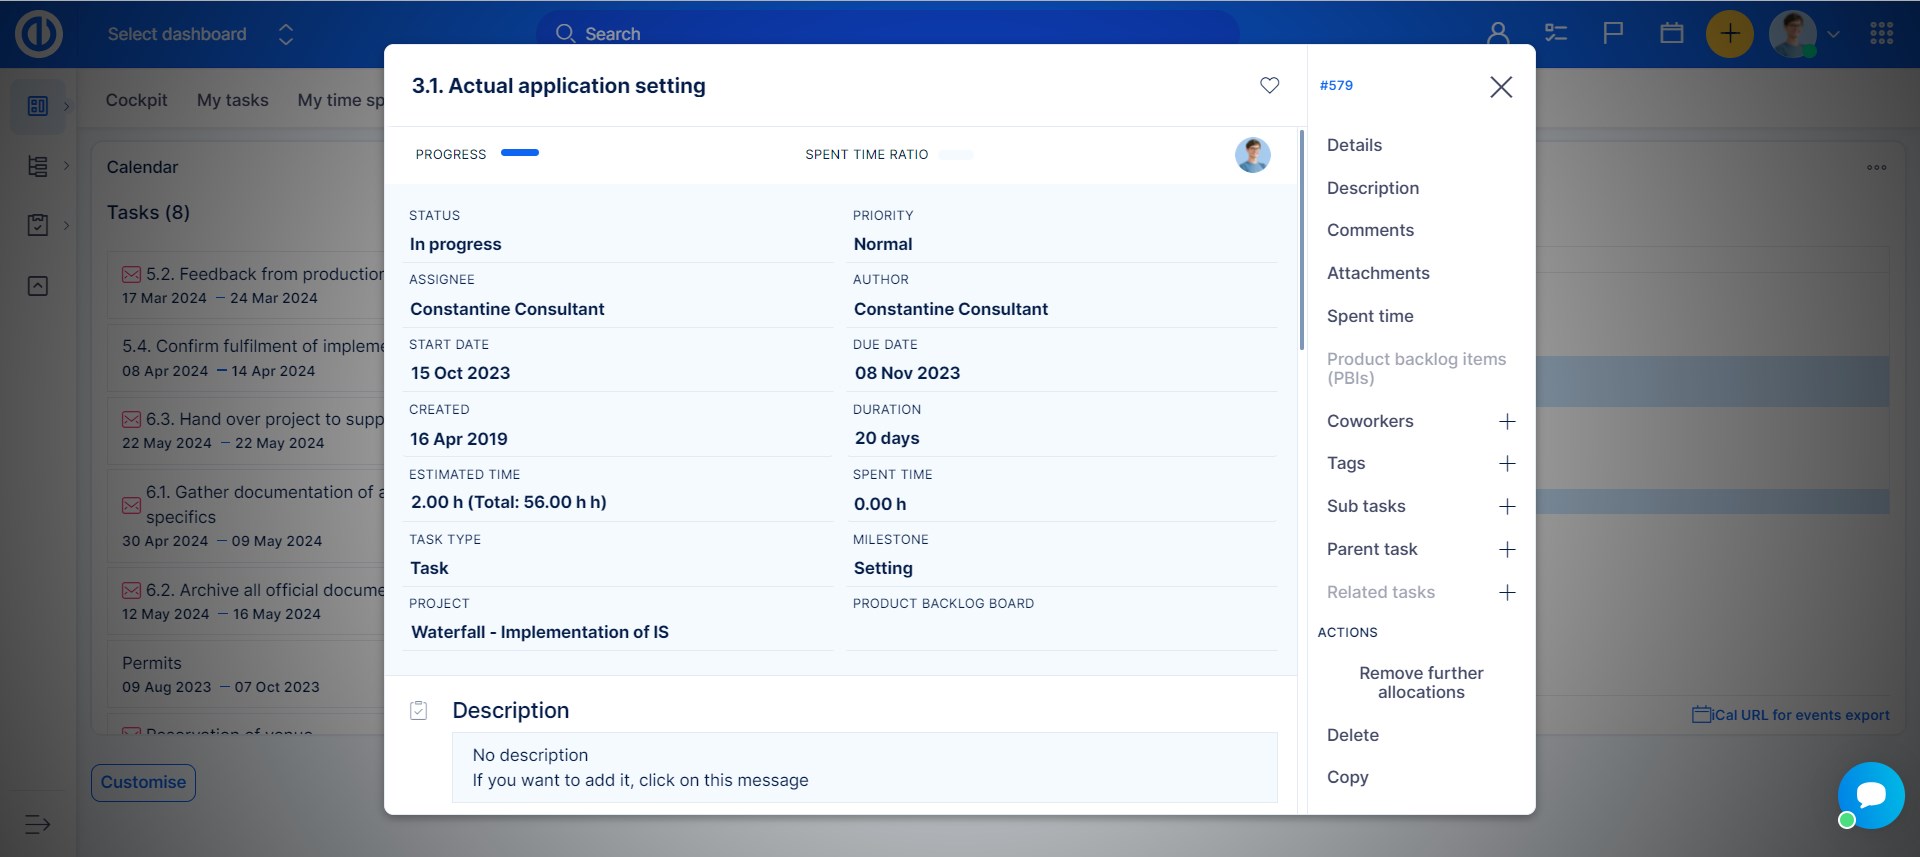
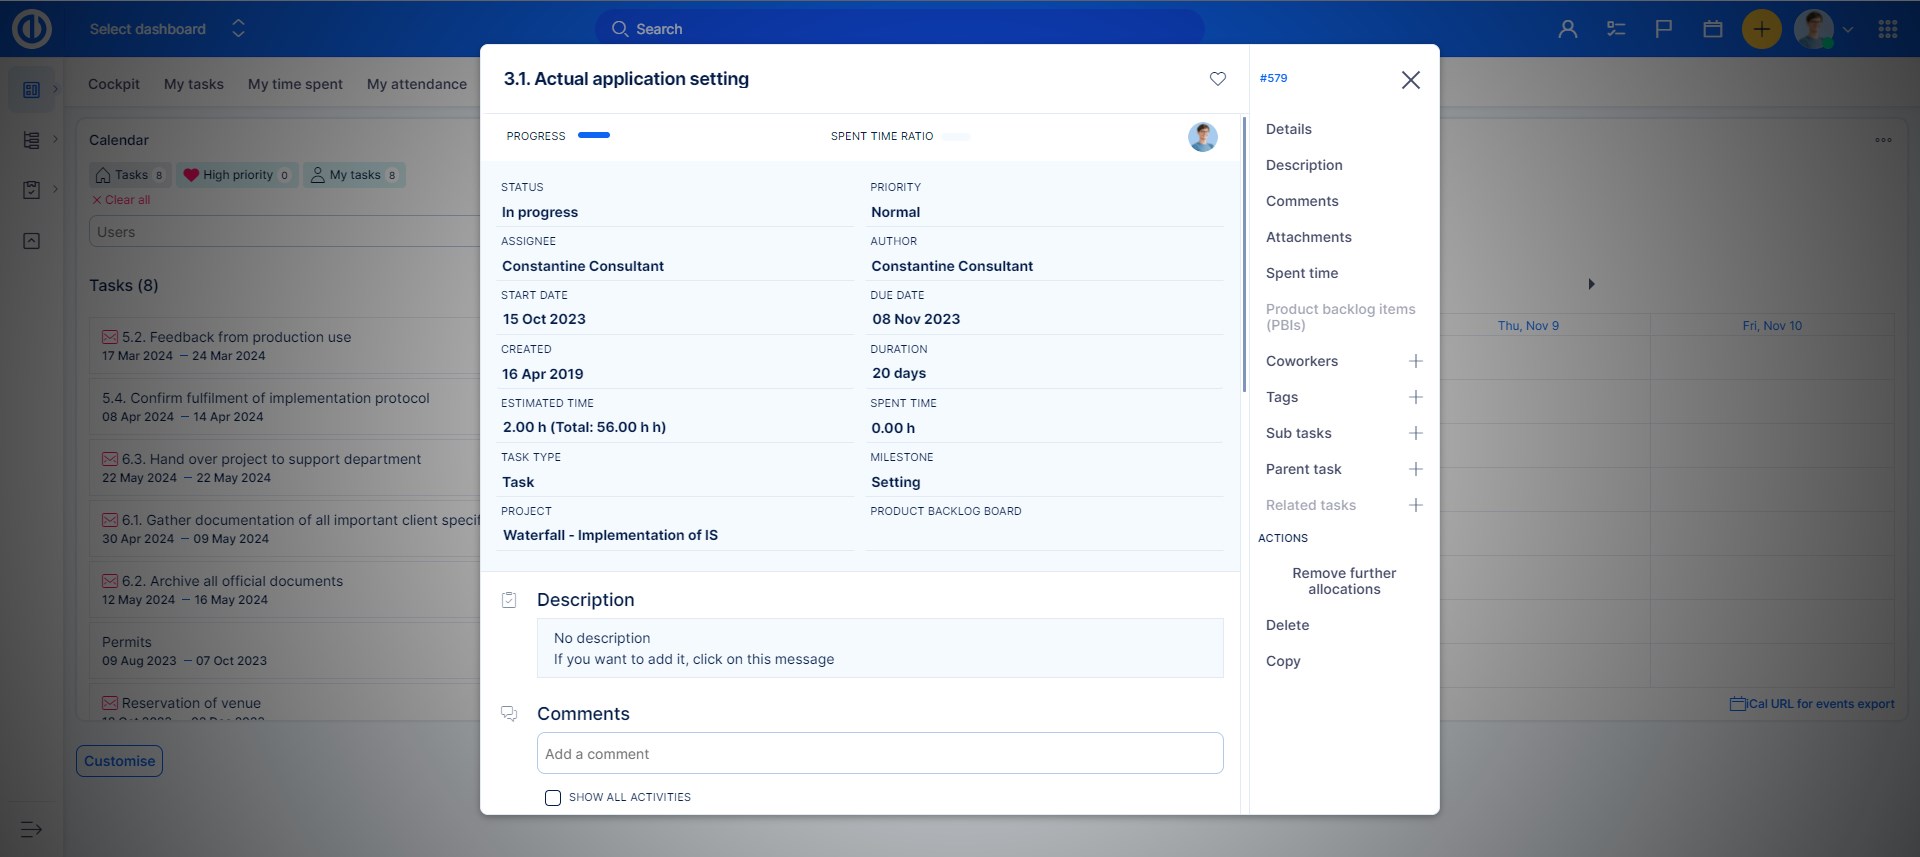
Quick task editor enables to see and/or edit all important data related to a specific task in a single-screen pop-up window, eliminating the need for opening the task in a separate tab. So, it is like a compact view of everything that can usually be found under various tabs, columns or buttons of the normal task view. Most importantly, the Quick task editor is extremely fast and easy to use and its main purpose is saving time while doing standard task management. To open the Quick task editor of a specific task from Calendar, just click on the task itself.
Below is how the Quick task editor looks like. As you can see, the sidebar menu contains buttons for quick navigation to required task attributes you would like to check or edit, namely details, description, comments, attachments, spent time, coworkers, tags, subtasks, parent task, and related tasks.
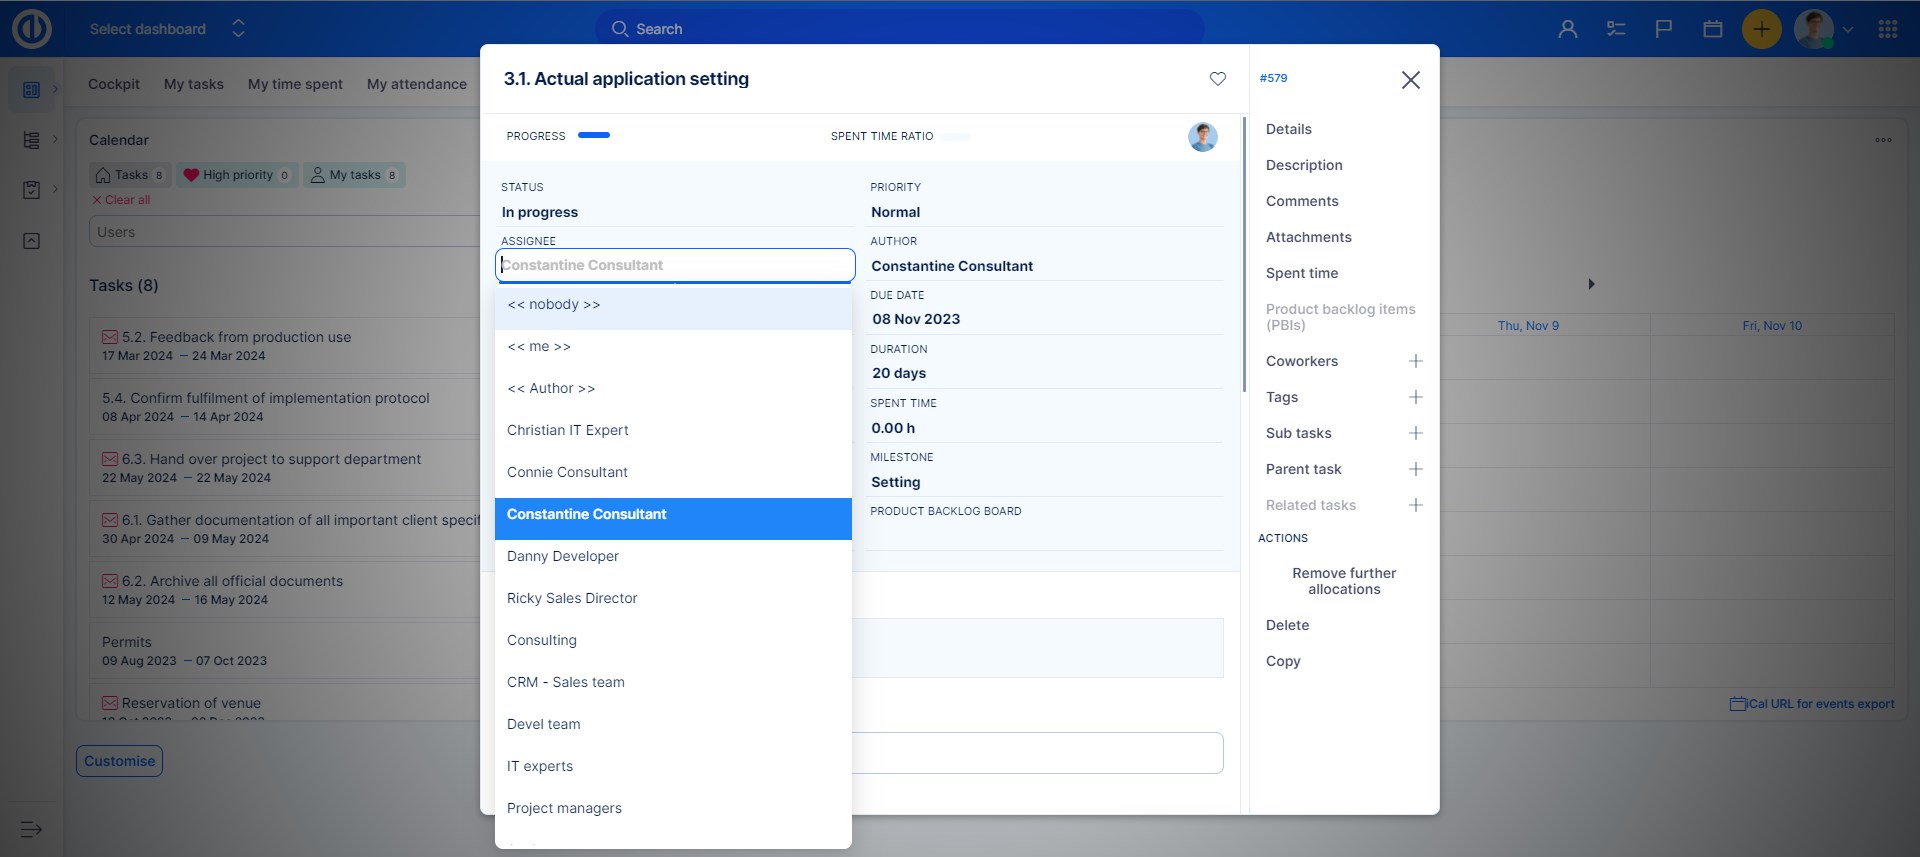
Of course, the Quick task editor is definitely not a passive view but is fully interactive so you can quickly edit any of these visible task attributes or add missing text just by clicking to the respective area on the screen.
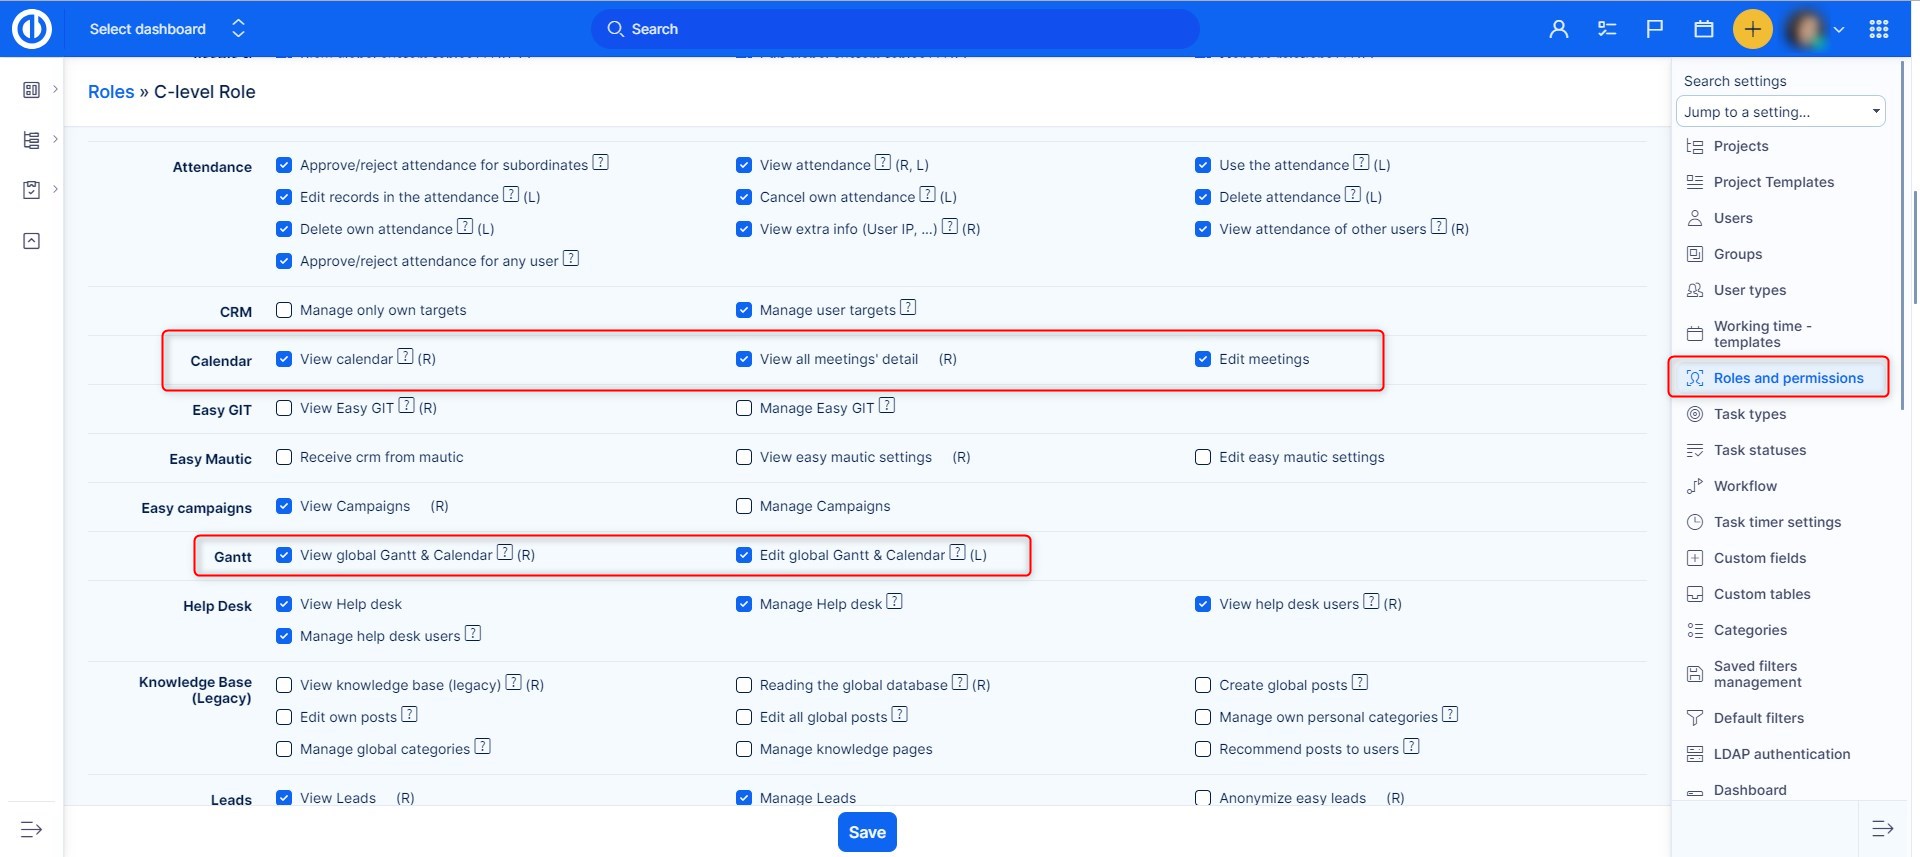
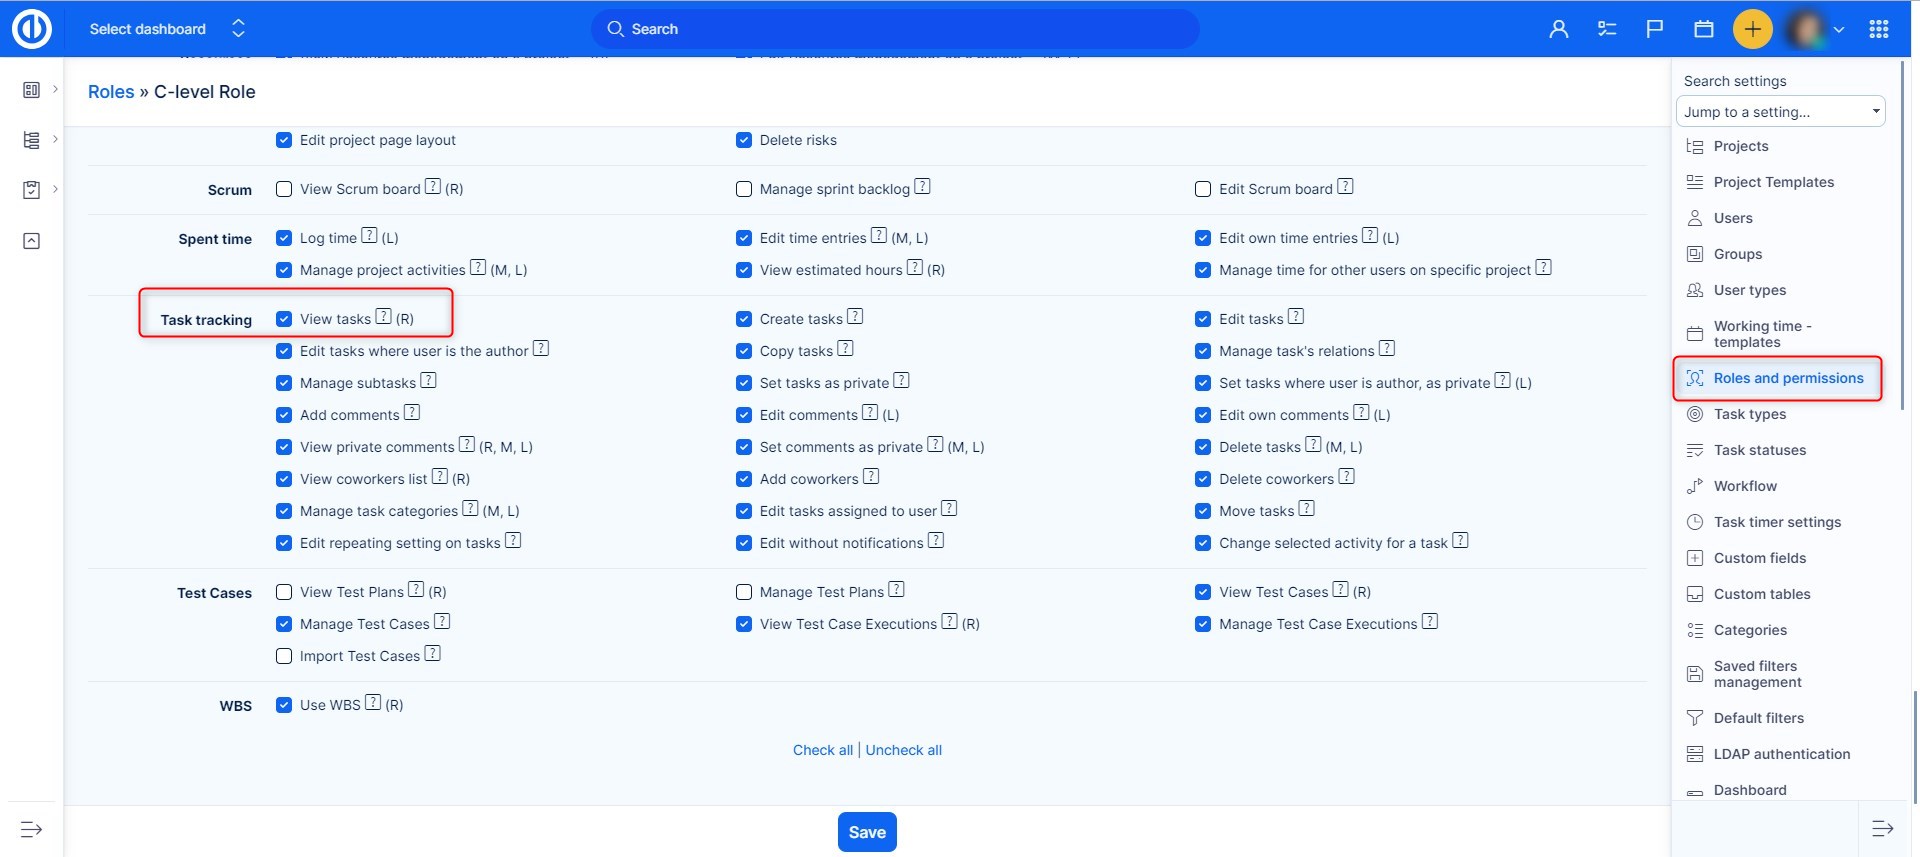
Roles and permissions
Roles and permissions of the plugin are common with those of Easy Gantt and Resource Management and can be edited in Administration >> Roles and permissions - select a user role - Easy Gantt & Resource Management & Calendar. Moreover, some permissions might be defined by workflow settings, such as that read-only fields cannot be changed from Calendar.
Users without permission to view tasks (this can be changed in Administration >> Roles and permissions >> Task tracking) are also able to see Calendar module including any tasks on the timeline, but they are unable to see the task names neither can they click through to see the task details. For such users, all tasks are just anonymous. Meetings in Calendar are visible to users depending on the allowed visibility of the user type who attends the meeting. Visibility of user types can be changed in Administration >> User types - Visibility options.
How is Calendar's behavior affected by the personal time zones of users
- Sales activity (discontinued from version 11) - When a sales activity is being created via Calendar, the time of the activity has to be selected in the application's default time zone. However, after the sales activity is created, each user sees it in his personal time zone as set on the user's profile. Therefore, if the personal time zone of a user is different from the application's default time zone, this particular user sees the same activity in a different time. When a sales activity is created together with a meeting, the scheduled time of a meeting is always displayed in the application's default time zone to all users regardless of their personal time zones.
- Attendance - When an attendance record is being created via Calendar, the time of the attendance has to be selected in the application's default time zone. However, after the attendance record is created, each user sees it in his personal time zone as set on the user's profile. Therefore, if the personal time zone of a user is different from the application's default time zone, this particular user sees the same attendance record in a different time.
- Meeting - When a new meeting is being created via Calendar, the time of the meeting has to be selected in the application's default time zone. However, after the meeting is created, each user sees it in his personal time zone as set on the user's profile. Therefore, if the personal time zone of a user is different from the application's default time zone, this particular user sees the same meeting in a different time.
- Task - The scheduled time of a task is displayed in the timezone of the assigned user. The time is affected by timezone set on users profile, but also it can be affected by the timezone set on the users computer. So even if a users timezone is not defined in the profile directly. The task might move to a different time, because of the computer timezone alone.
Corner situations
- Tasks assigned to groups are not supported by Calendar so you may experience problems with group tasks disappearing in Calendar when trying to schedule them.
- "Display range" setting in Calendar and Working time calendar must not be set over midnight (such as 22:00 - 06:00), otherwise, no data will be shown.

