


Navigation and Menus
Introduction
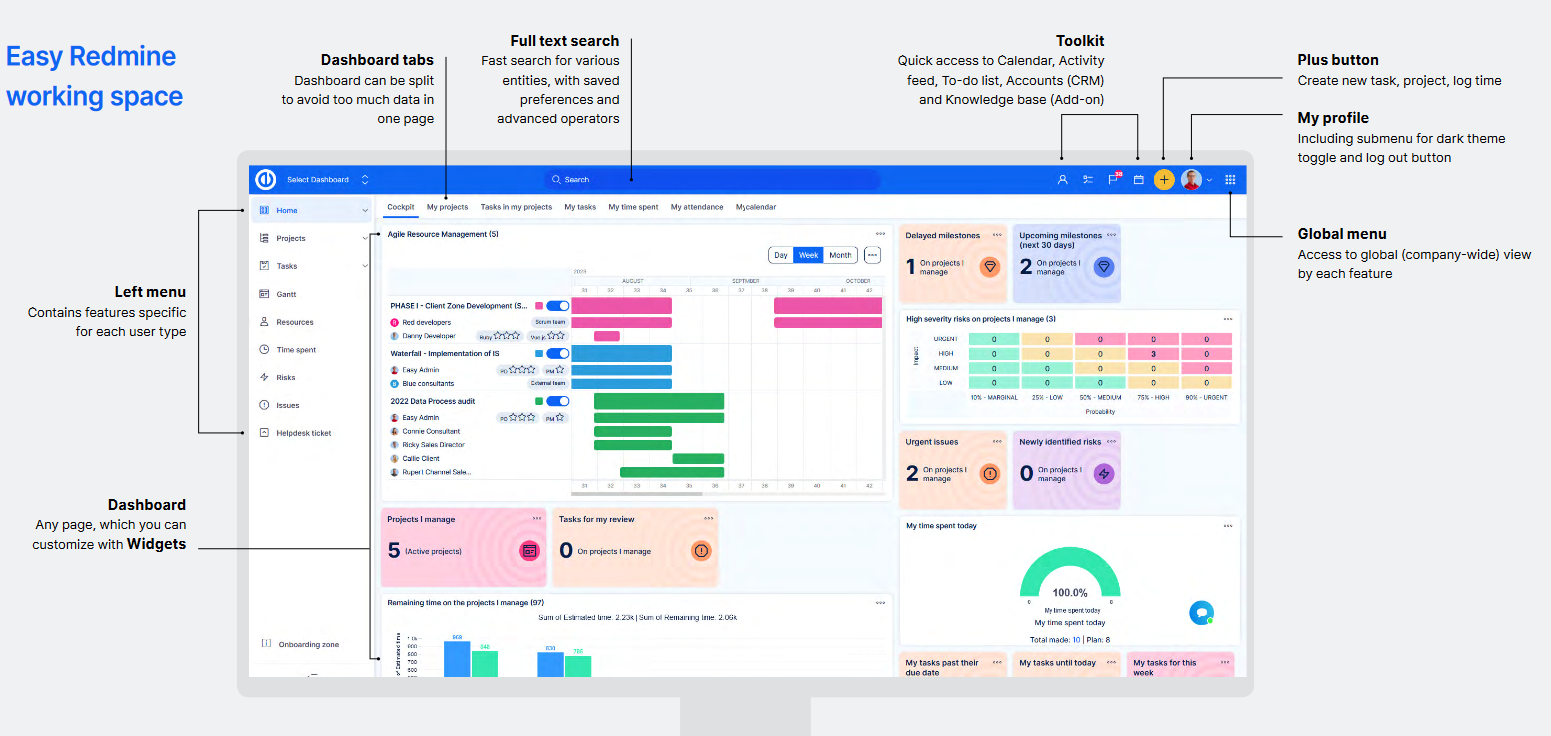
This article summarizes the main layout of the application and looks deeper at some related features.
This picture is taken from the Owner's manual and simply explains the navigation elements.
Activity Feed
The activity feed is available as a widget for your dashboard or at the toolkit at the top bar under icon:
![]()
It keeps you informed about the last activities on selected projects. An activity is considered any created or edited piece of information within the below-listed entities. On the contrary, a deleted/removed entity is not considered an activity and is, therefore, not shown in Activity feed.
- Tasks
- News
- Documents
- Wiki edits
- Opportunities
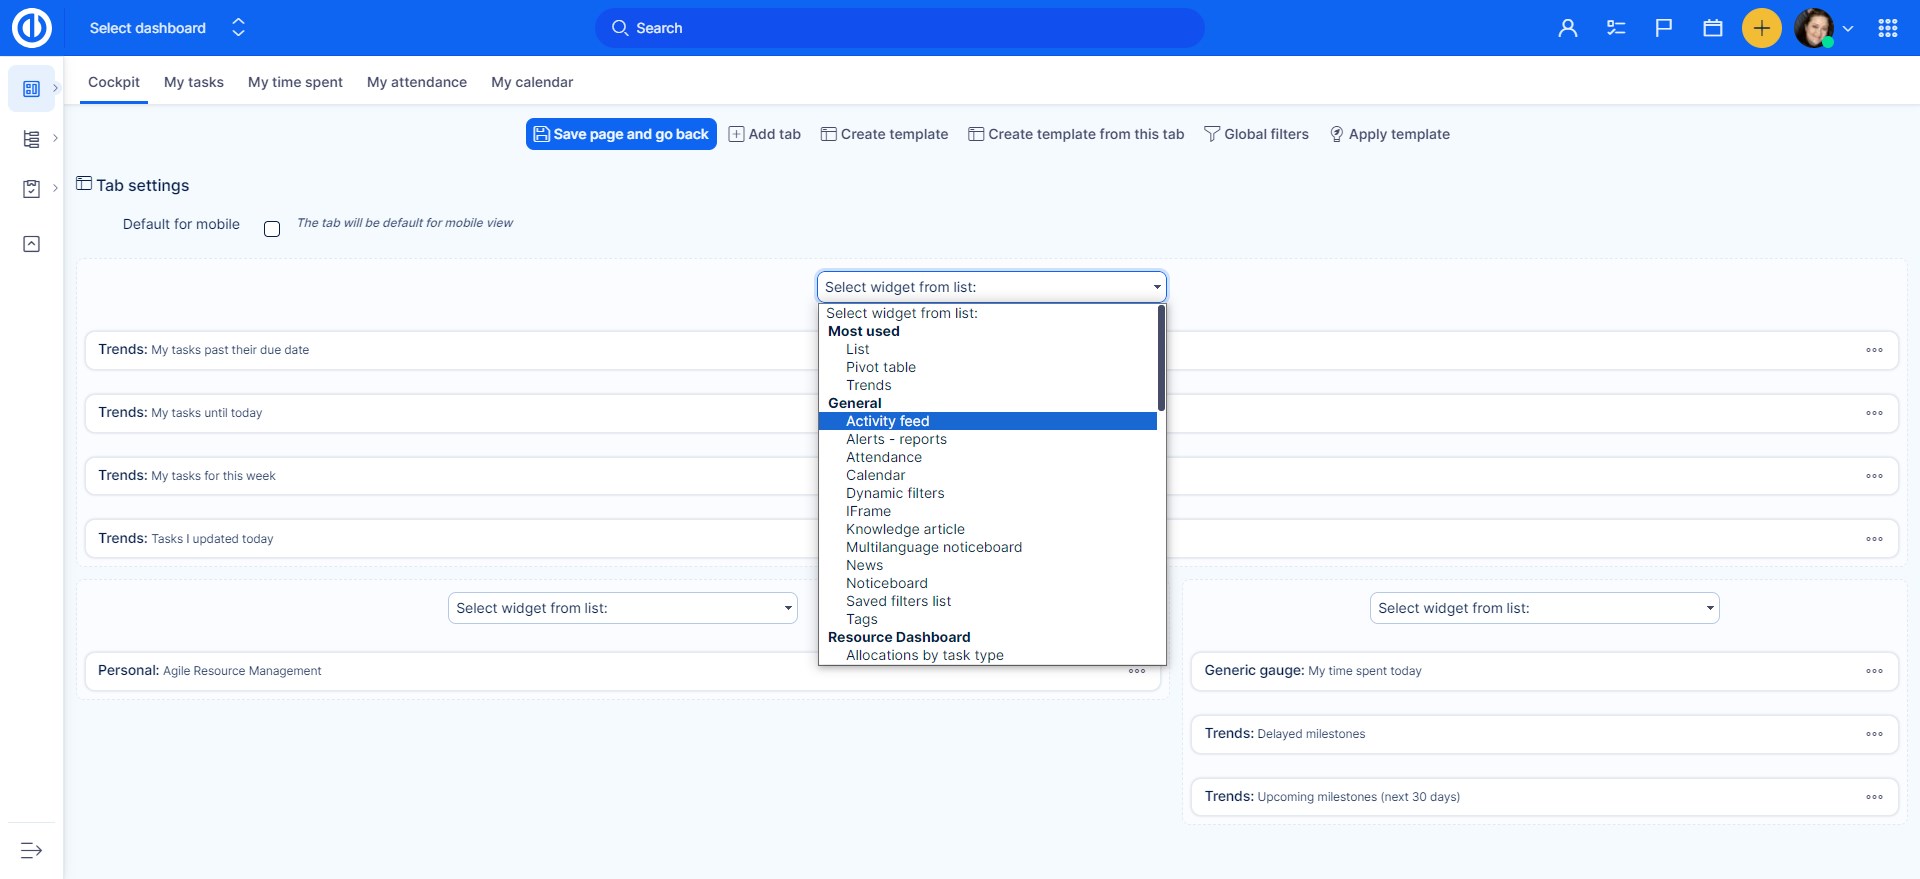
The activity feed shows the activities of all users, provided they concern you personally, are not created by you, and you haven't read them yet (failure to meet any of these conditions will cause the activity to disappear from the feed). You can select which projects and types of activities you are interested in. The necessary condition is that you must be a member of the project the activities of which you want to track. You can add Activity feed widget on your Dashboards such an My dashboard and Project Dashboard. Just click on "Personalize this page" button down the page and select the widget from the list as shown on the picture.
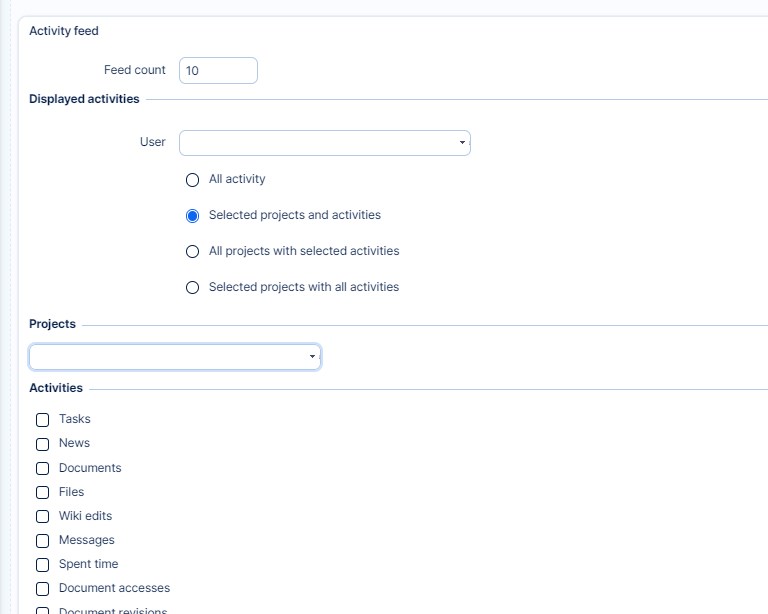
Now, after you selected the widget to add, you have to set it up. The settings is really easy and quick as it only includes a few options:
- Feed count - the number of feeds displayed (only activity from the current day is listed)
- All activity - displays all activities on all projects you are a member of
- Selected projects and activities - displays selected projects and selected types of activities you want to track (see picture below)
- All projects with selected activities - displays selected types of activities on all projects you are a member of
- Selected projects with all activities - displays all activities on selected projects you want to track
Now, if everything is set, just click on "Save page and go back" green button. When you go back to your dashboard or project dashboard you can find the added widget there. It might look like this.
[ 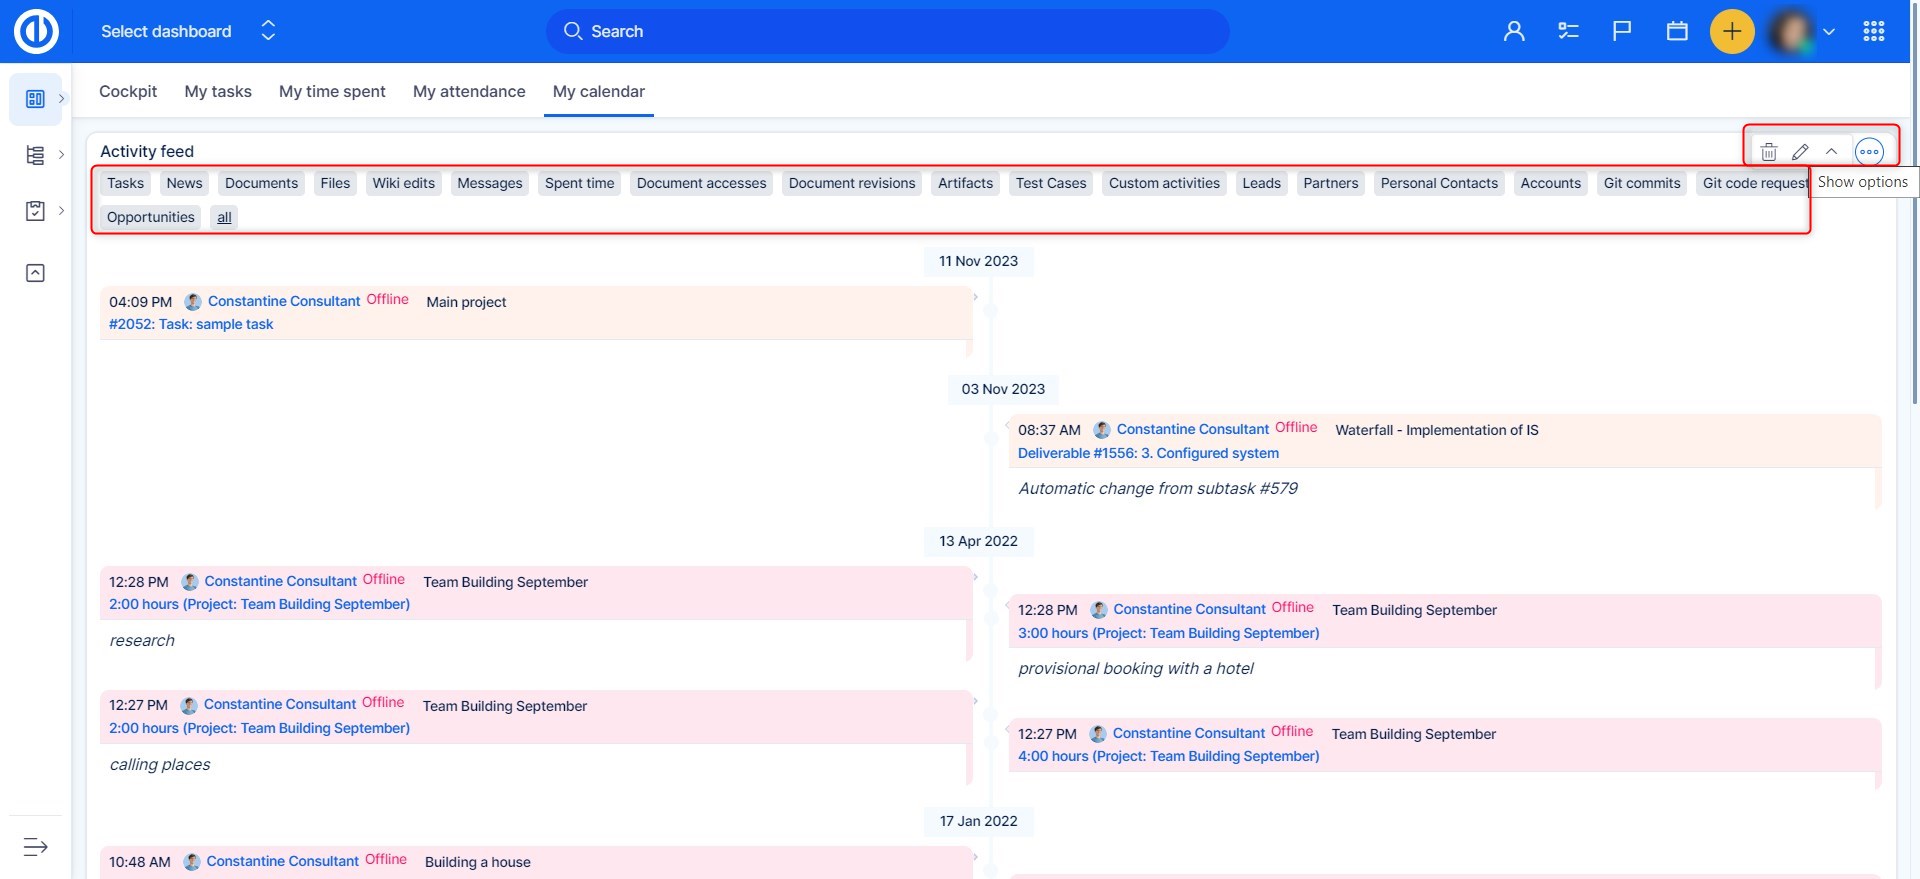
In the upper part of the widget you find tabs with the types of activities so you can easily switch between them without the need to change the settings. If you need to change the settings, just click on the pencil icon in the upper right corner. The cross icon next to it will collapse the widget so you can hide it when you don't need to see any activities.
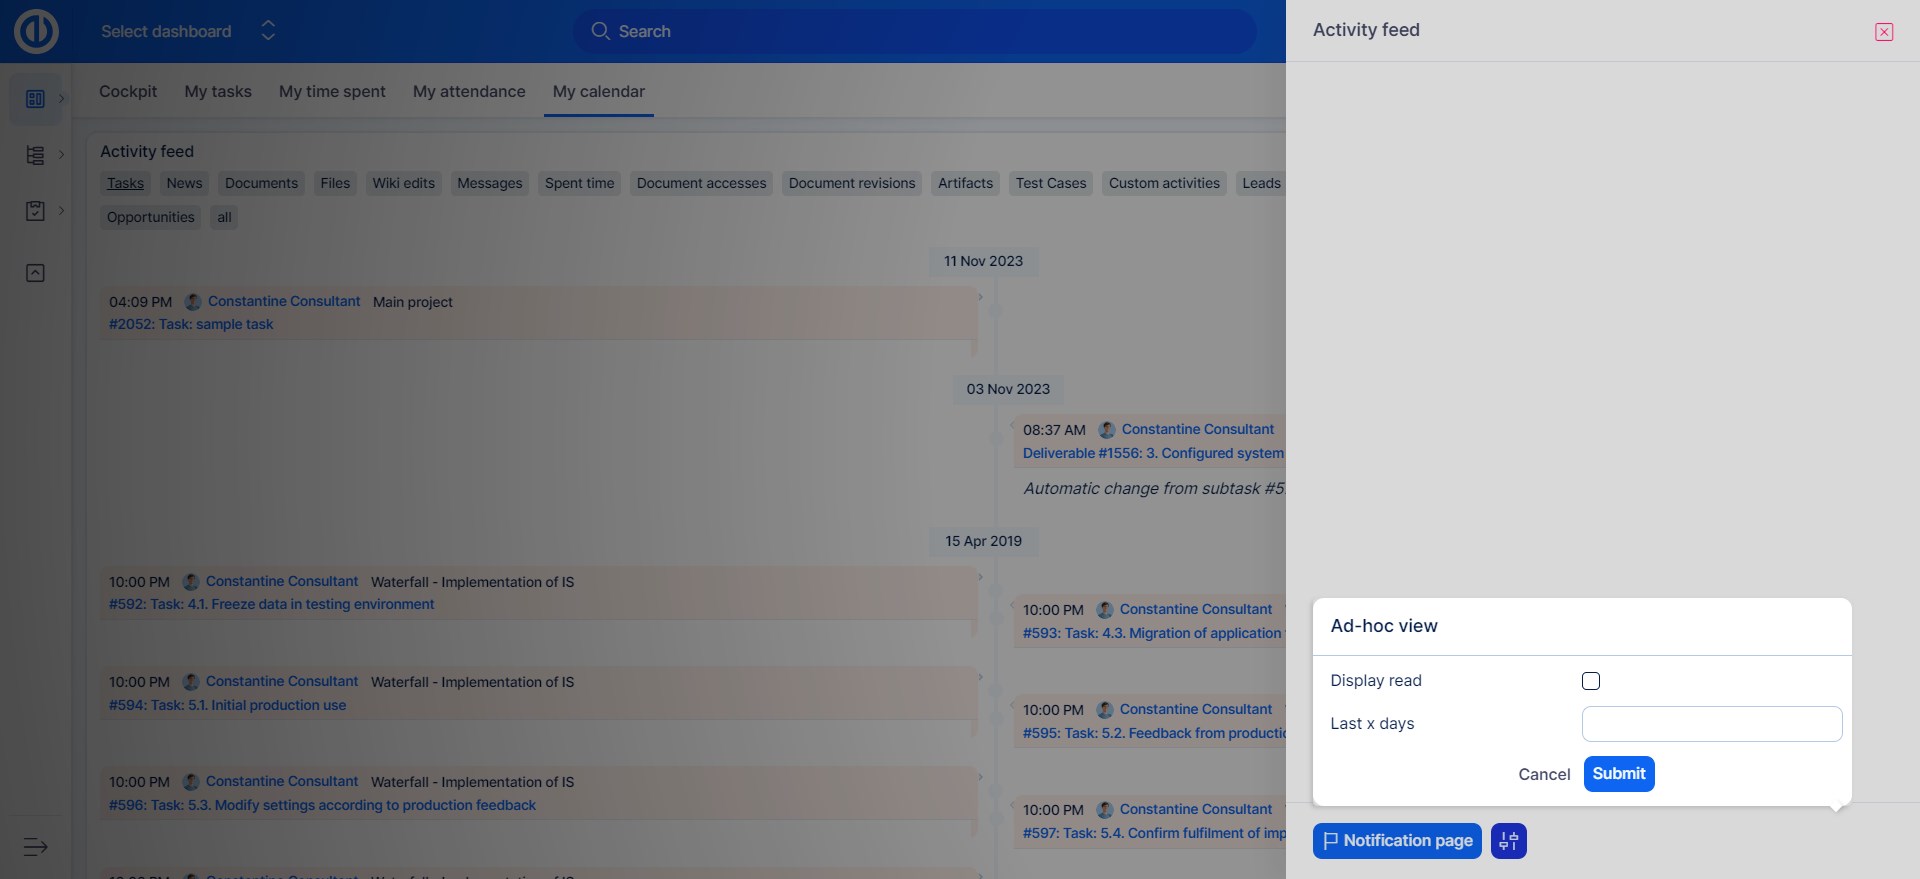
After opening an Activity feed list from the toolkit at the top bar, you can configure some options by clicking the eye icon just below the list, such as:
- display feeds from the last X days
- display feeds that have already been read
Corner situations of activity feed
Activity feed normally shows the updates you have not seen. But there are cases when updates that you have seen also appear in Activity feed. Every time someone updates the task, it is marked as unseen for you and thereby also the feed activity history includes this task.
To-Do list
The To-Do list can be opened by clicking on this icon at the toolkit at the top bar
![]()
This is how it looks opened.

To add any To-do you can click on the Add a To-do
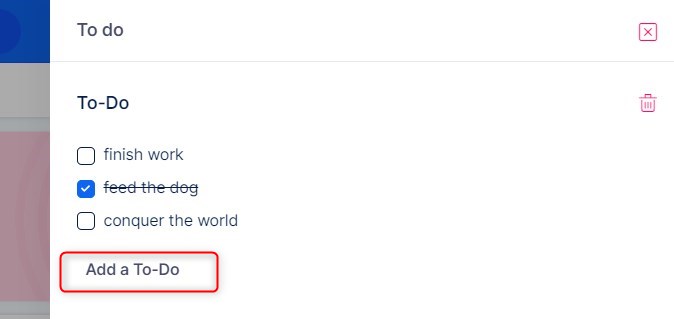
Further you are able to have multiple To-do lists at once, at the bottom of the module you will find option to add a new list. This option has to be enabled in Administration >> Plugins >> Quick „to-do“ reminders - Configure

Jump to dashboard
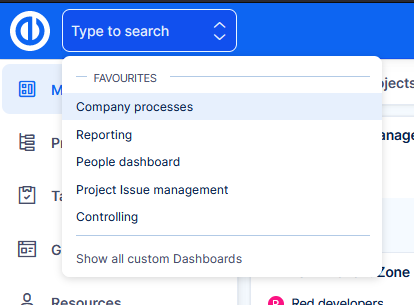
At the top left part of the topbar, you will find this function by which you can navigate to custom dashboards.
How it works
- User needs permission View custom dashboards enabled to use this feature.
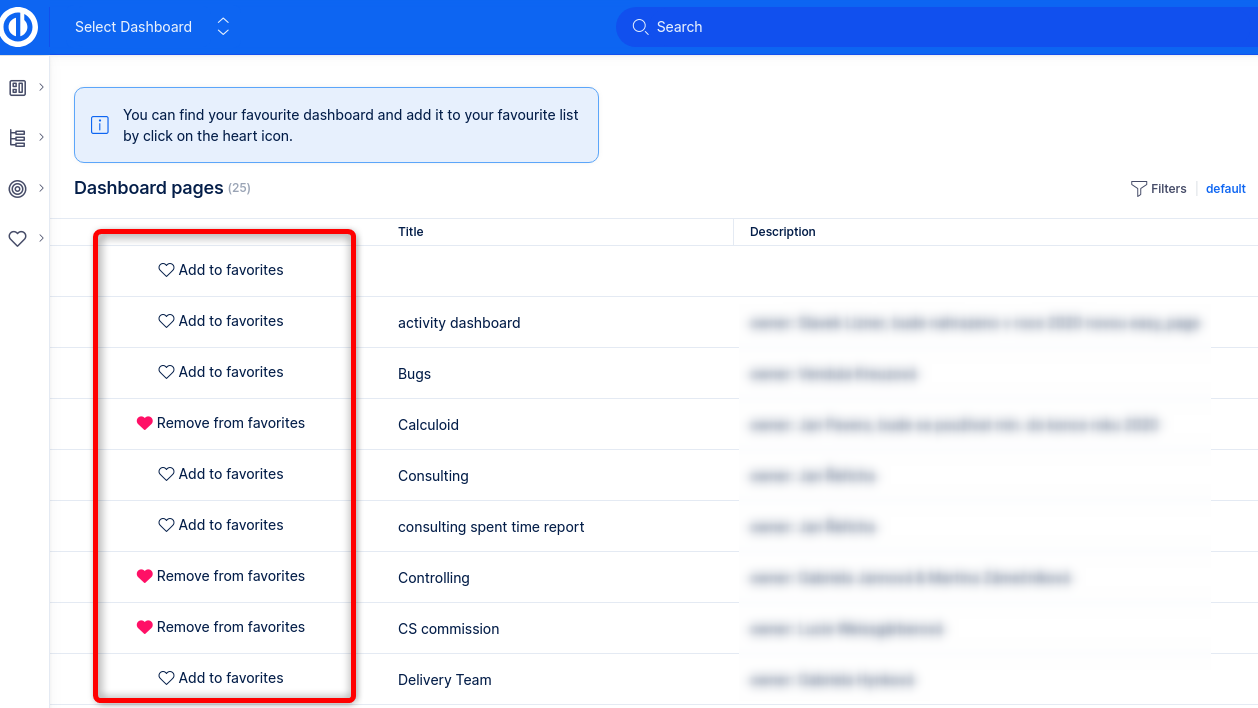
- By clicking Show all custom dashboards you will be directed to the list of dashboards.
- Here you can set dashboards that you often visit, as favourite.
- Your favourite dashboards are then presented directly in the selection from the top bar.
Why this feature?
Custom dashboards have always been a strong asset of our application. However, they were missing an entry point, where users could actually find them. The admin would have to add the link to the left menu, or share it manually some other way. Jump to dashboard feature is the solution to this problem.
Now you can fully unleash the power of dashboarding for any part of your company that is managed in Easy Redmine.
Full-text search
Once indexing is done (detailed description in a separate chapter below), users can utilize this fast full-text search. Here is a brief description:
- Type any term, hit ENTER (or pause typing for autosearch)
- Returned results are in all entity types by default (tasks, projects, documents, etc).
- To filter results for a certain entity type, click on its tag
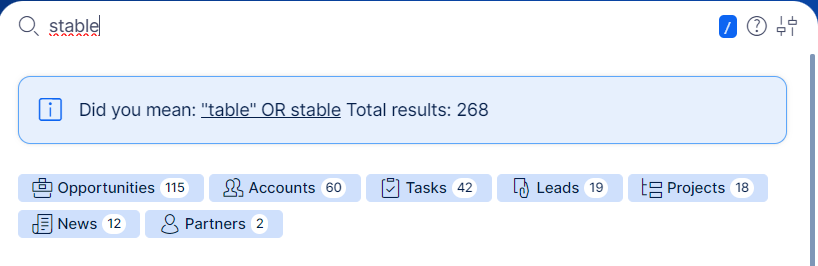
- By typing in special characters, you can filter entities directly by the search term
- t: looking for tasks, e.g. "t: some task"
- p: looking for projects, e.g. "p: some project"
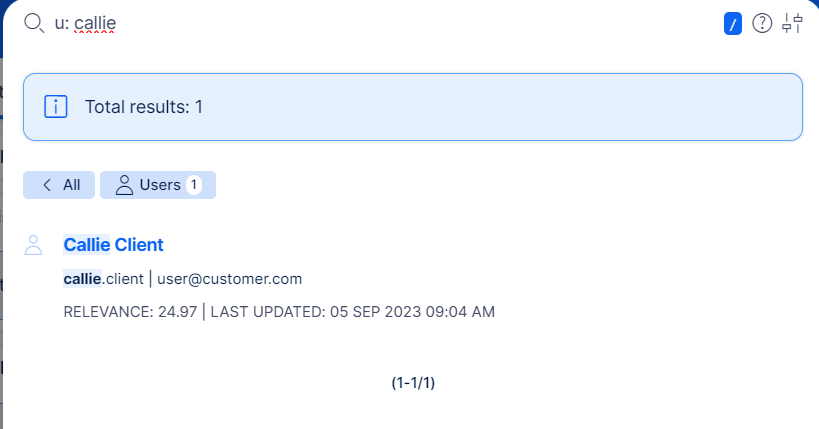
- u: looking for users, e.g. "u: some user"
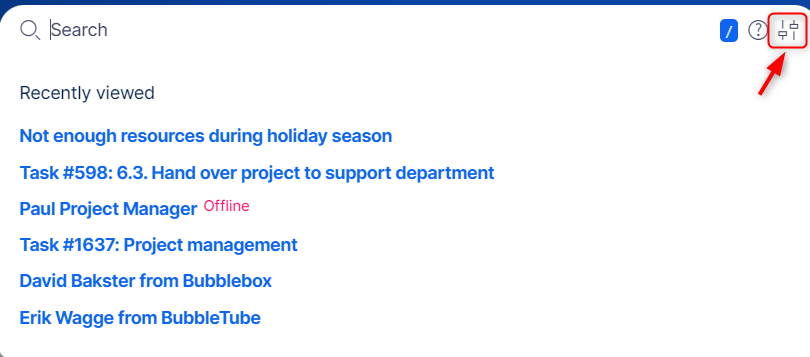
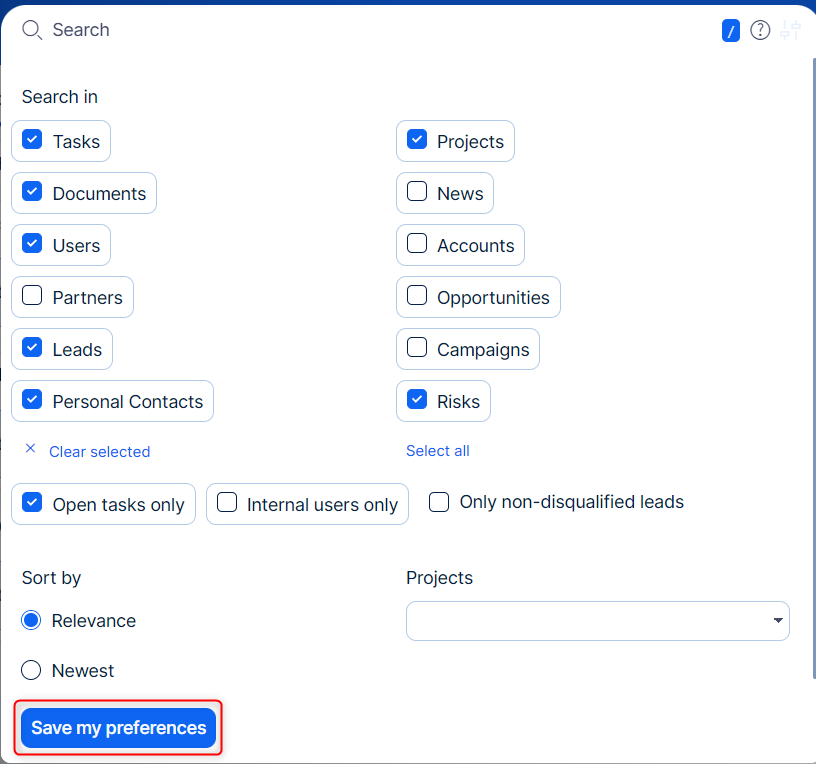
- To select more entity types at once, go to ad-hoc settings. The settings also contain sorting options, additional filters (such as only open tasks = tasks with non-closed status), and the possibility to search within a single project
Once you changed some ad-hoc settings, hit the Search button again. - Save your prefered entities to be searched by default
- Sales representative might want to search by default in Accounts and Opportunities, on the other hand project managers might prefer Tasks and Projects as default
- Search preferences are save individually for each user.
- Use the tooltip
 for more precise search capabilities.
 - Clicking on a search result always takes you to a new tab of your web browser, not to affect your work on the current tab.
- To hide the results, click away from the results search/results box
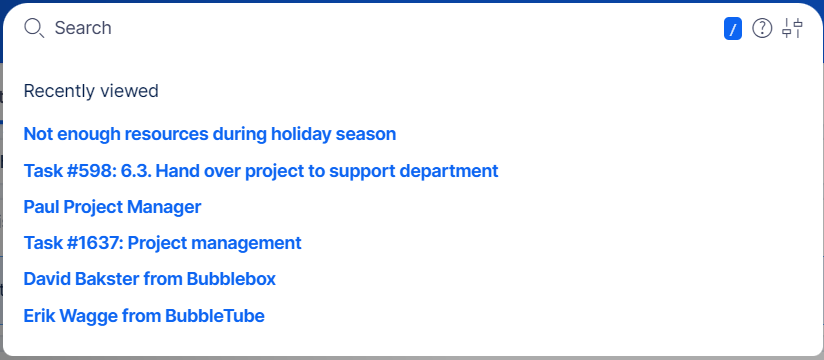
- Your (max.) 10 last clicked search results will appear before your next search attempt.
- By clicking the "/" character, it will immediately position the cursor in the search bar.
- You can utilize the up and down arrow keys within the search results.
Currently indexed entities
As of version 13.4, these entities are indexed:
- Tasks
- Projects
- Users
- Documents
- Wiki pages
- News
- Risks
- DMS documents
- DMS folders
- Leads (CRM)
- Opportunities (CRM)
- Accounts (CRM)
- Partners (CRM)
- Personal contacts (CRM)
- Campaigns (CRM)
From all entities, index contains name/subject/title, content/description, additional important fields (such as email of users), History/Comments, Attachment names.
To search and land on a specific task by Task ID , enter #id into the searchbar and hit enter in order to get to the specific task.
Global settings
The relevant settings are found under
Admin >> Plugins >> Easy Xapian fts - Edit
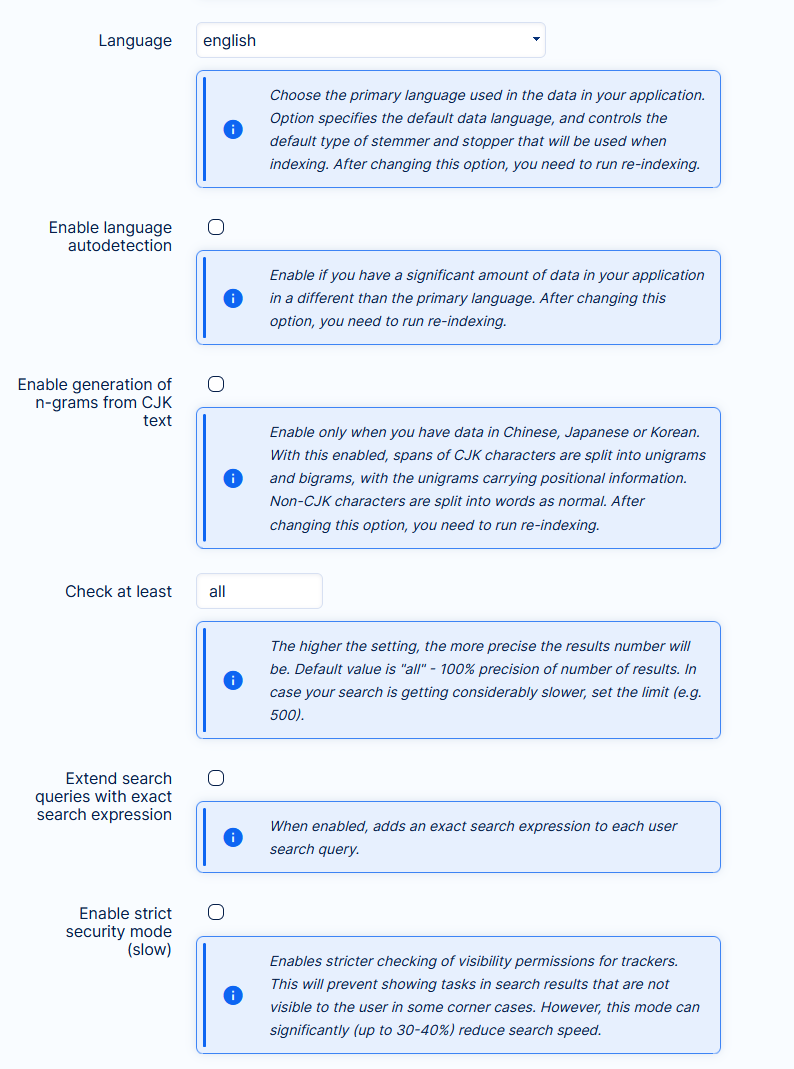
- Language - set it to the language in which you have the most data in your application. In case you change the language, you need to run re-indexing
- Language autodetection - enable in case you have a large amount of data in other languages than your primary one
- N-grams for CJK text - enable only if your data is in Chinese, Japanese or Korean
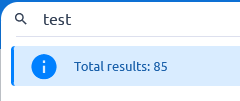
- Check at least - this setting determines the precision of the number of total results. Default setting is all = 100 % precise. Change it only if your search performance is getting considerably slower, which did not happen in our tests with millions of items.
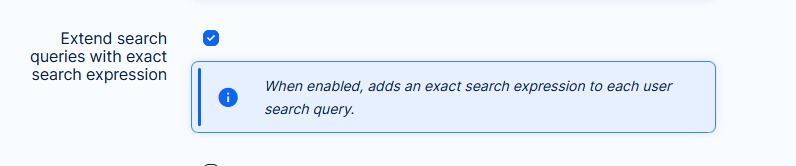
User mentions are extended when the "Extend search queries with exact search expression" feature is enabled, allowing more users to be mentioned in the comment by @.
Indexing process
Full-text search will not work unless the data is indexed. Based on the solution (Cloud vs Server) or search setting, you may need to run indexing manually.
Don't worry, even if you do, it is just a one-time action and requires just one click.
Cloud solution
During the upgrade process to version 11+ (and all higher versions) from an older version, we will take care of the indexing. However, there are cases that require re-indexing. These are listed further in the text.
Server solution
After new installation of version 11+ (and all higher versions) or upgrading to such version from an older one, you need to run indexing. Same if you do some particular operations, as listed below.
How index your data manually?
- Go to
Admin >> Plugins >> Easy Xapian fts - Edit
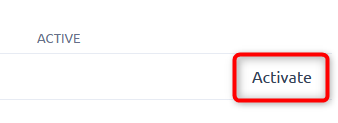
- Verify that the feature is Active

If not, activate it by clicking on the button very next
- Scroll down to RE-INDEX ALL button and click it
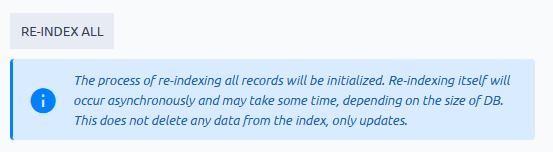
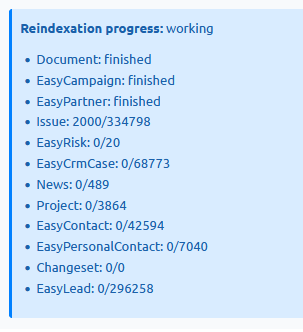
- Depending on the amount of data in your database, indexing may take from a few seconds, couple of minutes in extreme cases with milions of entities and journals, even some hours. It is done in the background => your users are not affected by it.
To see current progress, simply refresh the page.
- If data is not indexed at all, no results will be found on the search attempt. If indexing is still in progress, results may not be complete. In both cases, users will see an info message about indexation
What about future re-indexing?
As stated above, manual re-indexing is not necessary for regular use. When creating, updating, or deleting data in the application the index is automatically updated.
Situations that may require re-indexing include:
- the database was migrated to a new server or instance
- change a setting of search that requires re-indexing (written in the tooltip of every such setting)
- if Xapian search was deactivated for a period of time - during this period, the index was not continuously updated
- application crashed during a data changing operation
Historical context
In October 2021 (version 11+), Easy Redmine introduced a new search engine due to the technical obsolescence of the original search. The current search is built on the Xapian engine. Thanks to indexing, it is able to show results within 1 second in 95 % of attempts, while in the original search it was not exceptional to get results in several minutes with ad-hoc database requests.
Such improvement required changes in parts of the application's foundations, which admins should be aware of. The user comfort brought by the new search is definitely worth the minor amount of attention required from the admins.
Original (legacy) search
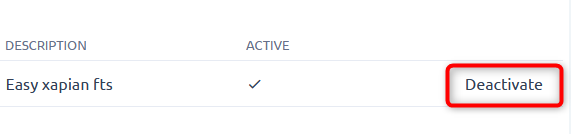
Since the new search engine is a significant technological leap (which always carries some unforeseeable risks), we have kept the original (slow) search in the application as a backup option. To switch to the original search, go to Admin >> Plugins >> Easy Xapian fts - Edit and click Deactivate
This is a global option => you can use only one search engine in the application at once. The situation when one user uses the new search and another user the legacy search is not possible. Just a reminder, if you deactivate and reactive Xapian search again, you will need to run re-indexing.
We should emphasize, the legacy search will not receive any bug fixes, optimizations, or other improvements in the future. It is strictly used as a backup solution for critical failures of the new search. The new search will continue to be maintained, improved, and optimized as an integral part of Easy Redmine.
What are the other search options
Special symbols used for searching
Autocomplete
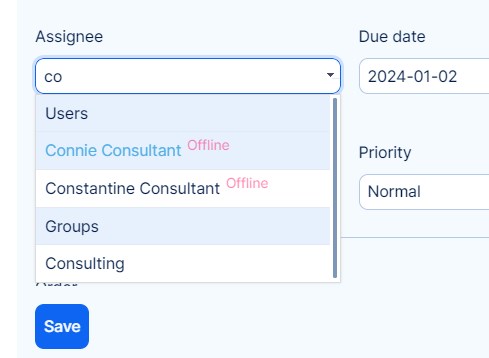
Autocomplete replaces the classic select field where you would have to scroll through many predefined options. Instead, you start writing and the relevant options are suggested automatically based on the symbols already entered.
Query search
This search option is available on listings, such as the task list. Simply enter the searched word and confirm with the ENTER key. It searches for entity names that match the current filter.

Special symbols used for searching
There is an option to use special characters (so-called wildcards) to expand your search. These work on all search types. A wildcard character is used to substitute one or more characters in a string. All the wildcards can also be used in combinations.
| Symbol | Description | Example |
|---|---|---|
| % | Represents zero or more characters | bl% finds bl, black, blue, and blob |
| _ | Represents a single character | h_t finds hot, hat, and hit |
| [] | Represents any single character within the brackets | h[oa]t finds hot and hat, but not hit |
| ^ | Represents any character not in the brackets | h[^oa]t finds hit, but not hot and hat |
| - | Represents a range of characters | c[a-b]t finds cat and cbt |

